Single Sign On (SSO) using Okta
Overview
Single sign-on (SSO) is an authentication scheme that enables users to use a single ID and password combination to log into multiple platforms, services, or systems.
Cloudchipr supports SSO and is compatible with any SAML 2.0-compliant SSO provider, including:
This is a feature for enterprise customers and as such may not be available when you attempt to access it. If you would like access, please get in touch.
To enable SSO, it is necessary to have either an owner or admin role within your Cloudchipr organization.
Enable SSO for Cloudchipr using Okta
To configure SSO for Cloudchipr using Okta, follow these steps:
Create Application
- In Okta, navigate to the Admin dashboard and click
Applications. - On the Applications page, click
Create App Integration.

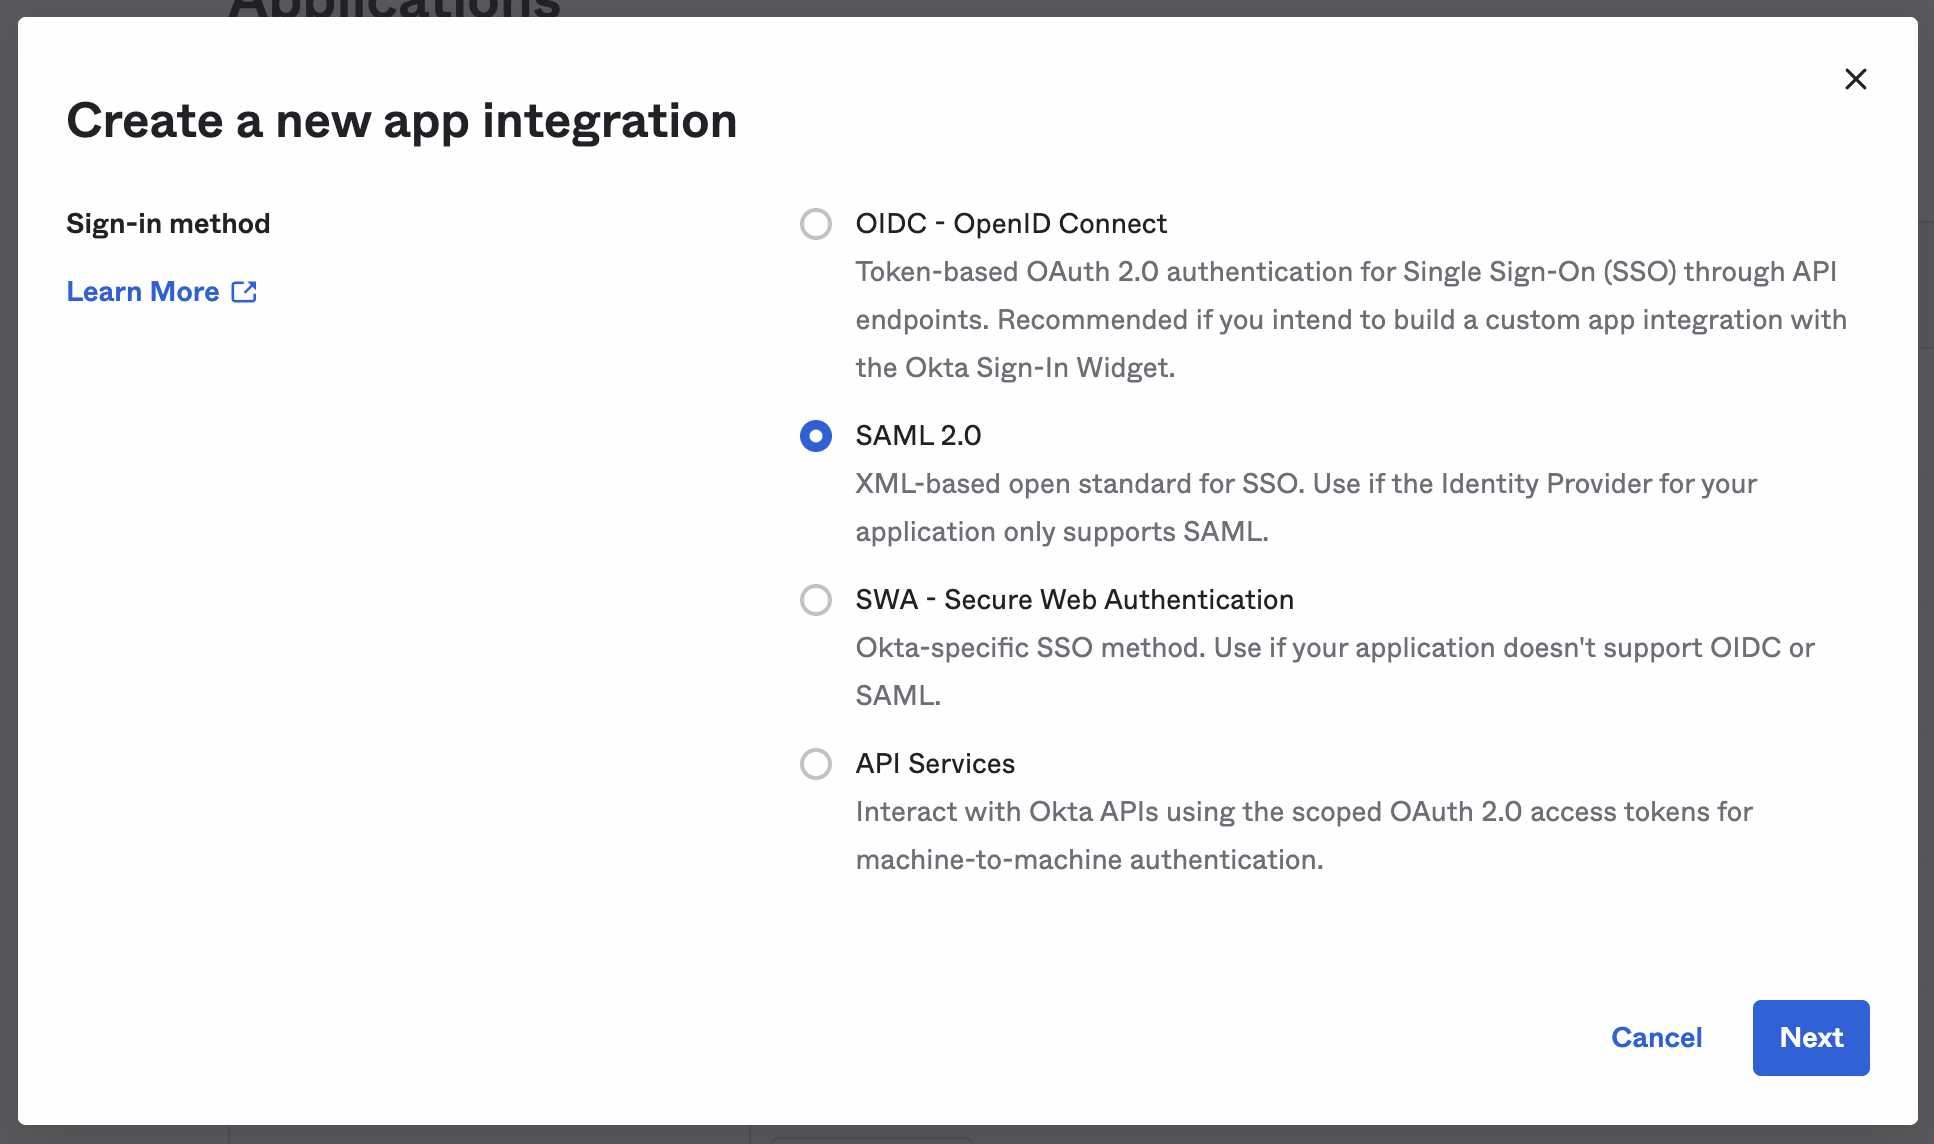
- In the modal that appears, select the SAML 2.0 radio button and click
Next.
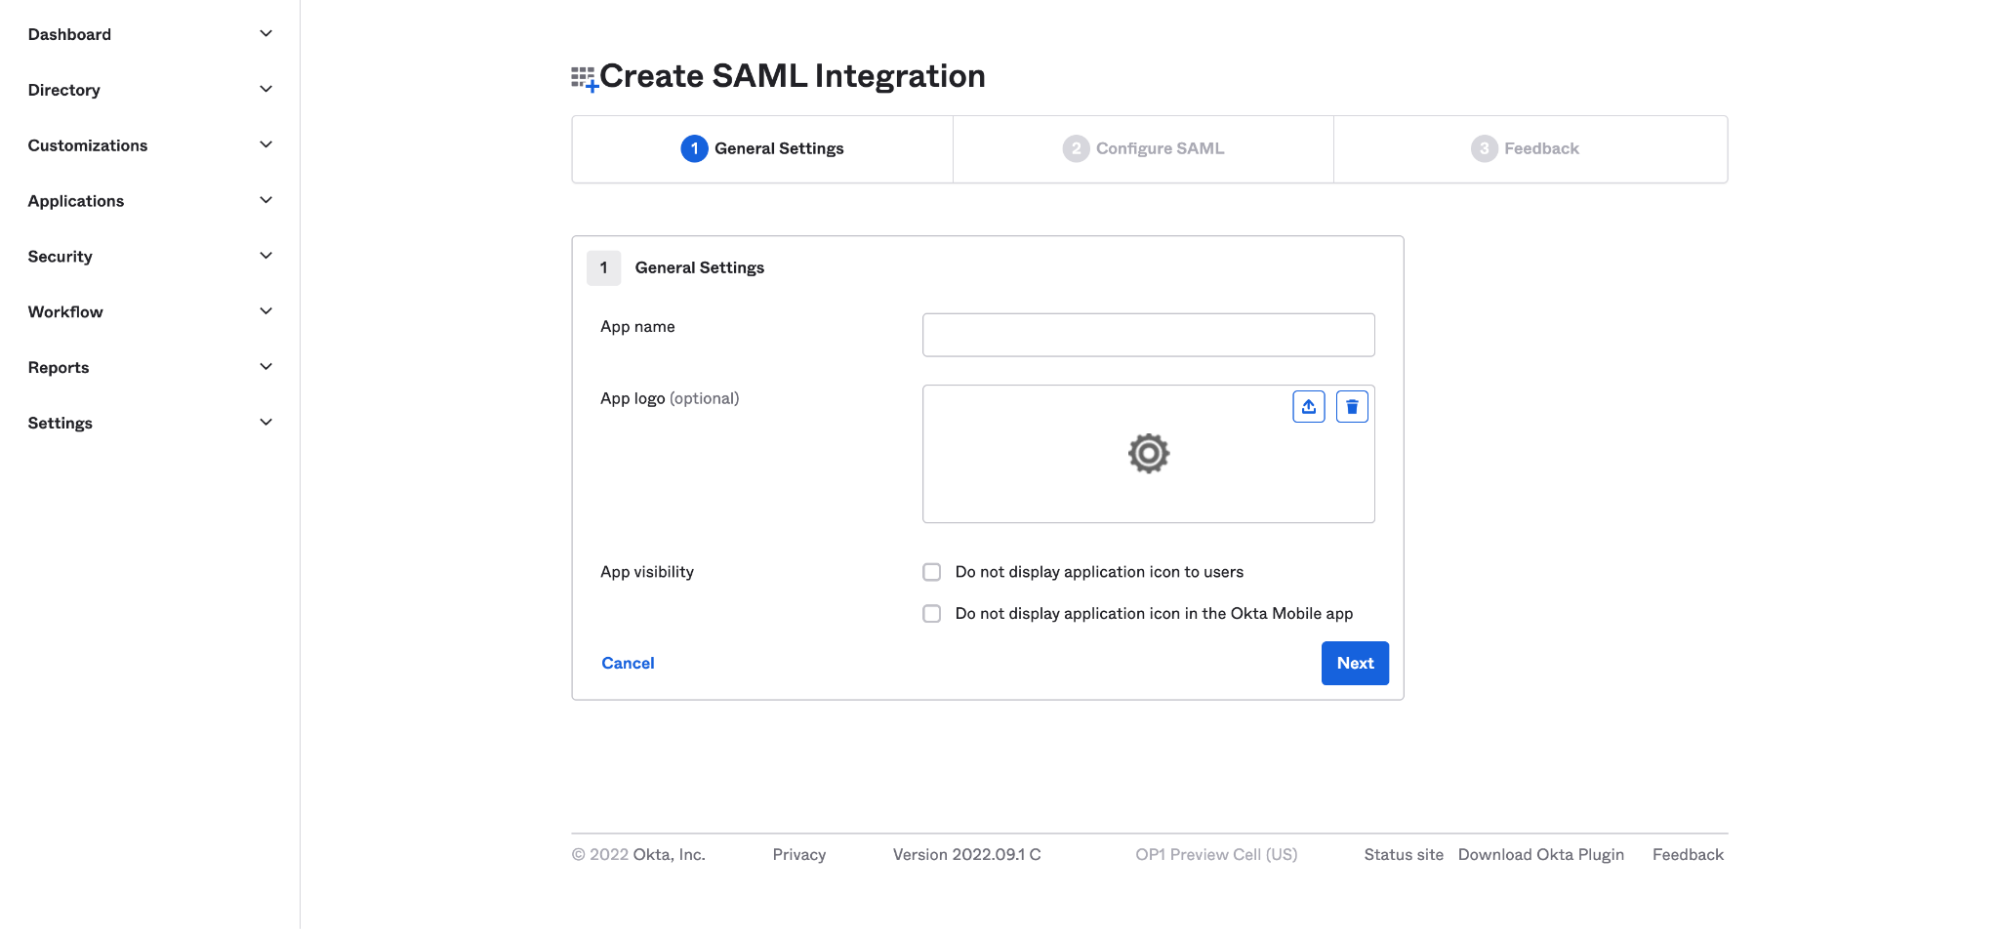
- Enter a name for the app. For easier recognition, you can also upload a logo to go with it. Then click
Next.
Create SAML Integration
- Next, you'll configure your SAML settings. Copy the Single sign-on URL and Audience URI (SP Entity ID) from Cloudchipr, and paste them into the matching fields in Okta.
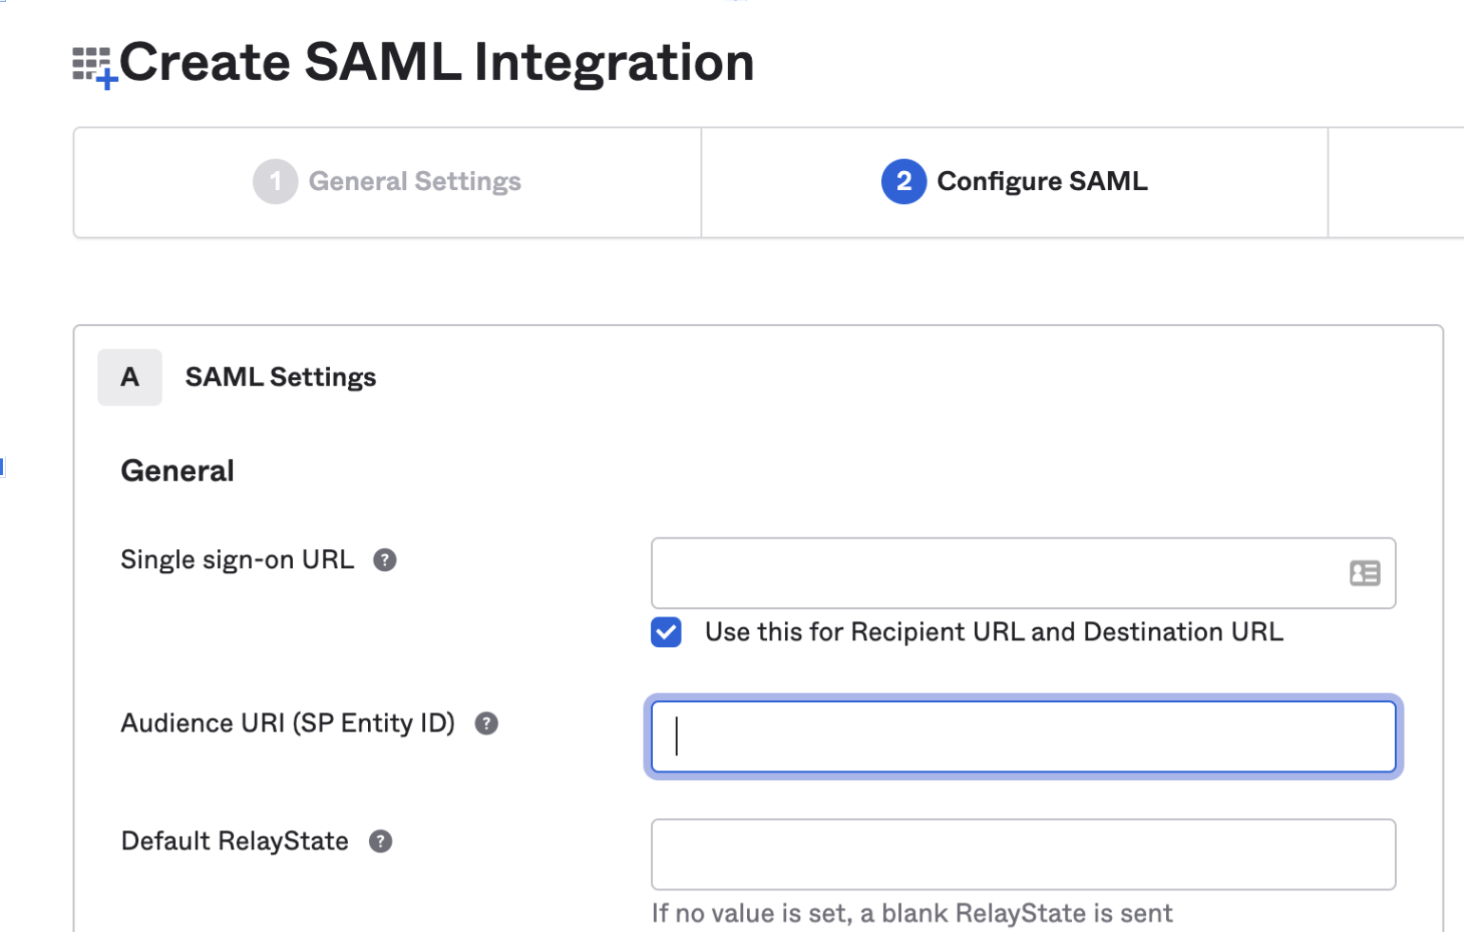
You can find the Single sign-on URL and the Audience URL (Entity ID) in Cloudchipr, under > ⚙️ Settings > Account Security & SSO > Enable Okta
-
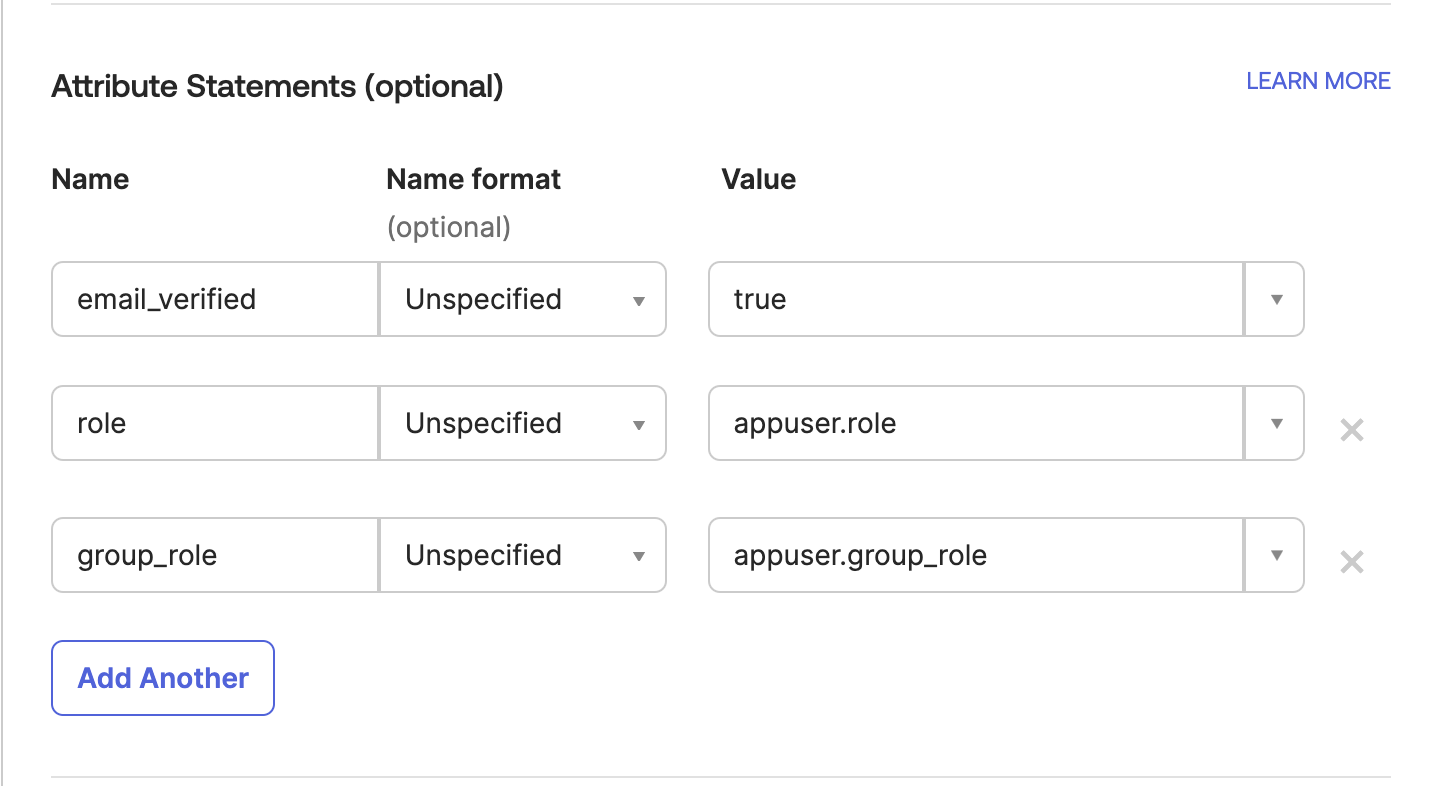
Add Attribute Statements (This helps to map necessary Okta values to Cloudchipr application)
-
organization_idcan be found in Cloudchipr UI, in the Settings → Account Security section when you hit Enable in Okta, you can see yourOrganization IDName Name format Value email_verifiedUnspecifiedtrueroleURI Referenceappuser.rolegroup_roleURI Referenceappuser.group_role
It should look like below:
-
-
Select Next
-
Choose the following options:
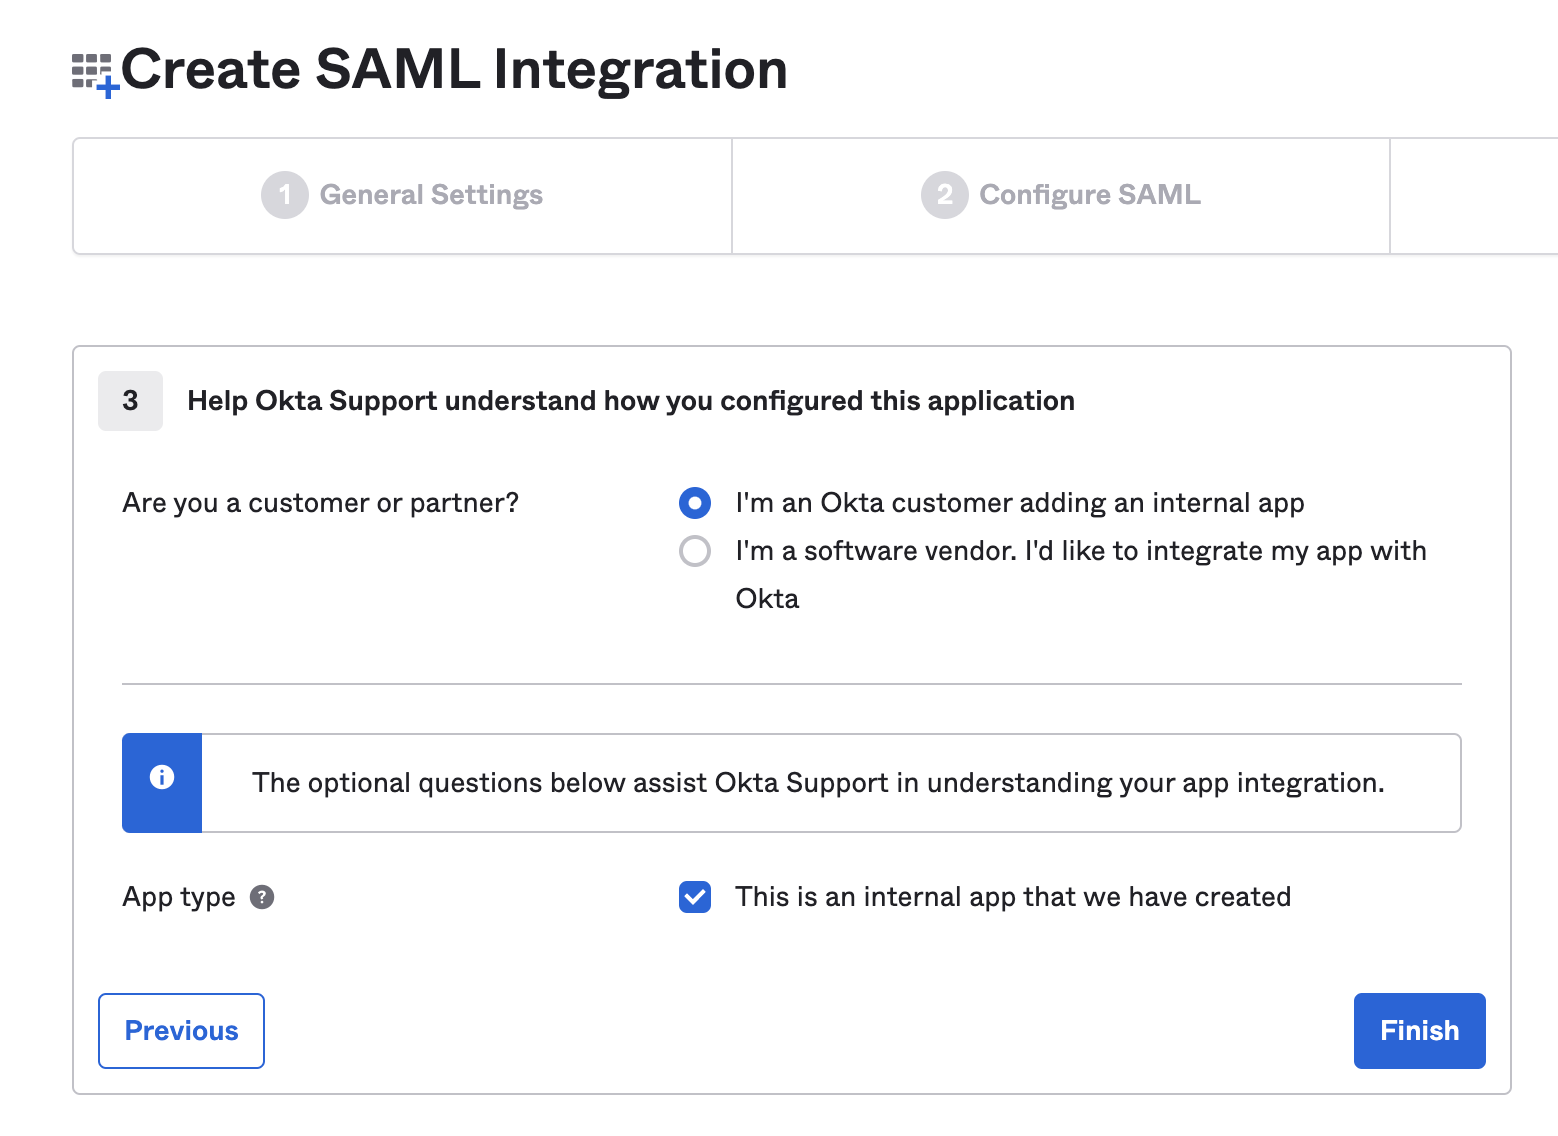
- Click on Finish
Setup per user custom attributes
- In the Admin Console, go to Directory > Profile Editor.
- Choose your application.
- Click Add Attribute
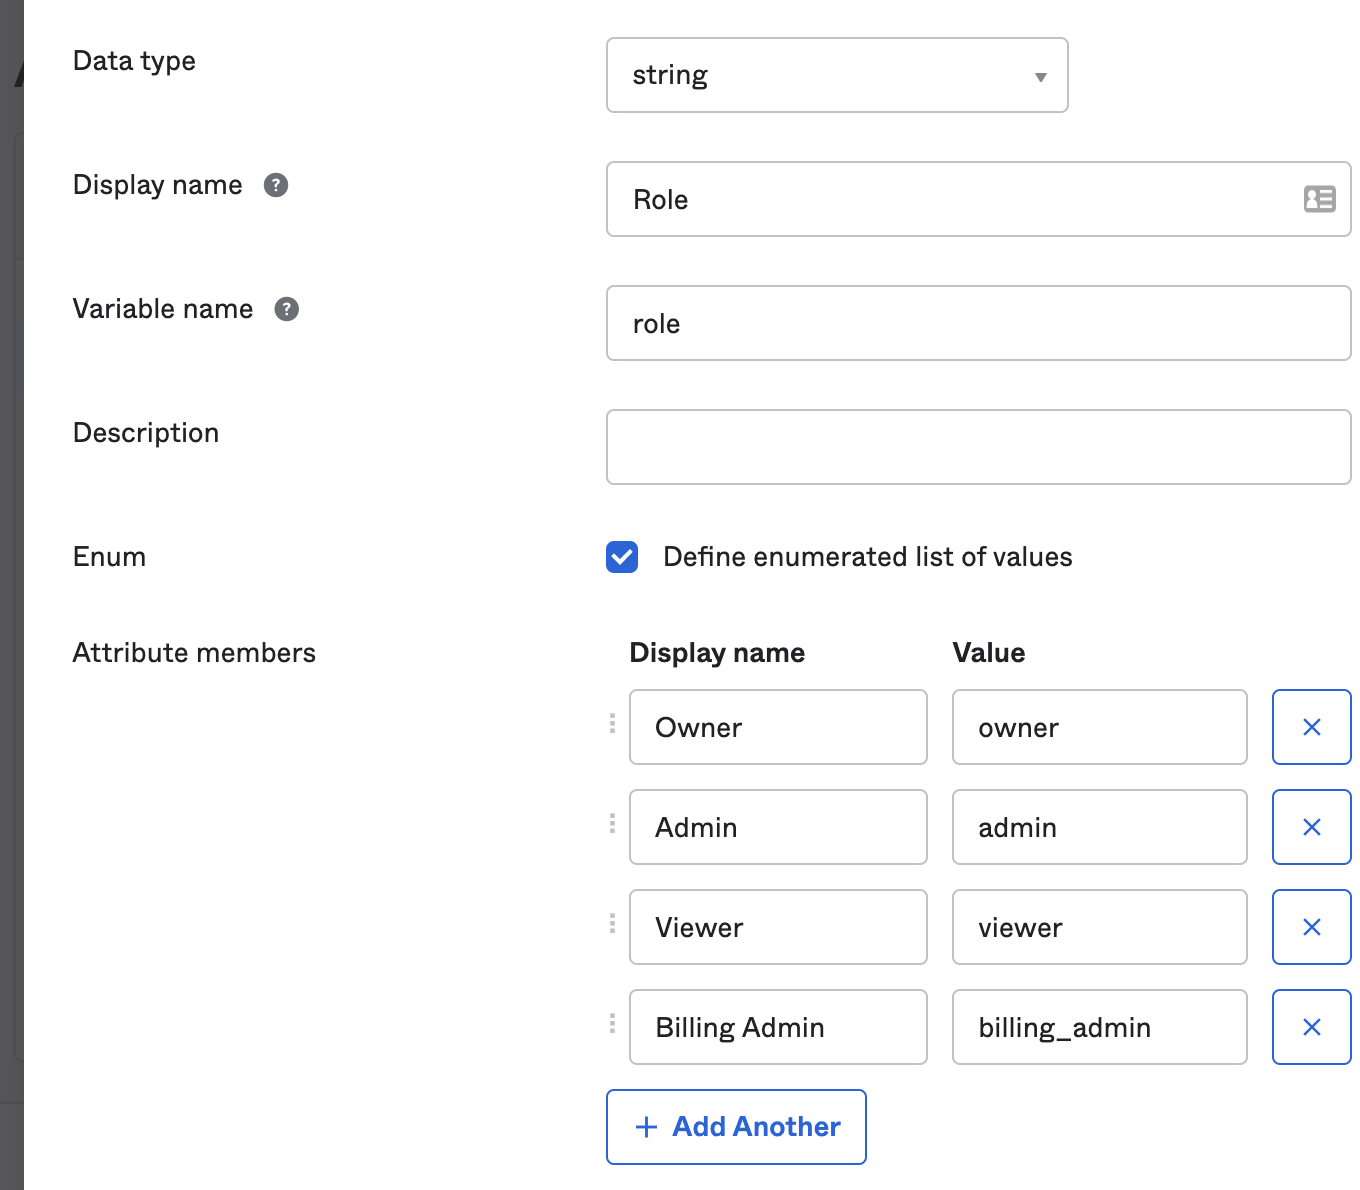
- Fill in the following fields on the opened page
- Data type: choose
string - Displal name: Role
- Variable name: role
- Attribute members: Ensure you use the exact values listed in the table below
- Data type: choose
| Display Name | Value |
|---|---|
| Owner | owner |
| Super Admin | super_admin |
| Admin | admin |
| Viewer | viewer |
| Billing Admin | billing_admin |
| Billing Explorer Admin | billing_explorer_admin |
| Viewer Protector | viewer_protector |
| Workflow Resources Protector | workflow_resources_protector |
- Click Save
It should appear as below.
Setup per Group custom attributes
- Click Add Attribute again to add Group custom attributes
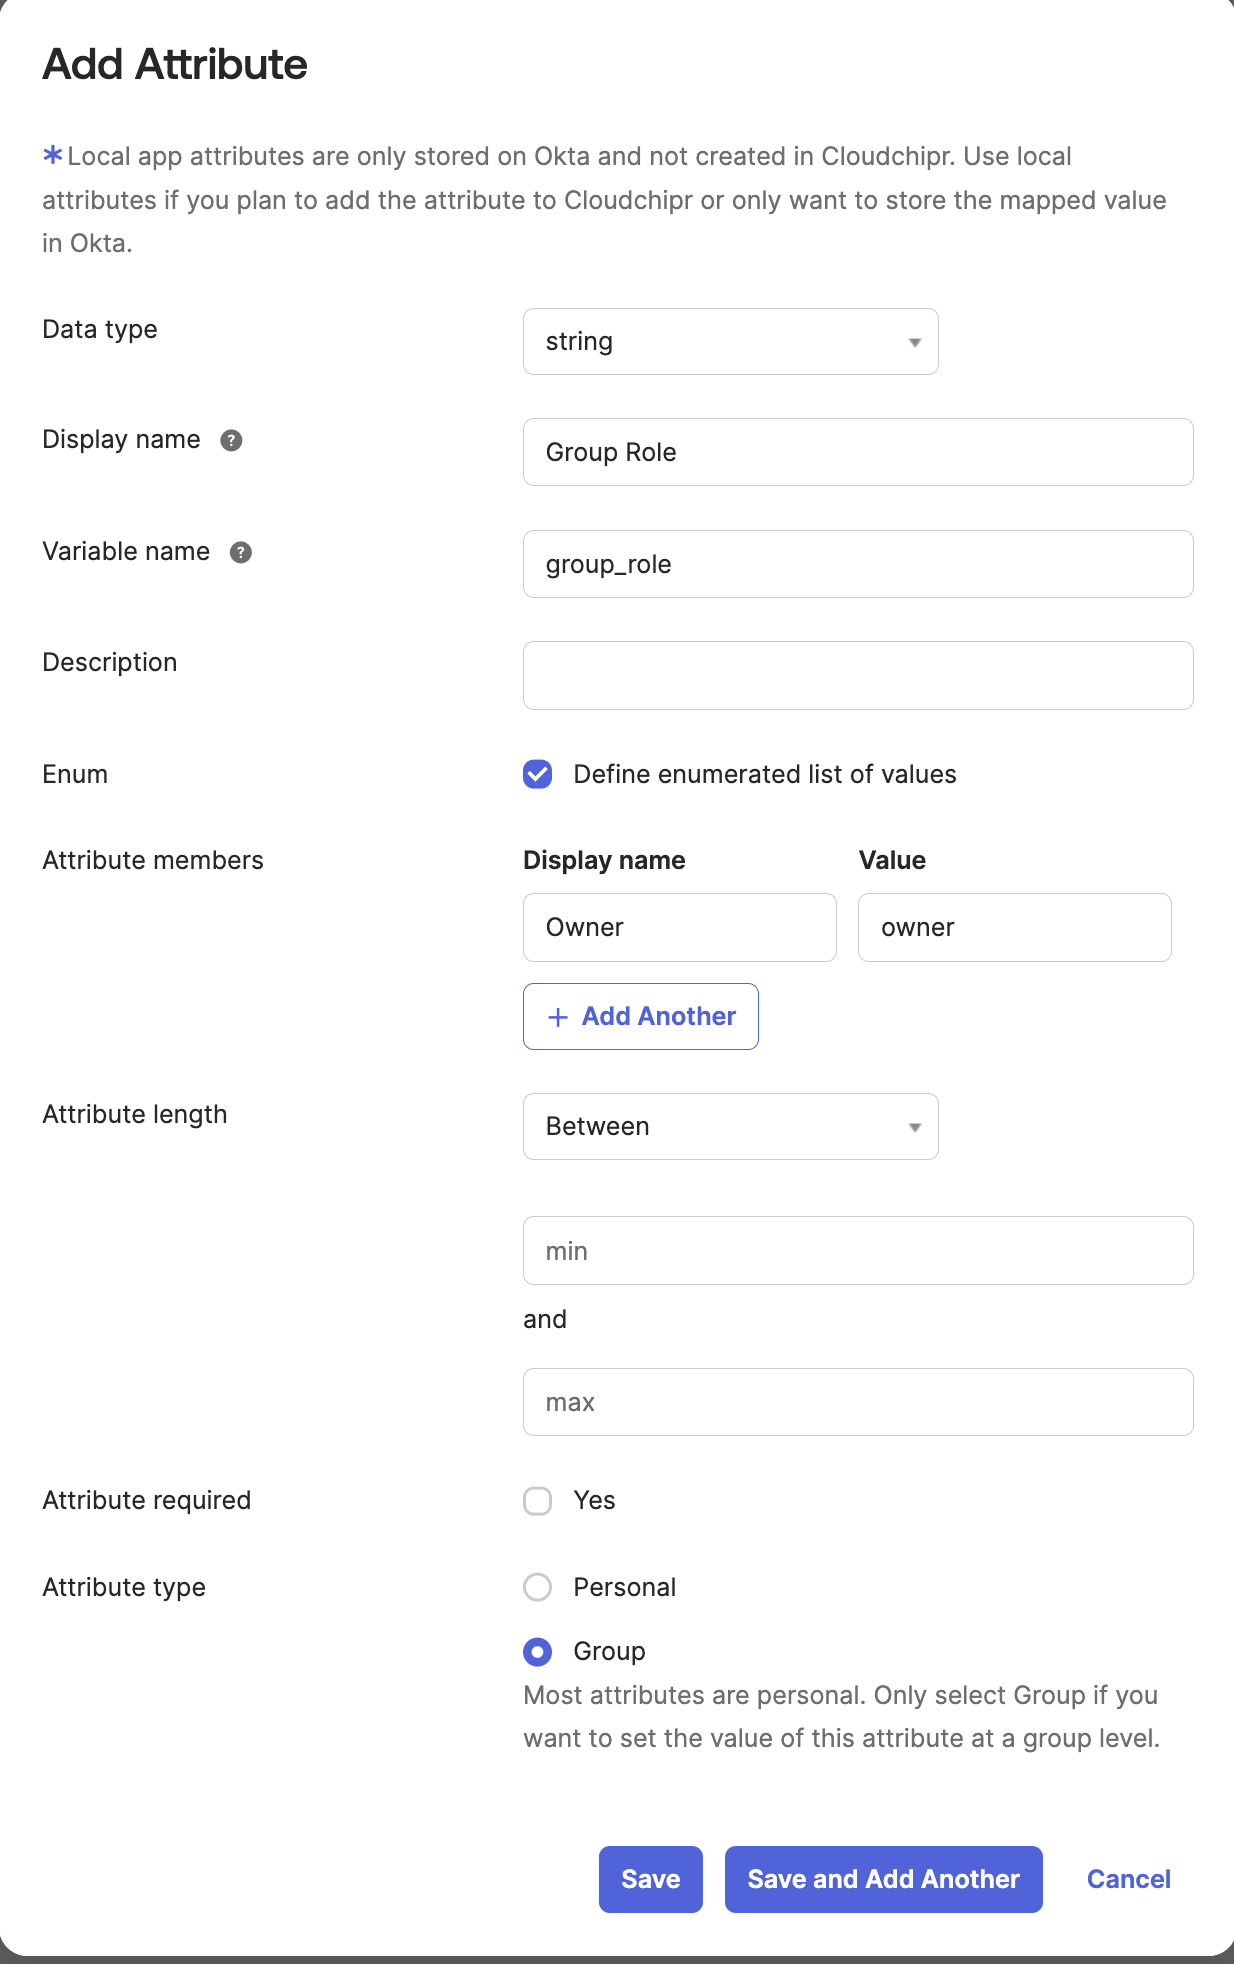
- Fill in the following fields on the opened page
- Data type: choose
string - Displal name:
Group Role - Variable name:
group_role - Attribute members: Ensure you use the exact values listed in the table below
- Attribute Type: choose
Group
- Data type: choose
Attribute members
| Display Name | Value |
|---|---|
| Owner | owner |
| Super Admin | super_admin |
| Admin | admin |
| Viewer | viewer |
| Billing Admin | billing_admin |
| Billing Explorer Admin | billing_explorer_admin |
| Viewer Protector | viewer_protector |
| Workflow Resources Protector | workflow_resources_protector |
- Click Save
It should appear as below.
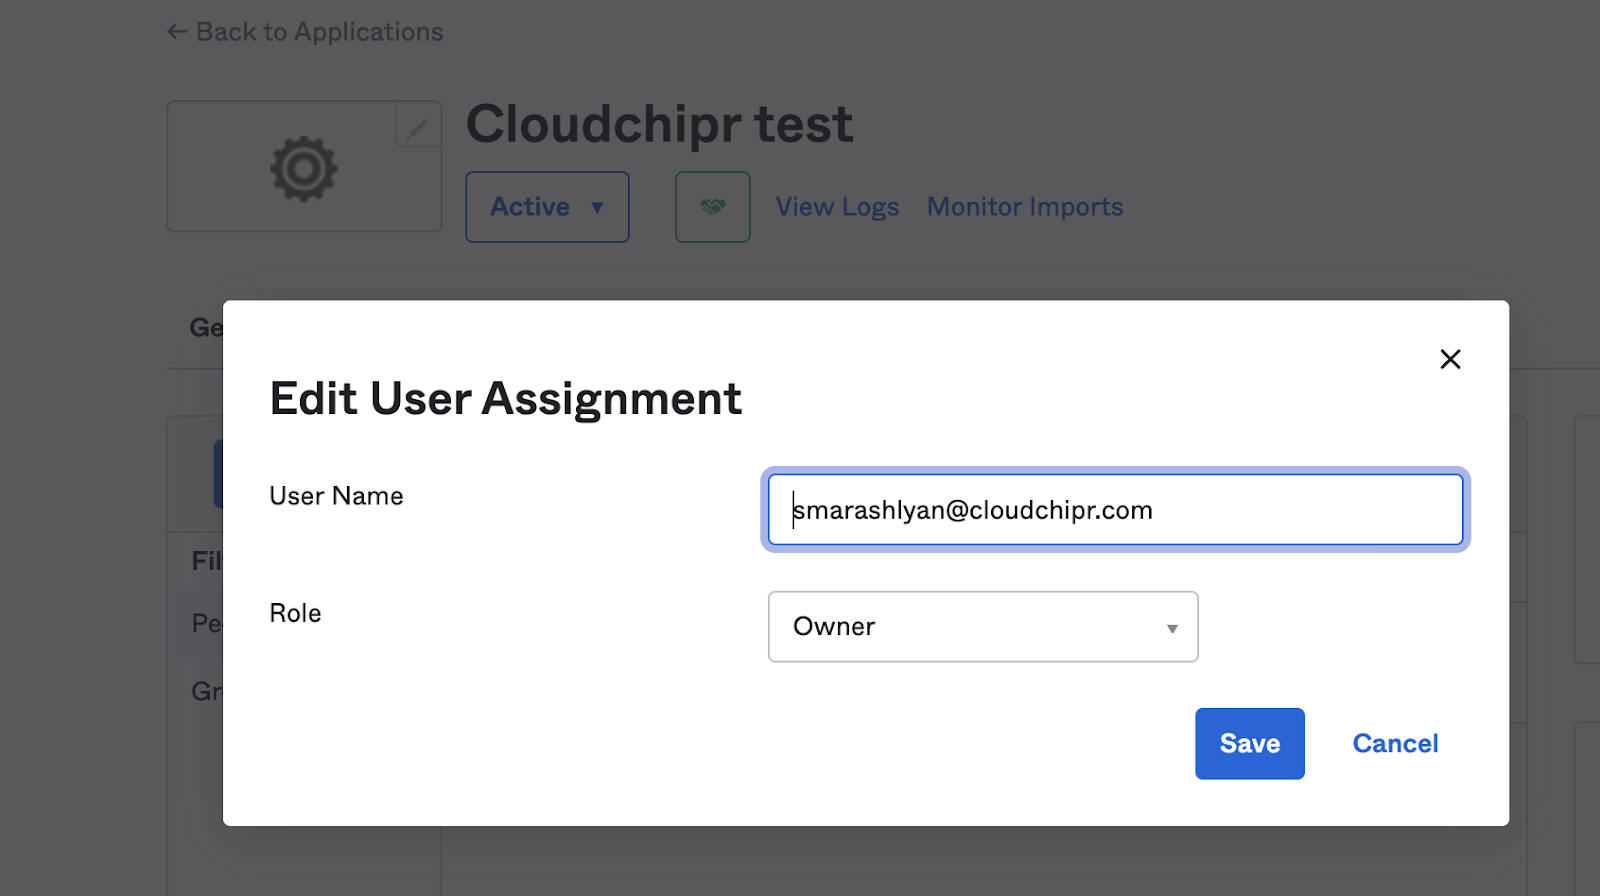
Assign the necessary roles to users
Within your Okta Application, assign the right roles to the users as in the example below:
Retrieve your SAML2.0 configurations from Okta and set in Cloudchipr.
-
In your Okta Application view, Go to the Sign On Tab
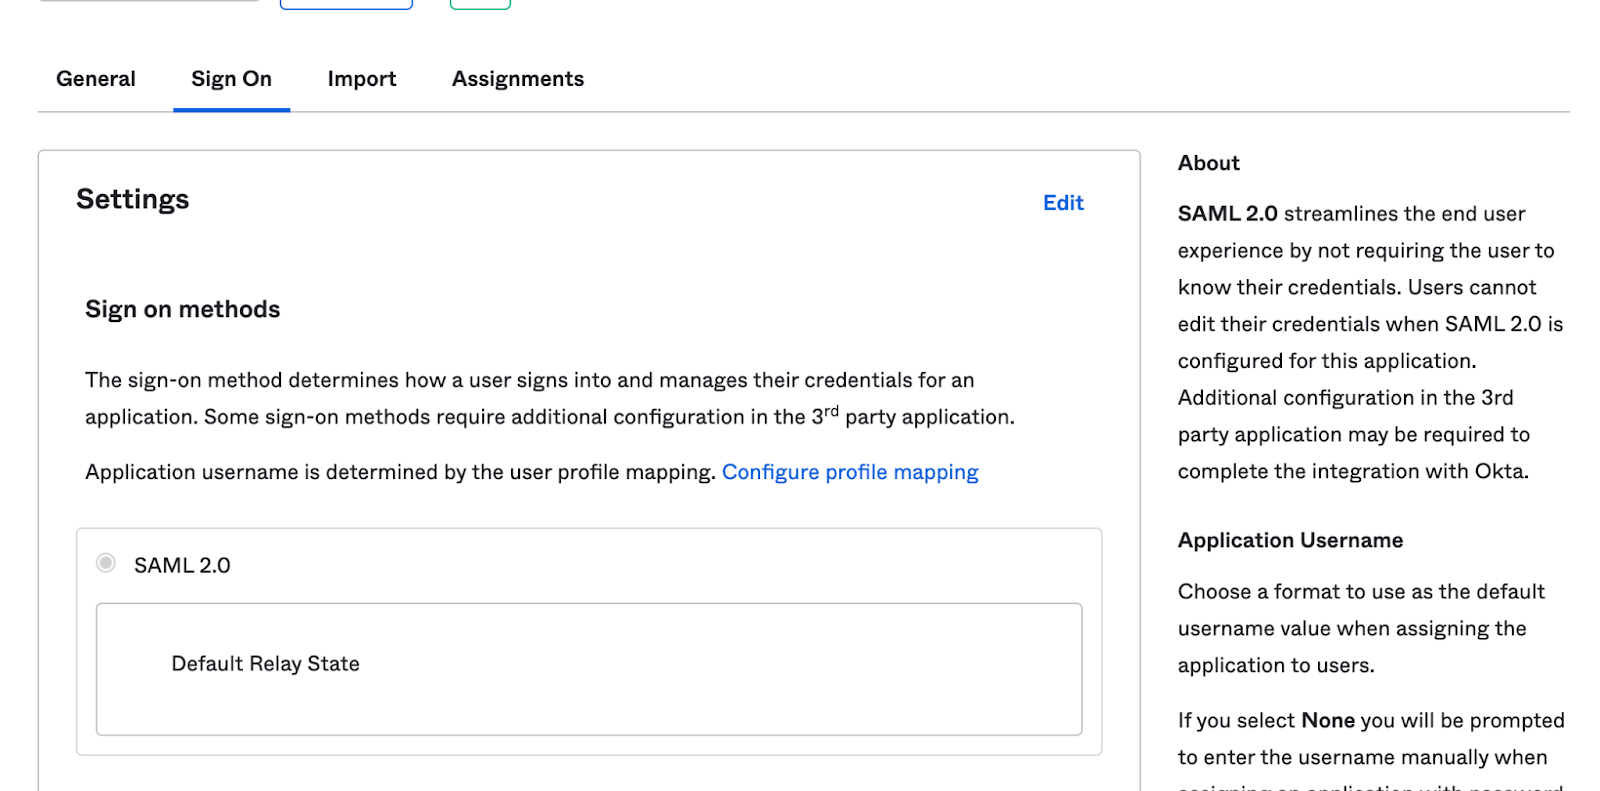
-
Scroll down and click View SAML Setup Instructions on the right side
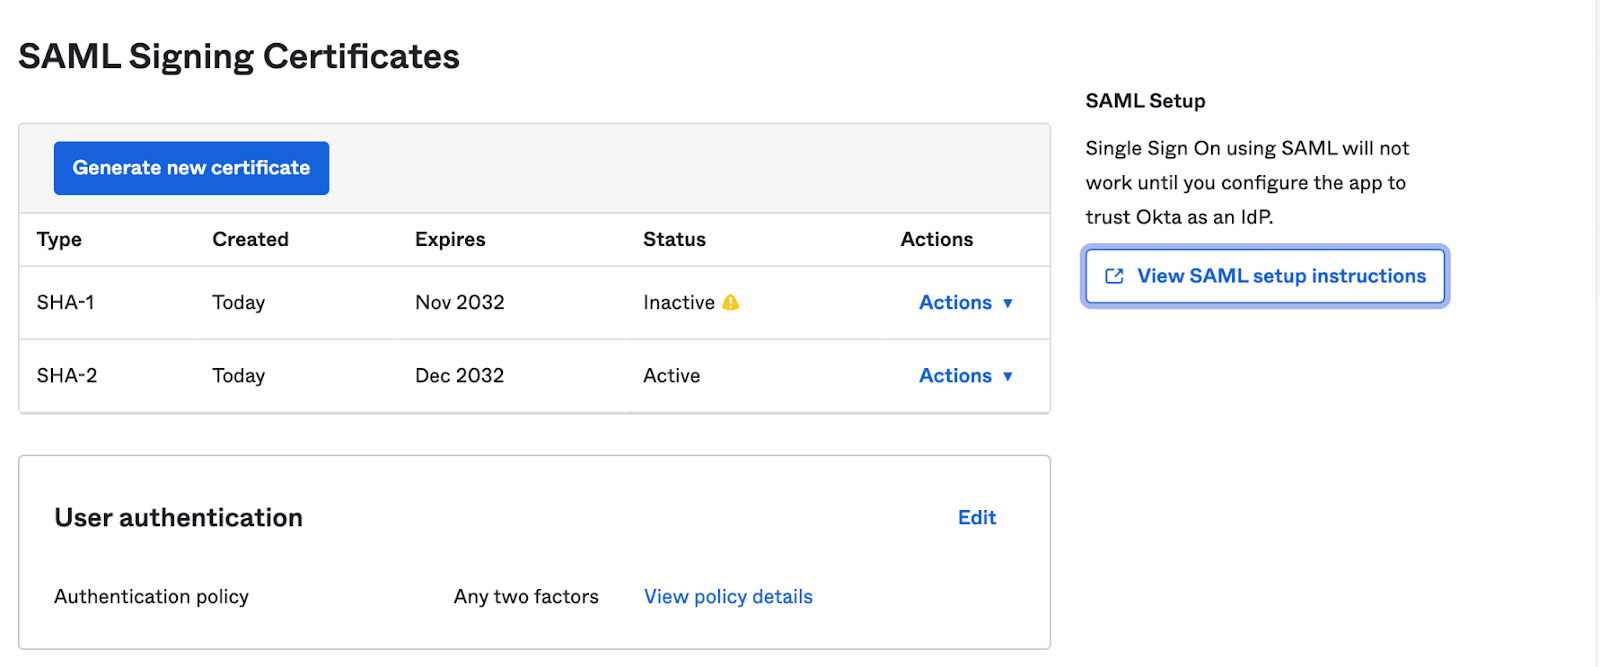
-
Please ensure to gather and save the following two pieces of information from the instructions page:
- Identity Provider Single Sign-On URL: This is the first entry on the page. You will need this URL later for authentication purposes when connecting to Cloudchipr with Okta.
- IDP Metadata XML File: Navigate to the bottom of the page and locate the section titled "Provide the following IDP metadata to your SP provider". Here, you will find an XML file. Please copy this file as it is necessary for setup.
-
In the Cloudchipr UI, navigate to the "Enable Okta" section and insert the copied XML file into the XML Metadata field. Then, click on Enable to activate the integration.

After activation, a notification confirming a successful Okta connection will appear in the bottom right corner of the screen.
All currently invited users will be deleted except the owner. Therefore, ensure you ask your Okta admin to re-invite them through Okta and inform them that authentication will be through Okta.
Enable Sync user profiles using SCIM
- Navigate to Cloudchipr > Settings > Security
- Copy SCIM Endpoint URL and Bearer Token
Configure SCIM in Okta Workforce for SAML Apps
- Go to your Okta Workforce Identity SAML application, select the General tab, then choose Edit for App Settings.
- In the Provisioning section, select SCIM and then Save.
- Under the General tab, confirm that Federation Broker Mode is disabled.
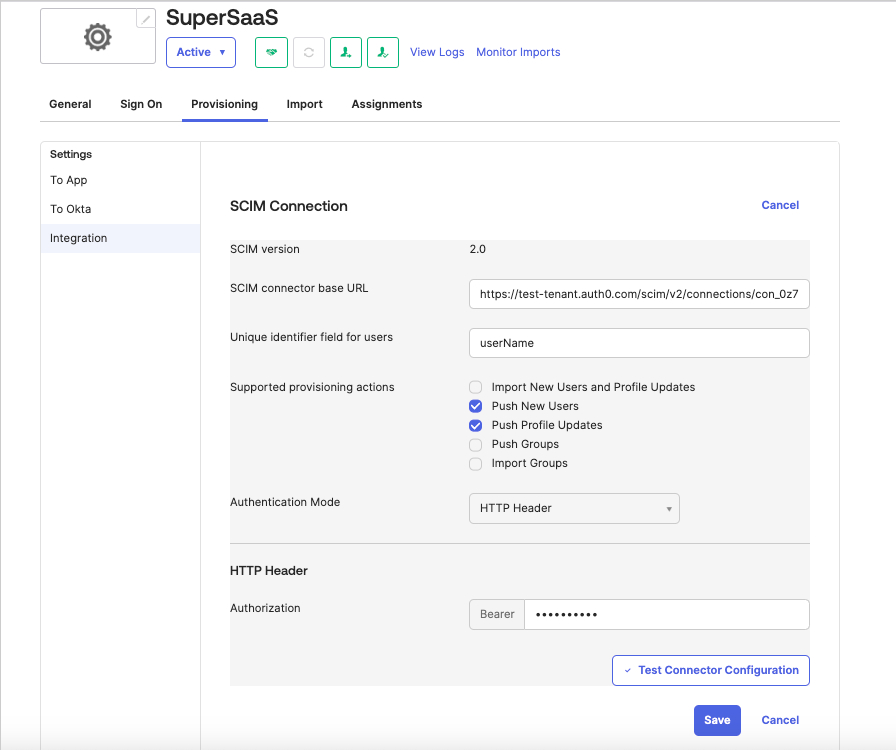
- Select the Provisioning tab, then go to the Integration tab and select Edit.
- Enter the SCIM Endpoint URL value you copied earlier into the SCIM connector base URL section.
- For a Unique identifier field for users, enter userName.
- Under Supported provisioning actions, select Push New Users and Push Profile Updates, then choose HTTP Header as the Authentication Mode.
- Paste the SCIM token into the Authorization field, then select Test Connection Configuration to test the new connection. Select Save.
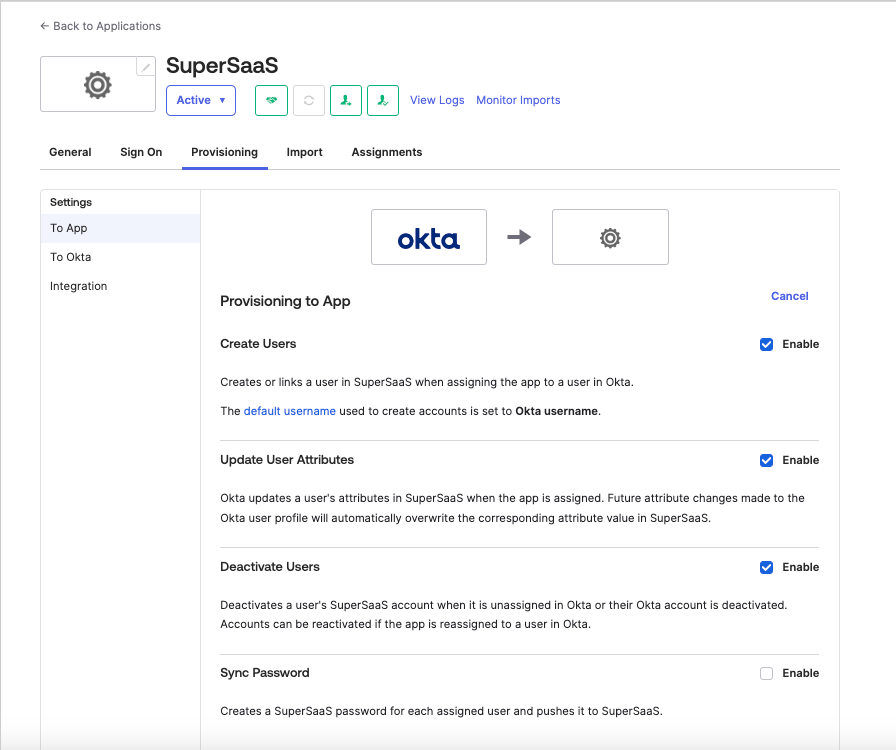
-
Browse to Provisioning > Settings > To App and choose Edit, then enable the Create Users, Update User Attributes, and Deactivate users operations. Select Save.
-
On the same page, under the Attribute Mappings section, use the X button to delete the following lines:
| Attribute | Value |
|---|---|
| Primary email type | (user.email != null && user.email != ”) ? ‘work’ : ‘‘ |
| Primary phone type | (user.primaryPhone != null && user.primaryPhone != ”) ? ‘work’ : ‘‘ |
| Address type | (user.streetAddress != null && user.streetAddress != ”) ? ‘work’ : ‘’ |
Configure Cloudchipr application role mapping
Add group attribute to the application
- Go to Directory -> Profile Editor and edit Cloudchipr application
- Click on
Add Attributebutton and add attribute as described below-
Data Type -> String
-
Display Name -> Group Role
-
Variable Name ->
group_role -
External Name ->
roles.^[type=='group_role'].value -
External namespace ->
urn:ietf:params:scim:schemas:core:2.0:User -
Check the checkbox on
Enumand add following values for it:Display Name Value Owner ownerSuper Admin super_adminAdmin adminViewer viewerBilling Admin billing_adminBilling Explorer Admin billing_explorer_adminViewer Protector viewer_protectorWorkflow Resources Protector workflow_resources_protector -
Attribute Type ->
Group
-
- Click on
Savebutton to save the attribute
Add user attribute to the application
- Go to Directory -> Profile Editor and edit Cloudchipr application
- Click on
Add Attributebutton and add attribute as described below-
Data Type -> String
-
Display Name -> User Role
-
Variable Name ->
user_role -
External Name ->
roles.^[type=='user_role'].value -
External namespace ->
urn:ietf:params:scim:schemas:core:2.0:User -
Check the checkbox on
Enumand add following values for it:Display Name Value Owner ownerSuper Admin super_adminAdmin adminViewer viewerBilling Admin billing_adminBilling Explorer Admin billing_explorer_adminViewer Protector viewer_protectorWorkflow Resources Protector workflow_resources_protector -
Attribute Type ->
Personal
-
- Click on
Savebutton to save the attribute
Create application assignment
The following steps are described for group assignment, but the same steps are valid for user assignments as well, where the only difference will be setting a value for User Role instead of Group Role.
-
Go to Applications -> Cloudchipr application
-
Click on Assign -> Assign to Groups

-
Select the group and click on
Assign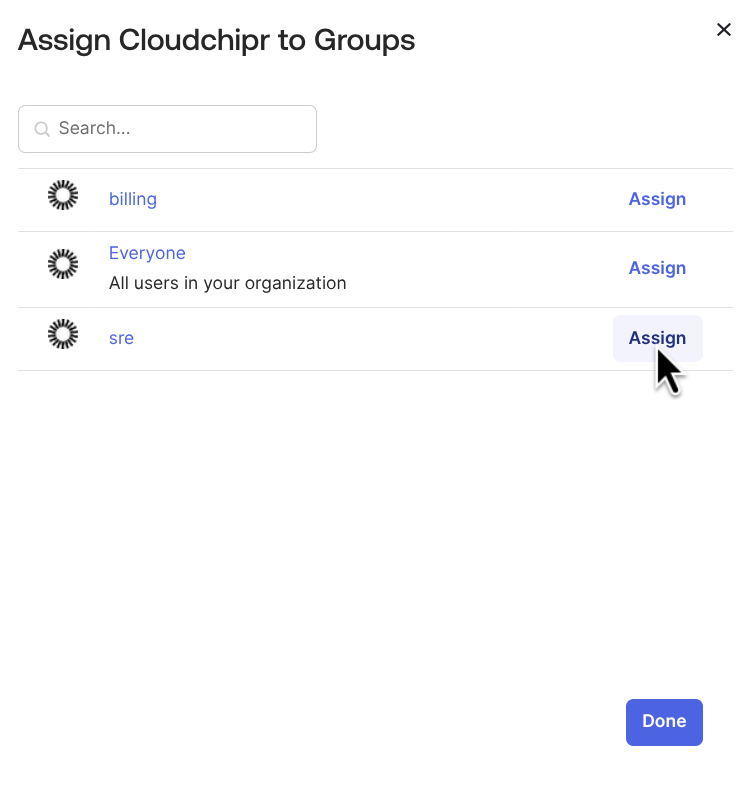
-
Scroll down the attributes to
Group Roleand choose the role and save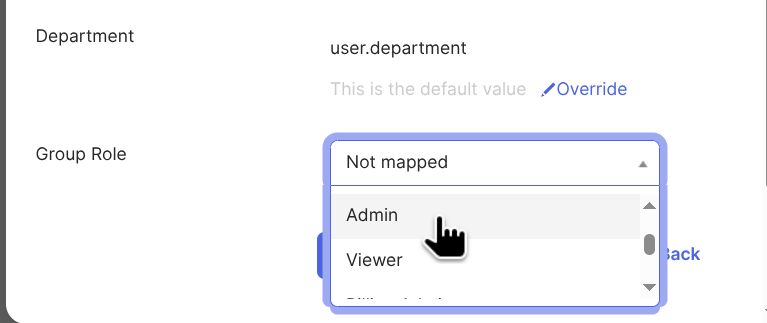
You can now test user provisioning in the Assignments tab and test update operations by editing the user attributes in the Directory > People section of your Okta admin portal.