Single Sign On (SSO) using Azure
Follow the steps below to enable Microsoft SSO.
-
Sign in to Cloudchipr.
-
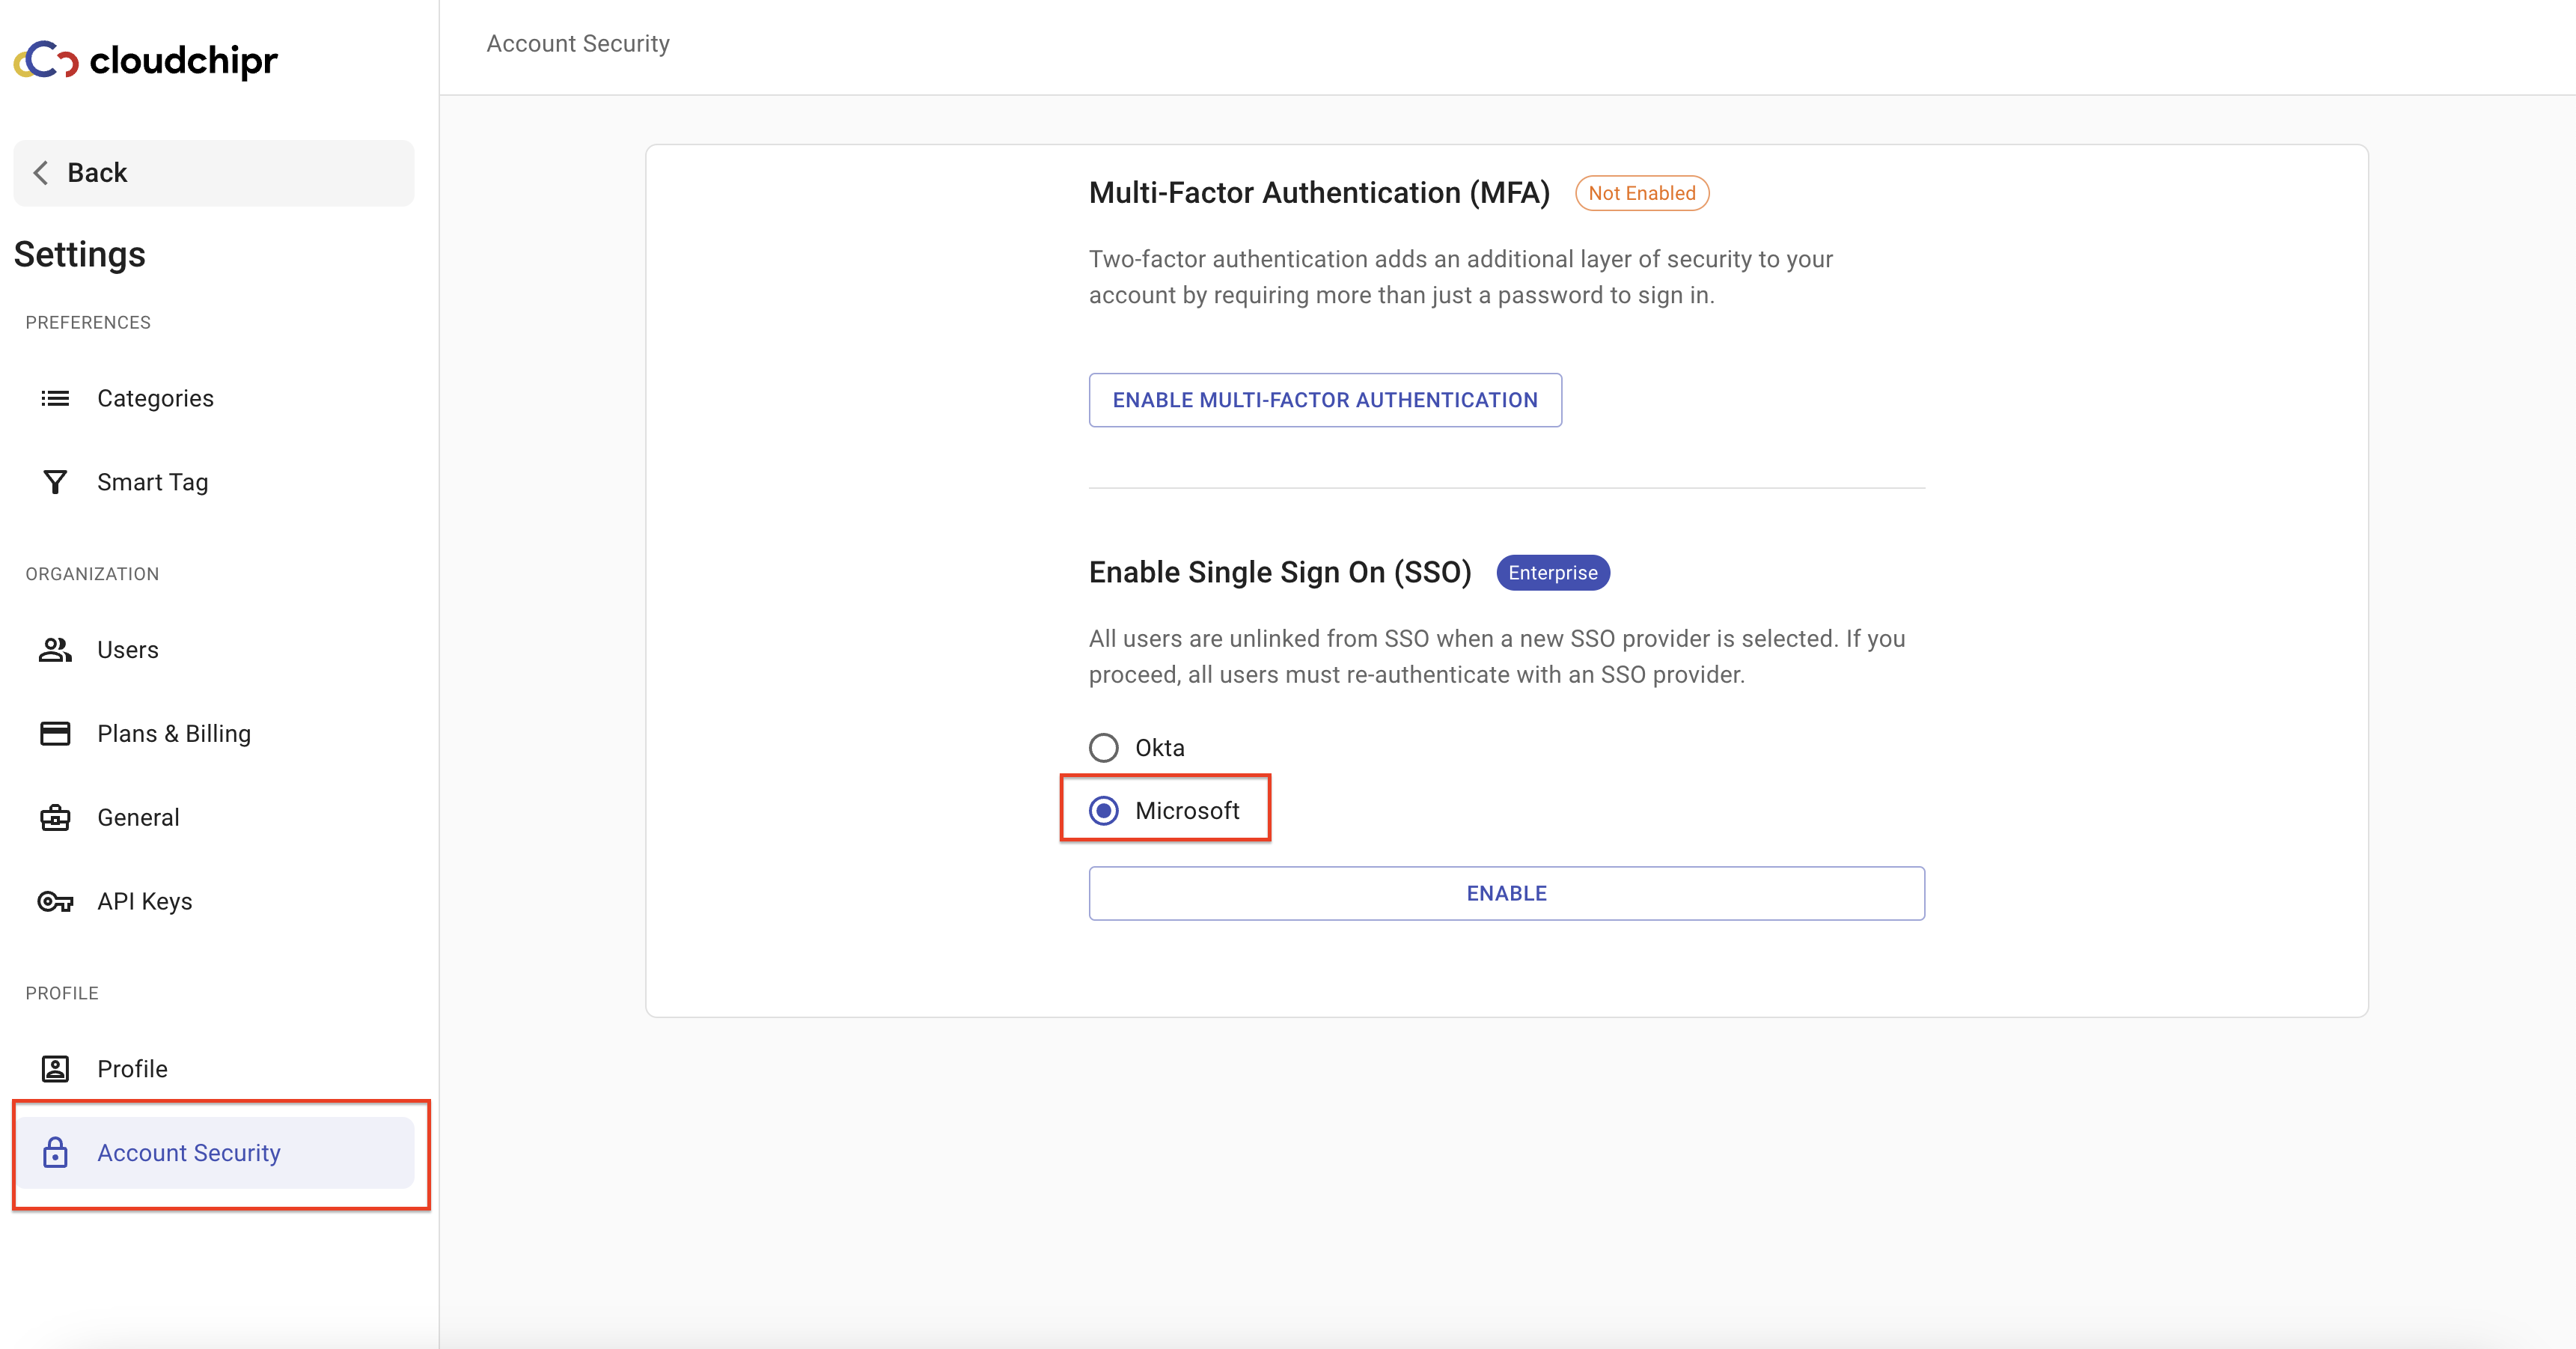
Browse to Settings > Account Security
- Select
Microsoftin Enable Single Sign On (SSO) section - Select ENABLE
- Select
-
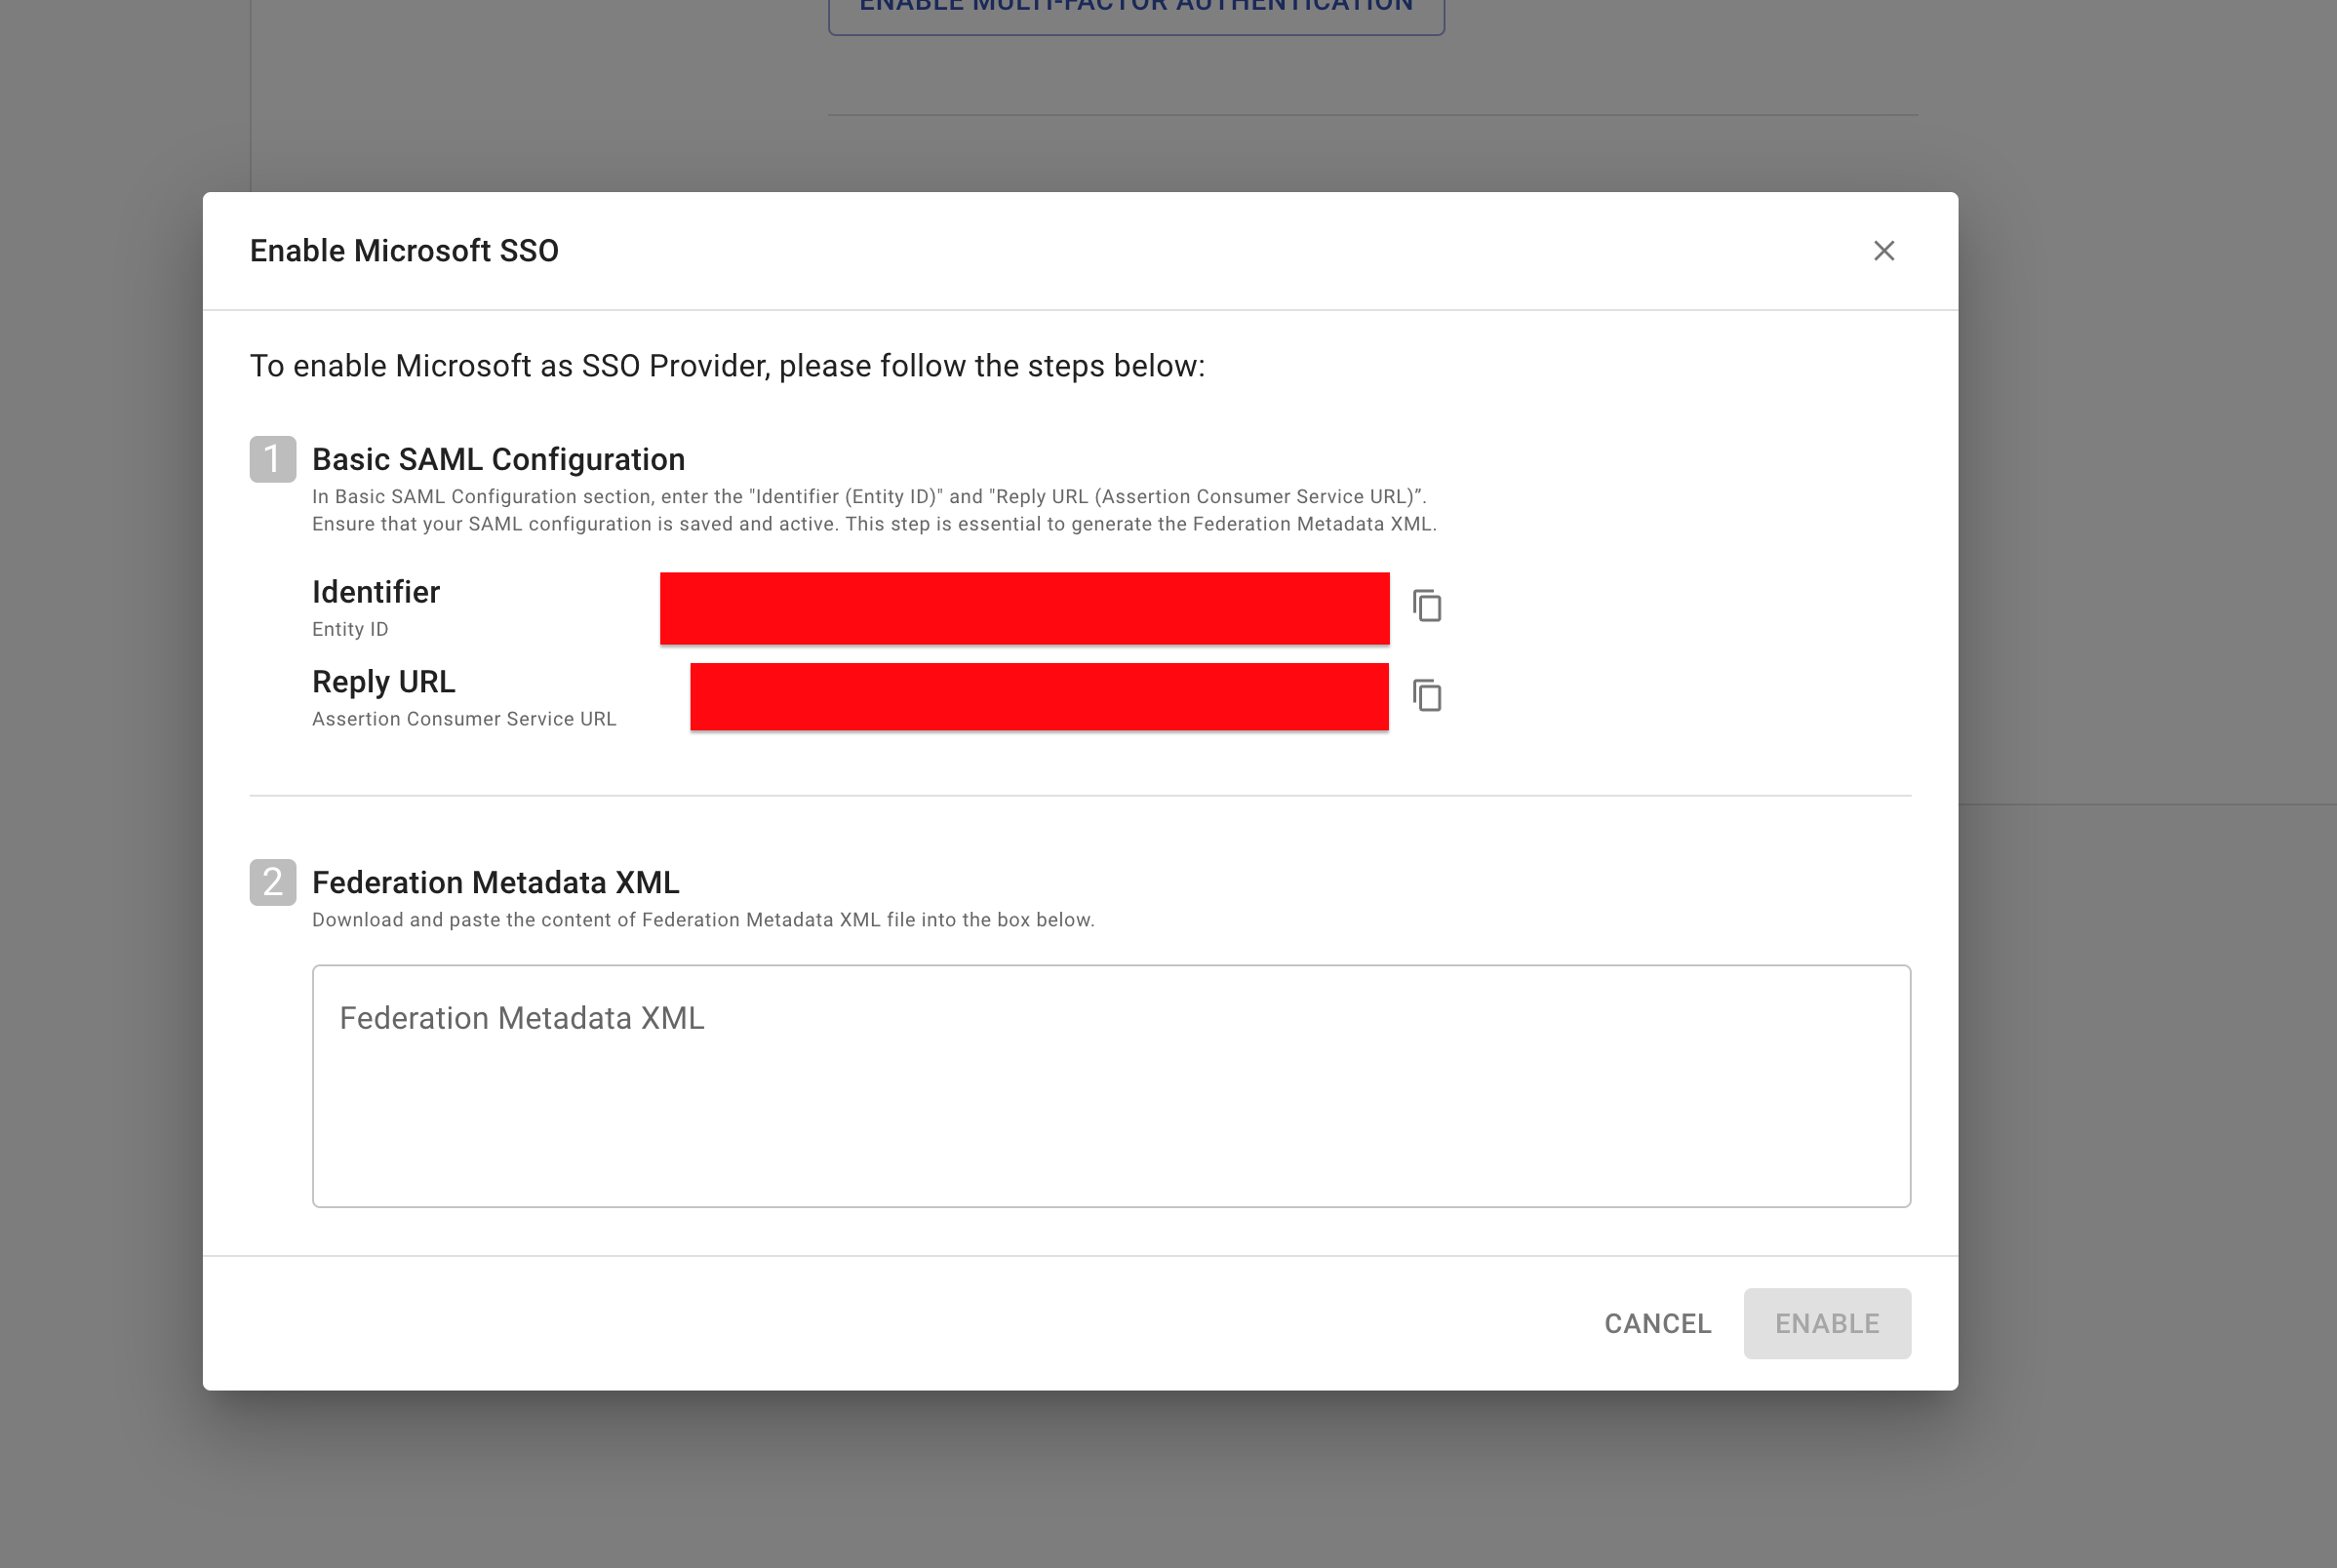
Keep the pop-up window open, as you will need to proceed with the Microsoft Entrap SSO setup steps. The information from these steps will be required in the upcoming stages.
Follow the steps below to enable Microsoft Entra SSO.
-
Sign in to Microsoft Entra admin center
-
Browse to Identity > Applications > Enterprise applications > New application.
-
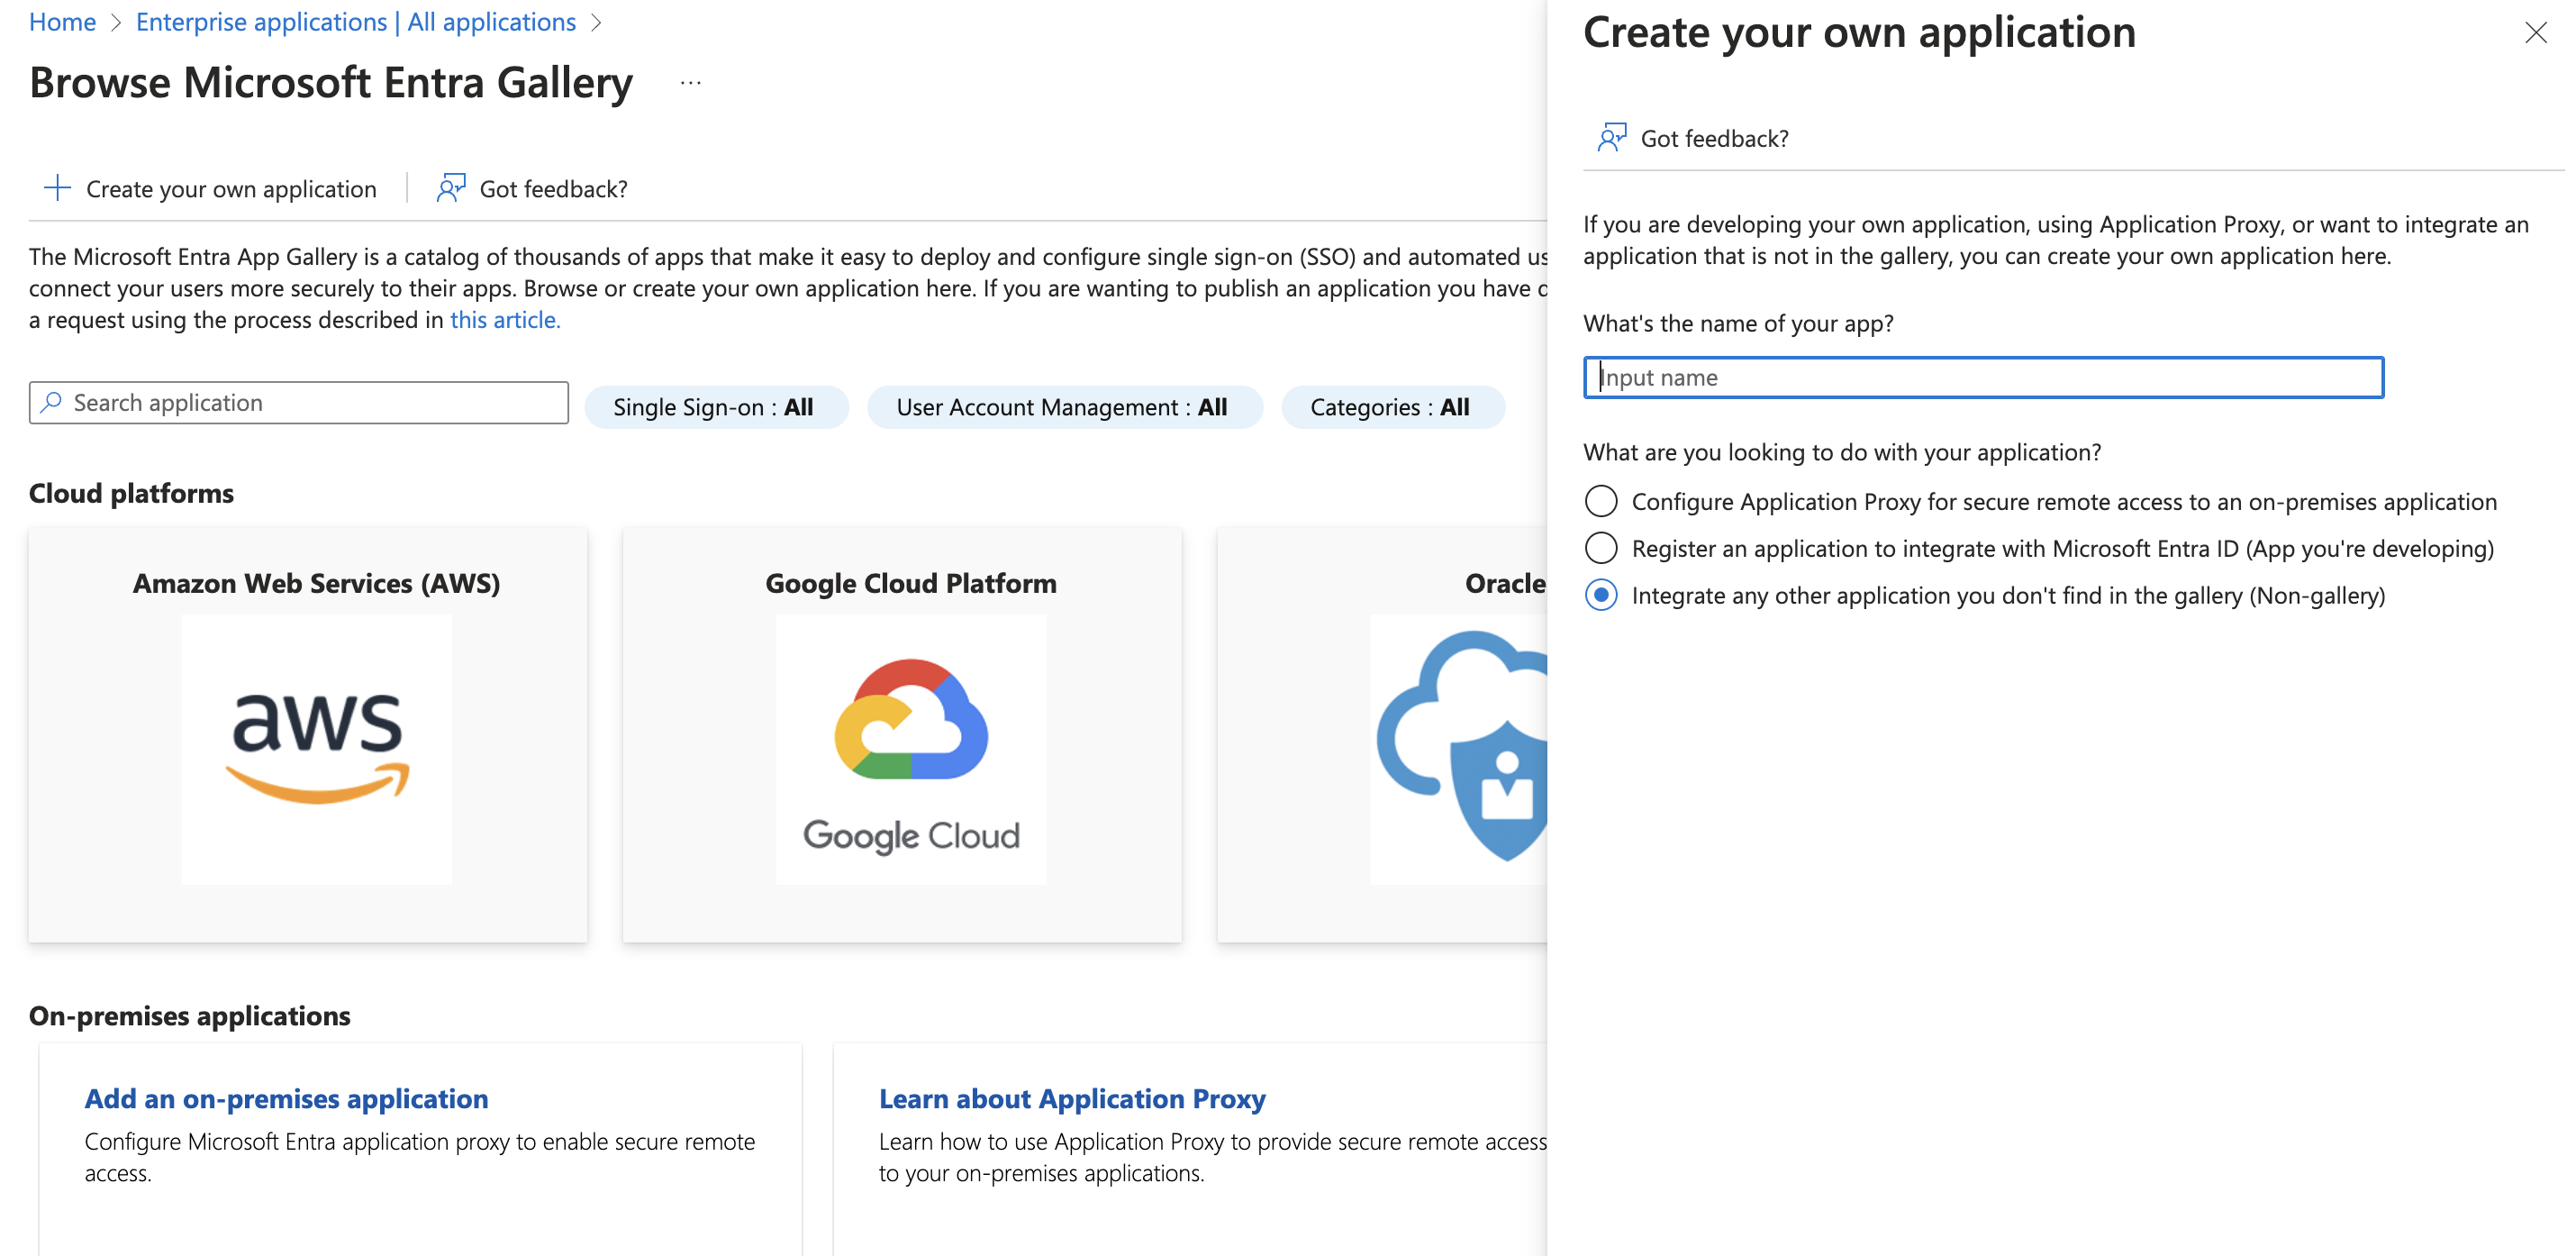
Select Create your own application
-
In the results panel choose
-
In the name field, enter
Cloudchipr. -
Choose
Integrate any other application you don't find in the gallery (Non-gallery)**** -
Select Create
-
-
Browse the newly created Identity > Applications > Enterprise applications >
Cloudchipr -
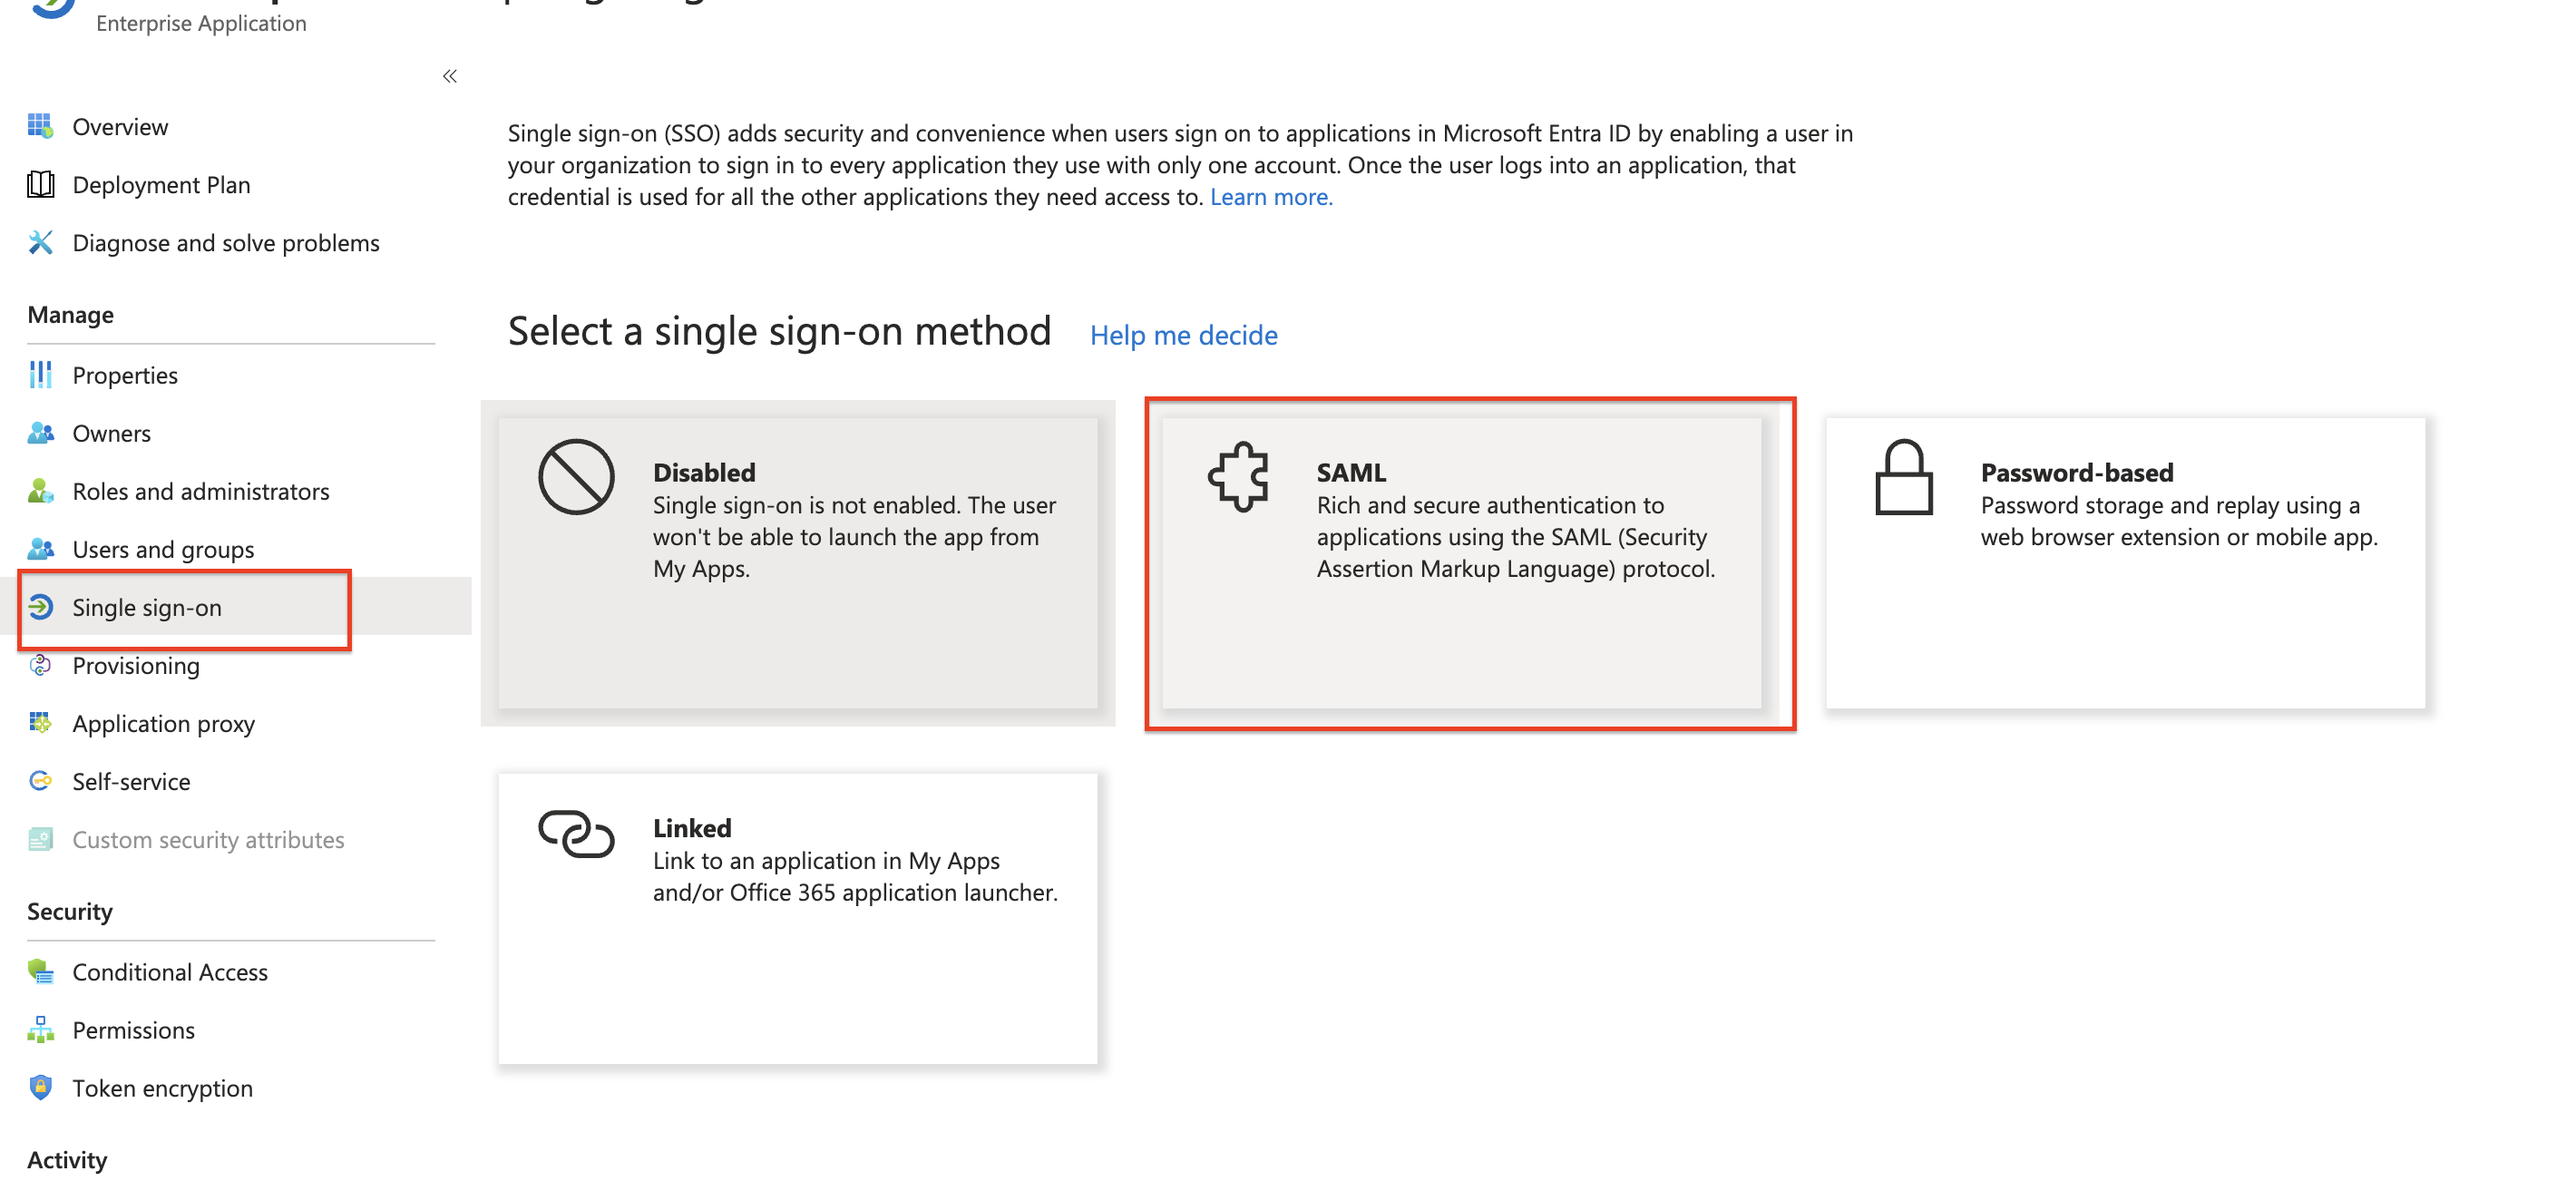
Click Single sign-on from the left menu
- Select
SAMLas Select a single sign-on method
- Select
-
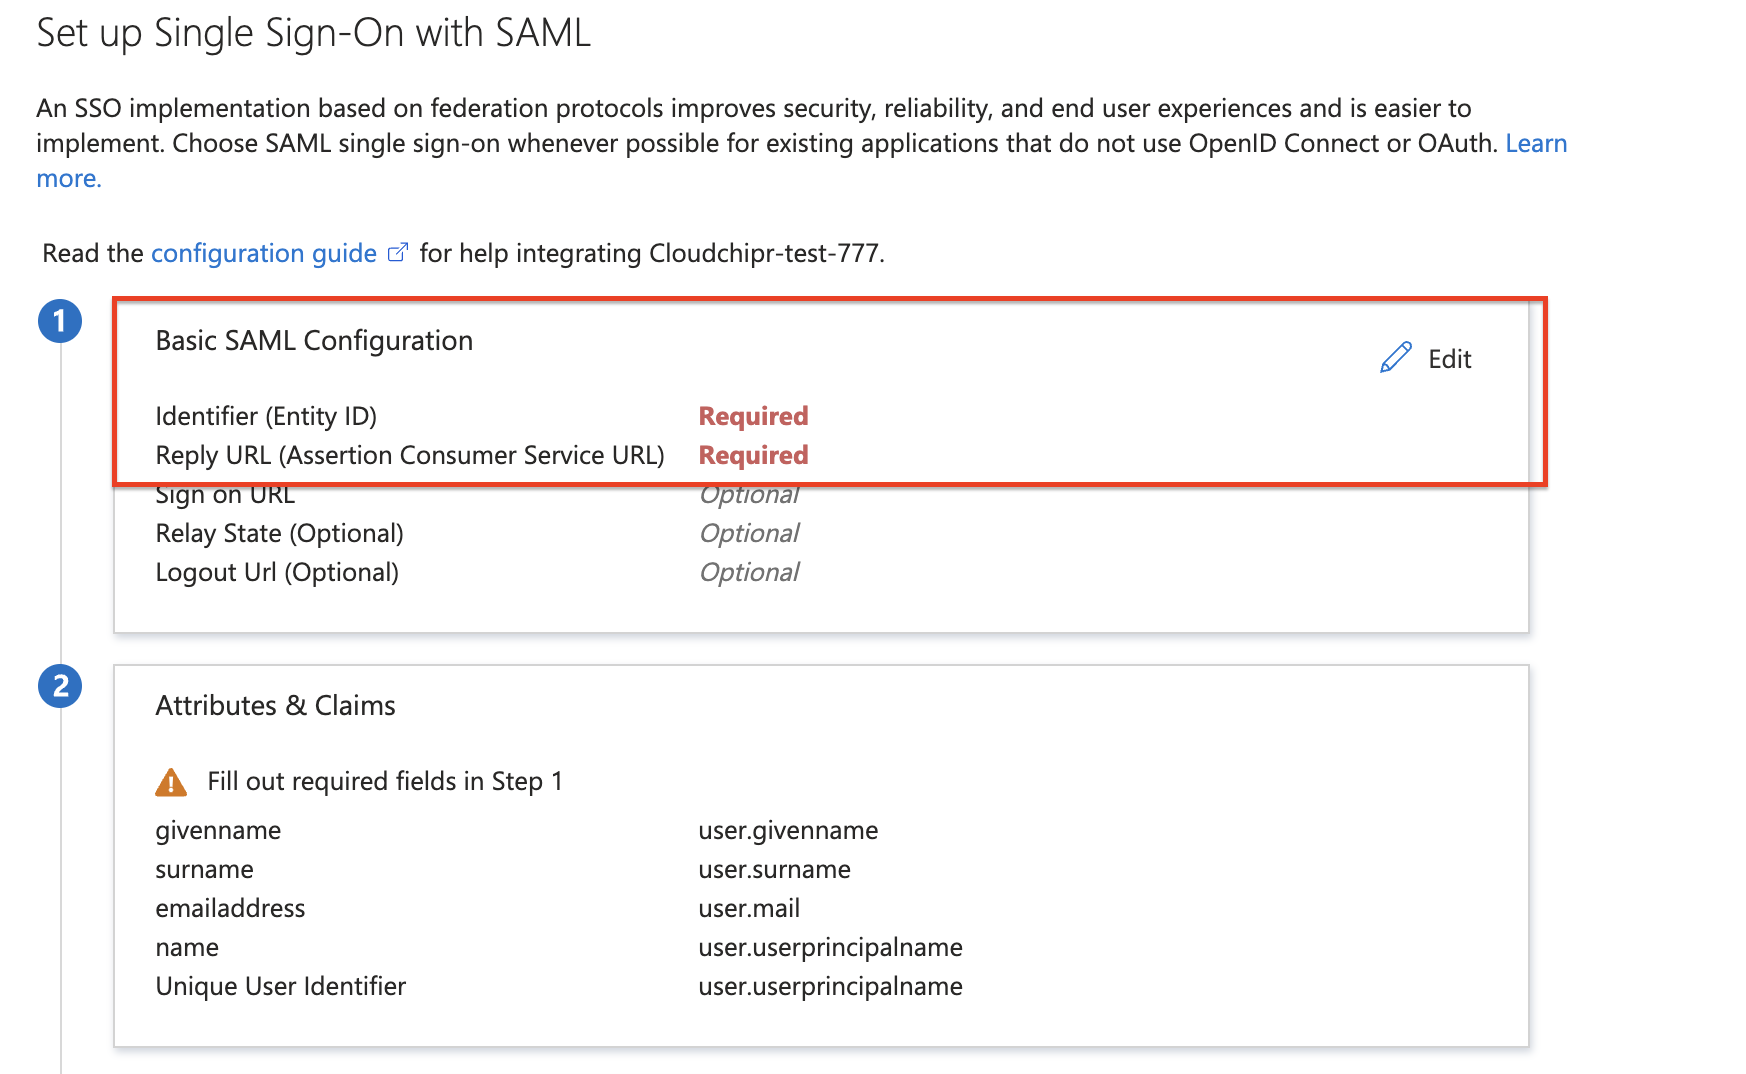
In the Basic SAML Configuration section, please follow the following steps:
- In the Identifier (Entity ID) text box, enter the
Identifiervalue copied from CloudchiprEnable Microsoft SSOsetup. - In the Reply URL (Assertion Consumer Service URL) text box, enter the
Reply URLfrom CloudchiprEnable Microsoft SSOsetup. - Select Save
-
On Set up single sign-on with SAML page, in the SAML Signing Certificate section, find
Federation Metadata XMLand select Download to download the certificate and save it on your computer.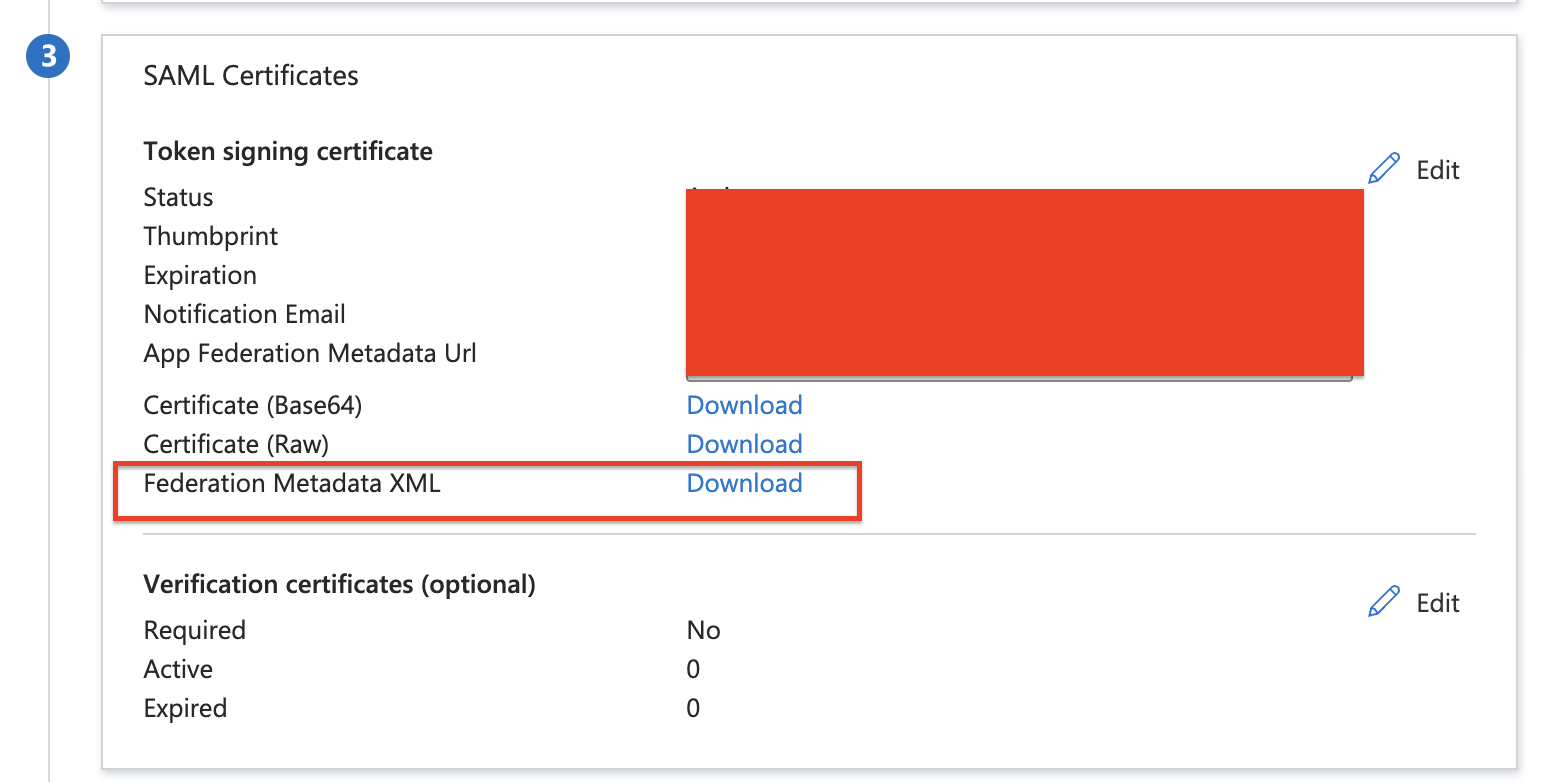
-
Open the
Federation Metadata XMLfile Copy the content and paste it in CloudchiprEnable Microsoft SSOsetup page.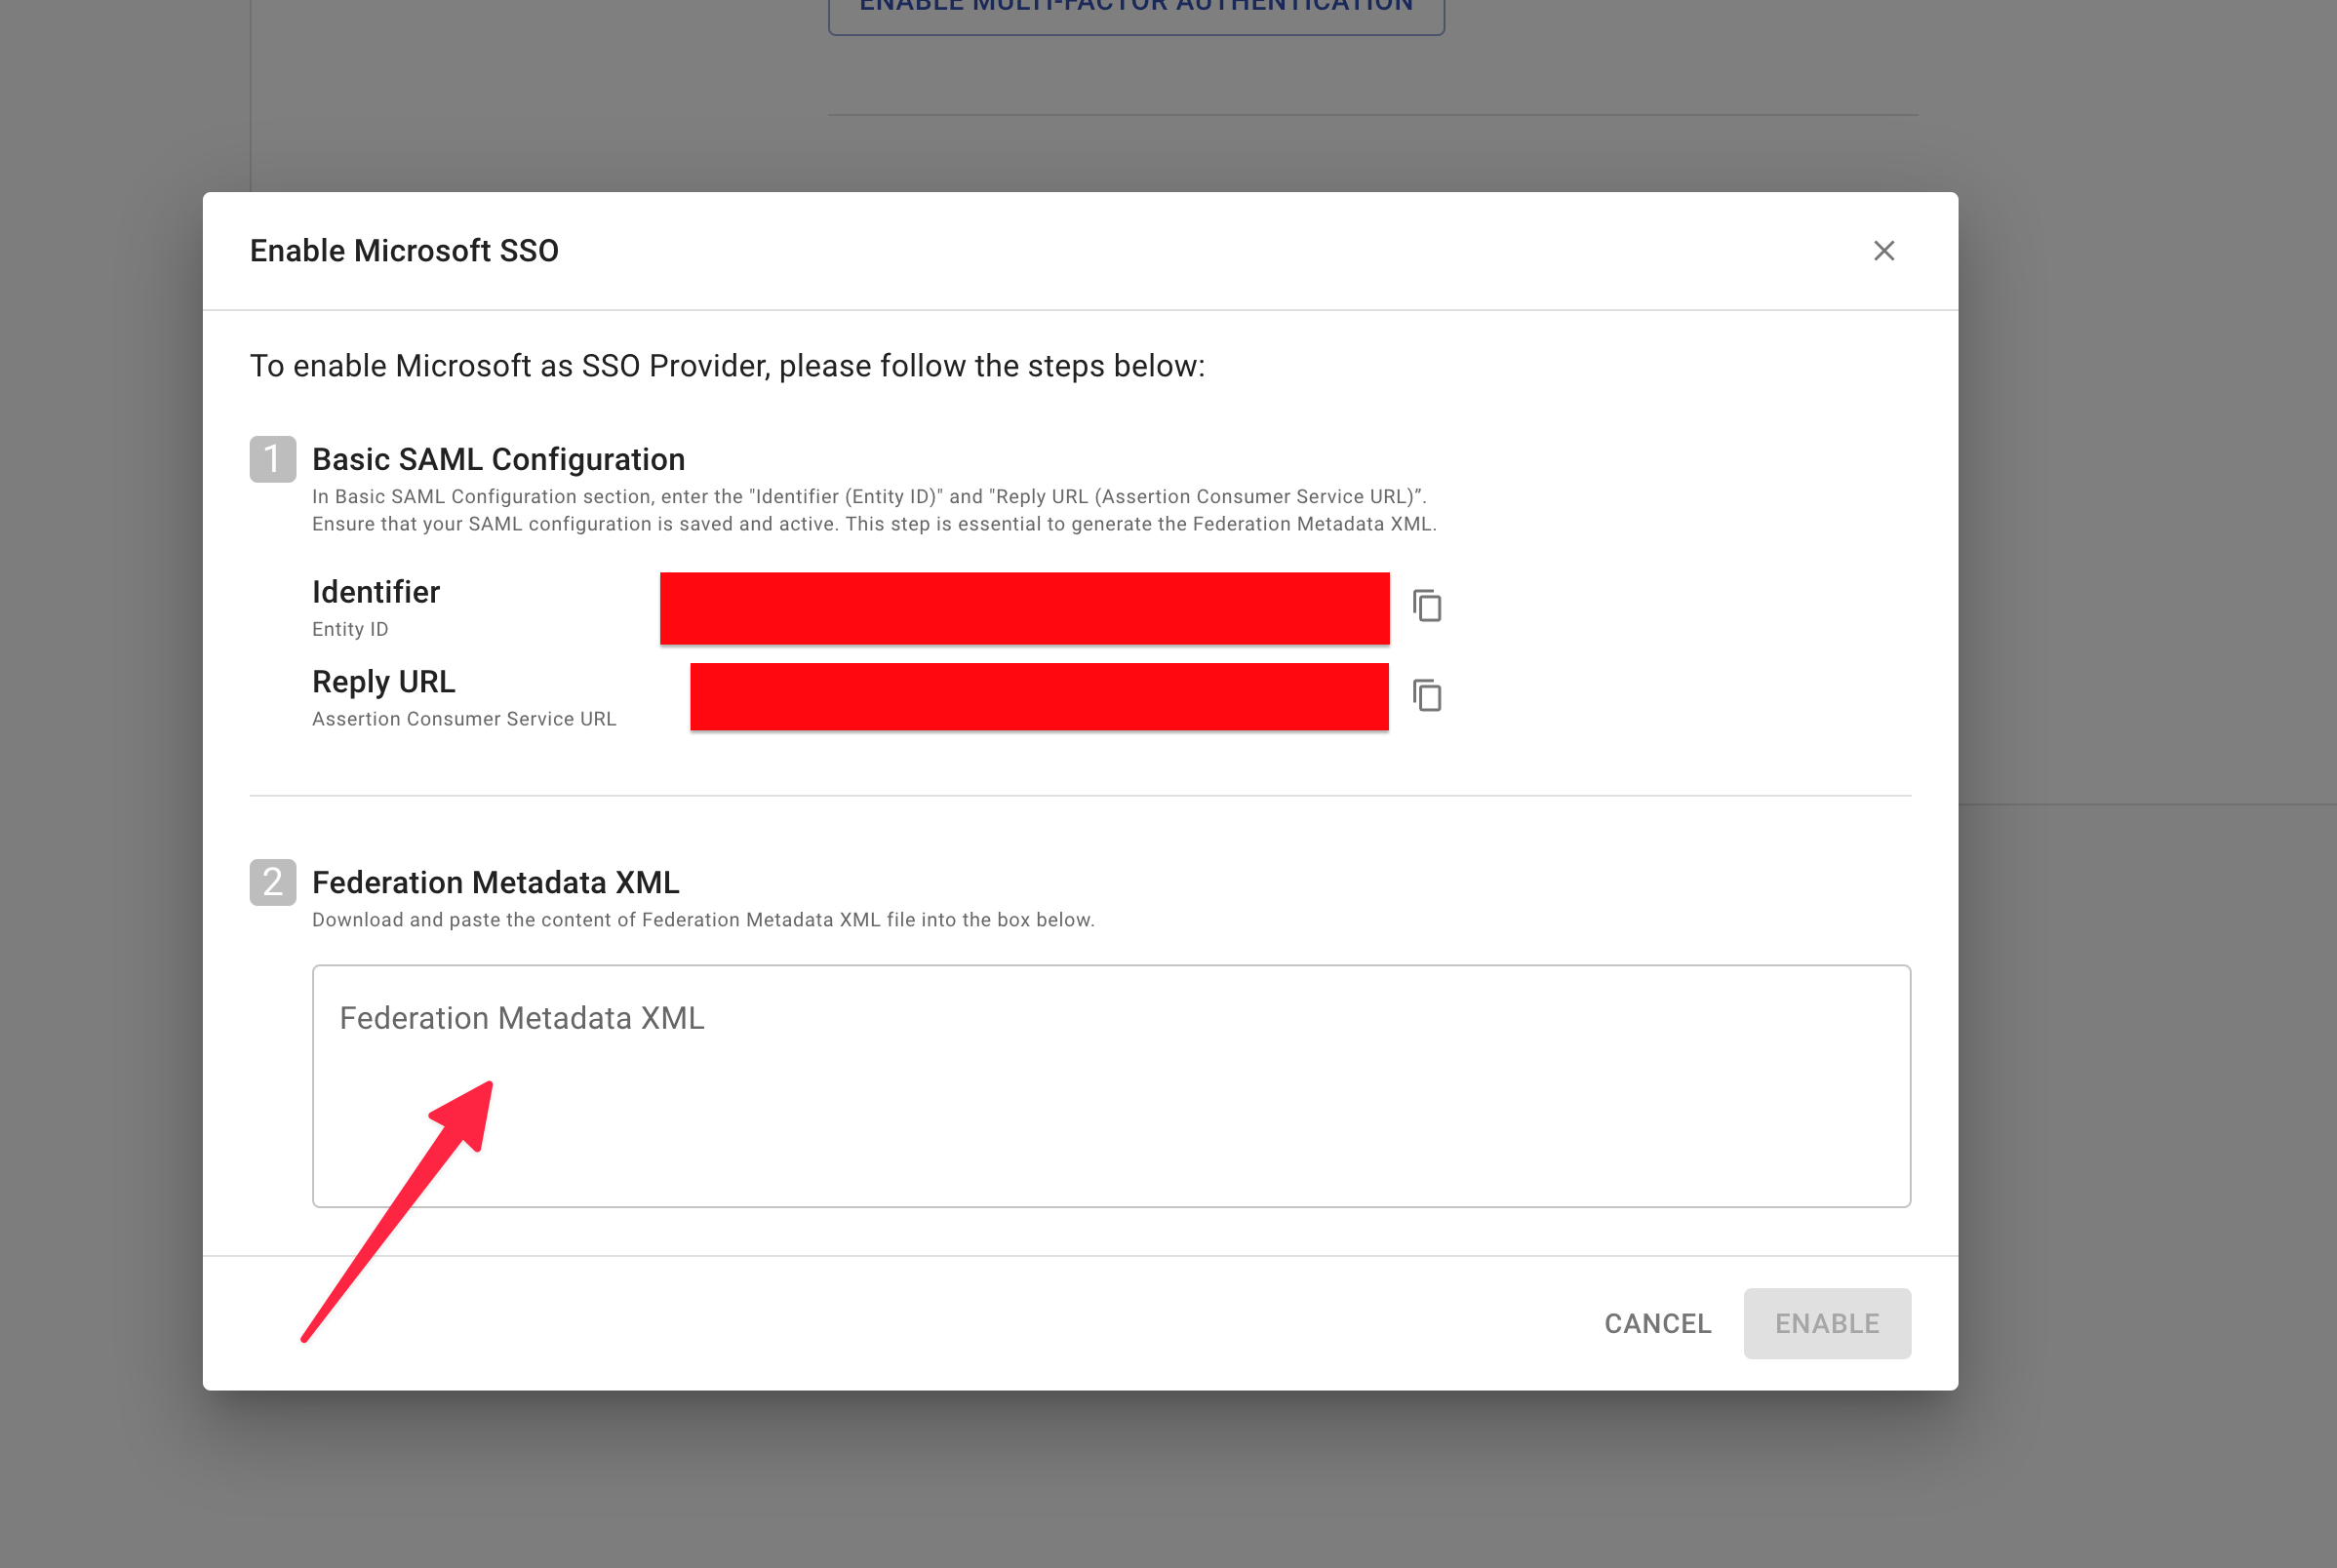
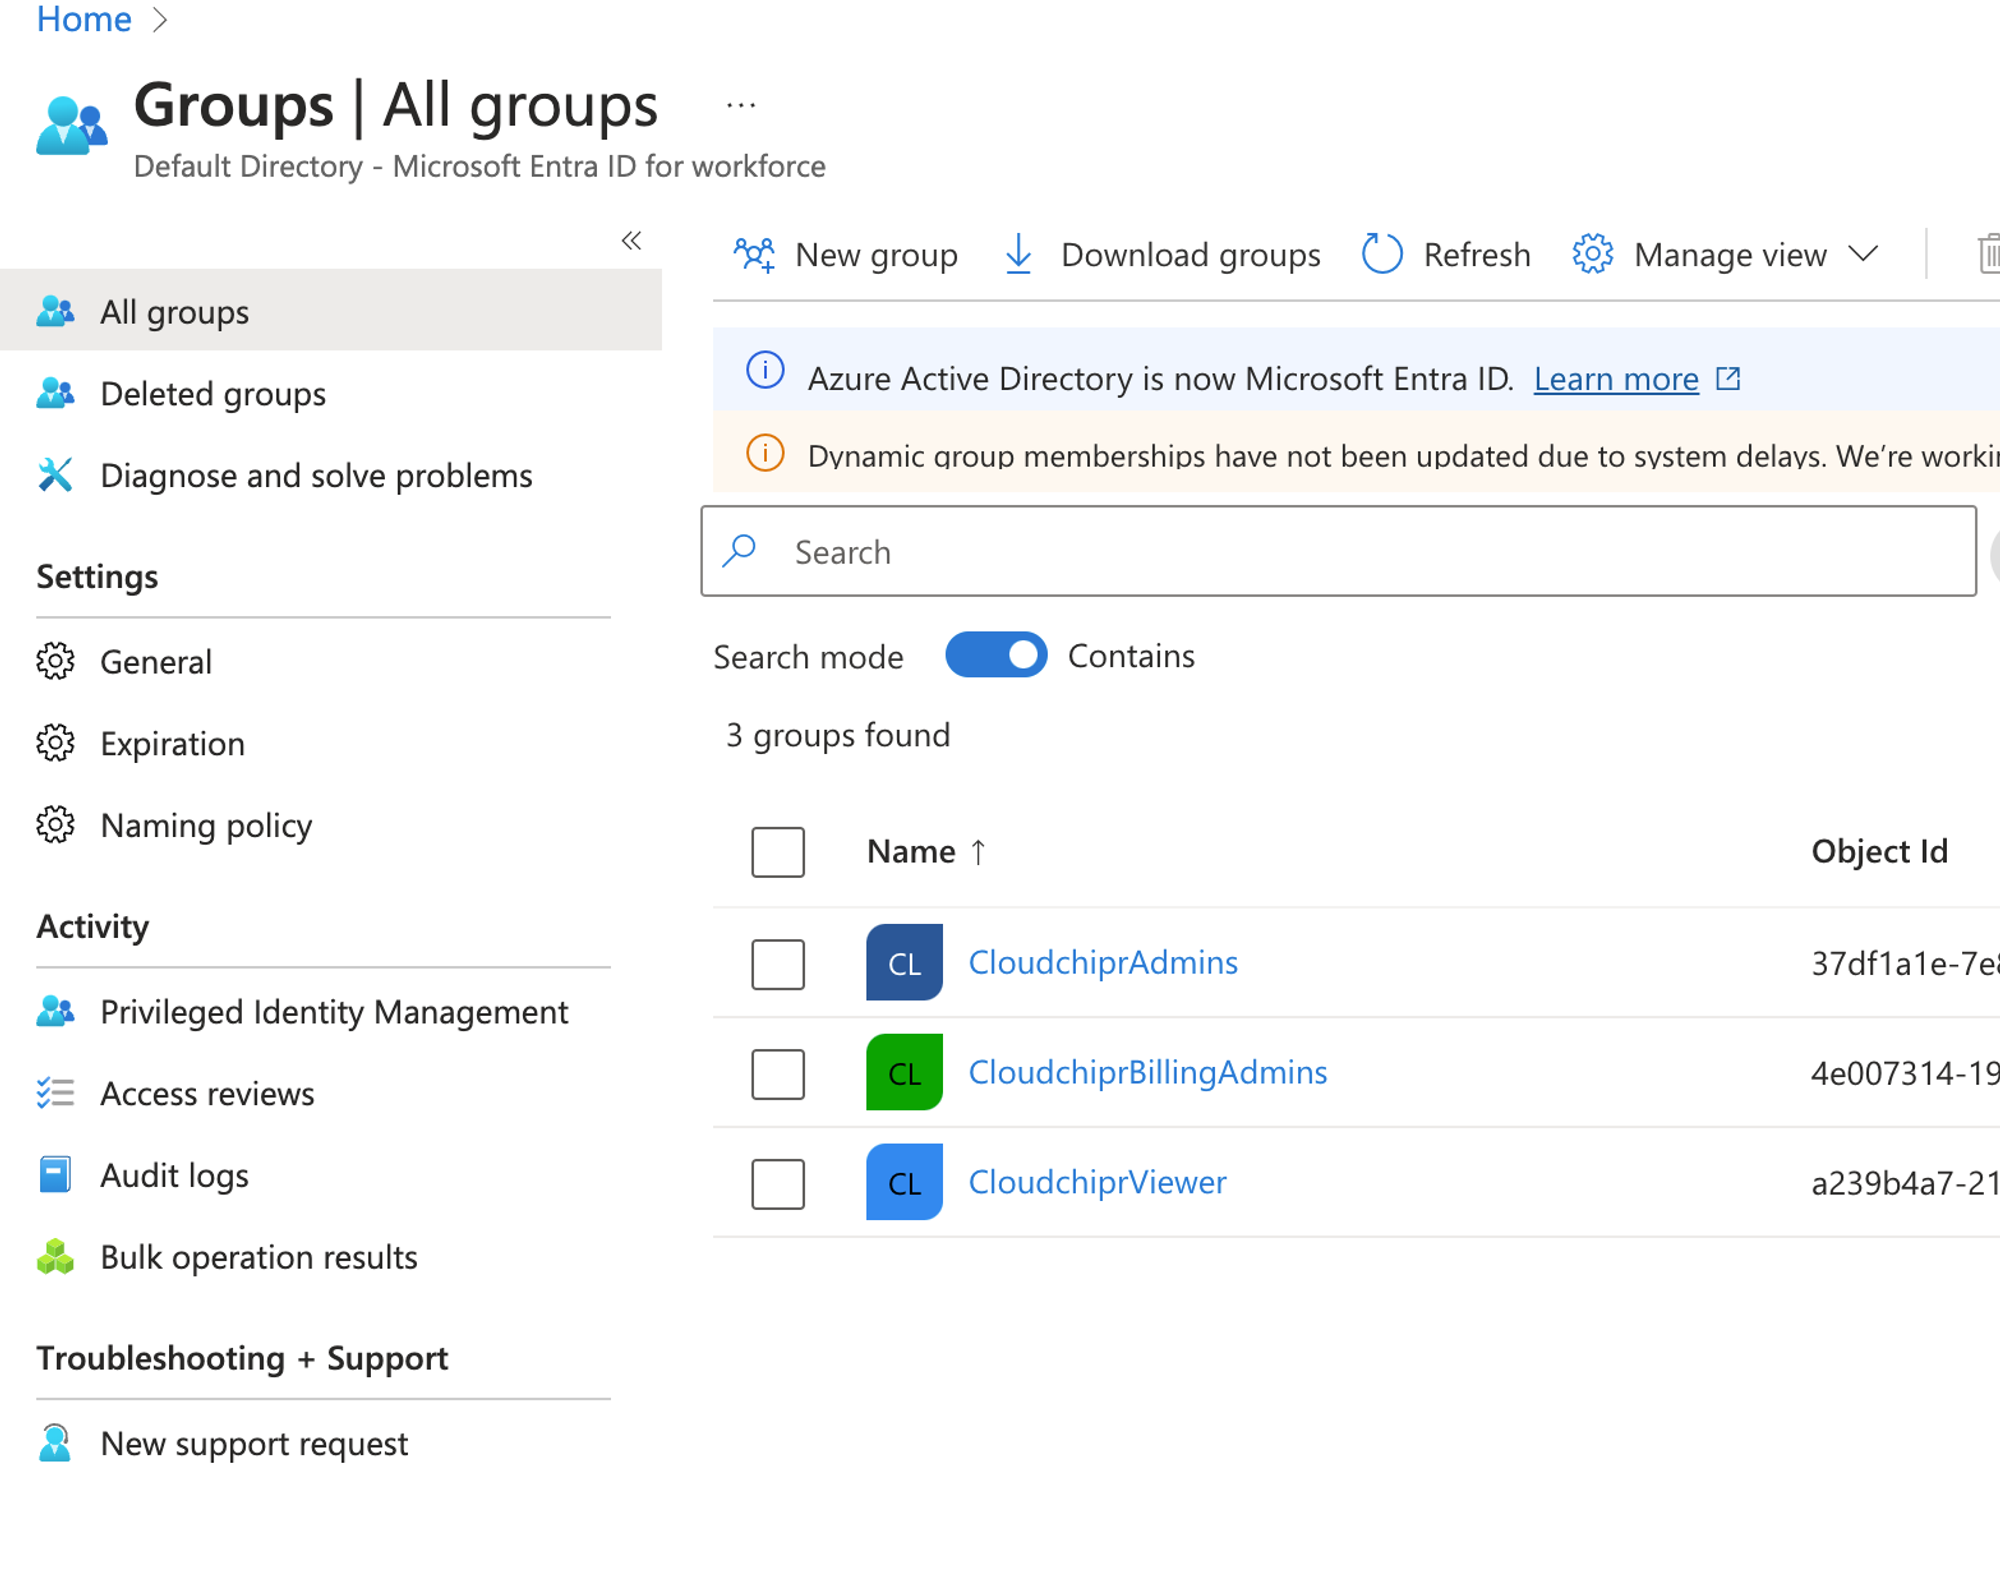
Add Roles- Sign in to Microsoft Entra admin center
- Browse to Identity > Groups
- Add New groups (Group type can be Security)
CloudchiprAdminsCloudchiprBillingAdminsCloudchiprViewers
-
Browse the newly created Identity > Applications > Enterprise applications >
Cloudchiprappication -
Click Single sign-on from the left menu
-
Click Attributes & Claims > Edit
-
Select Add new claim in Attributes & Claims dialog
-
In the Name text box, enter the
role -
Select
Claim conditions -
Add conditions
- For User type
Members, Scoped GroupsCloudchiprAdminsand SourceAttributeset value"admin" - For User type
Members, Scoped GroupsCloudchiprBillingAdminsand SourceAttributeset value"billing_admin" - For User type
Members, Scoped GroupsCloudchiprBillingExplorerAdminsand SourceAttributeset value"billing_explorer_admin" - For User type
Members, Scoped GroupsCloudchiprViewerand SourceAttributeset value"viewer" - For User type
Members, Scoped GroupsCloudchiprViewerProtectorand SourceAttributeset value"viewer_protector" - For User type
Members, Scoped GroupsCloudchiprWorkflowResourcesProtectorViewerand SourceAttributeset value"workflow_resources_protector"
- For User type
-
Select Save

-
Add Users
-
Browse the newly created Identity > Applications > Enterprise applications >
Cloudchipr -
select Users and groups.
-
Select Add user/group, then select Users and groups in the Add Assignment dialog.
-
In the Users and groups dialog, Choose Groups and add all cloudchipr groups
-
CloudchiprAdmins -
CloudchiprBillingAdmins -
CloudchiprViewer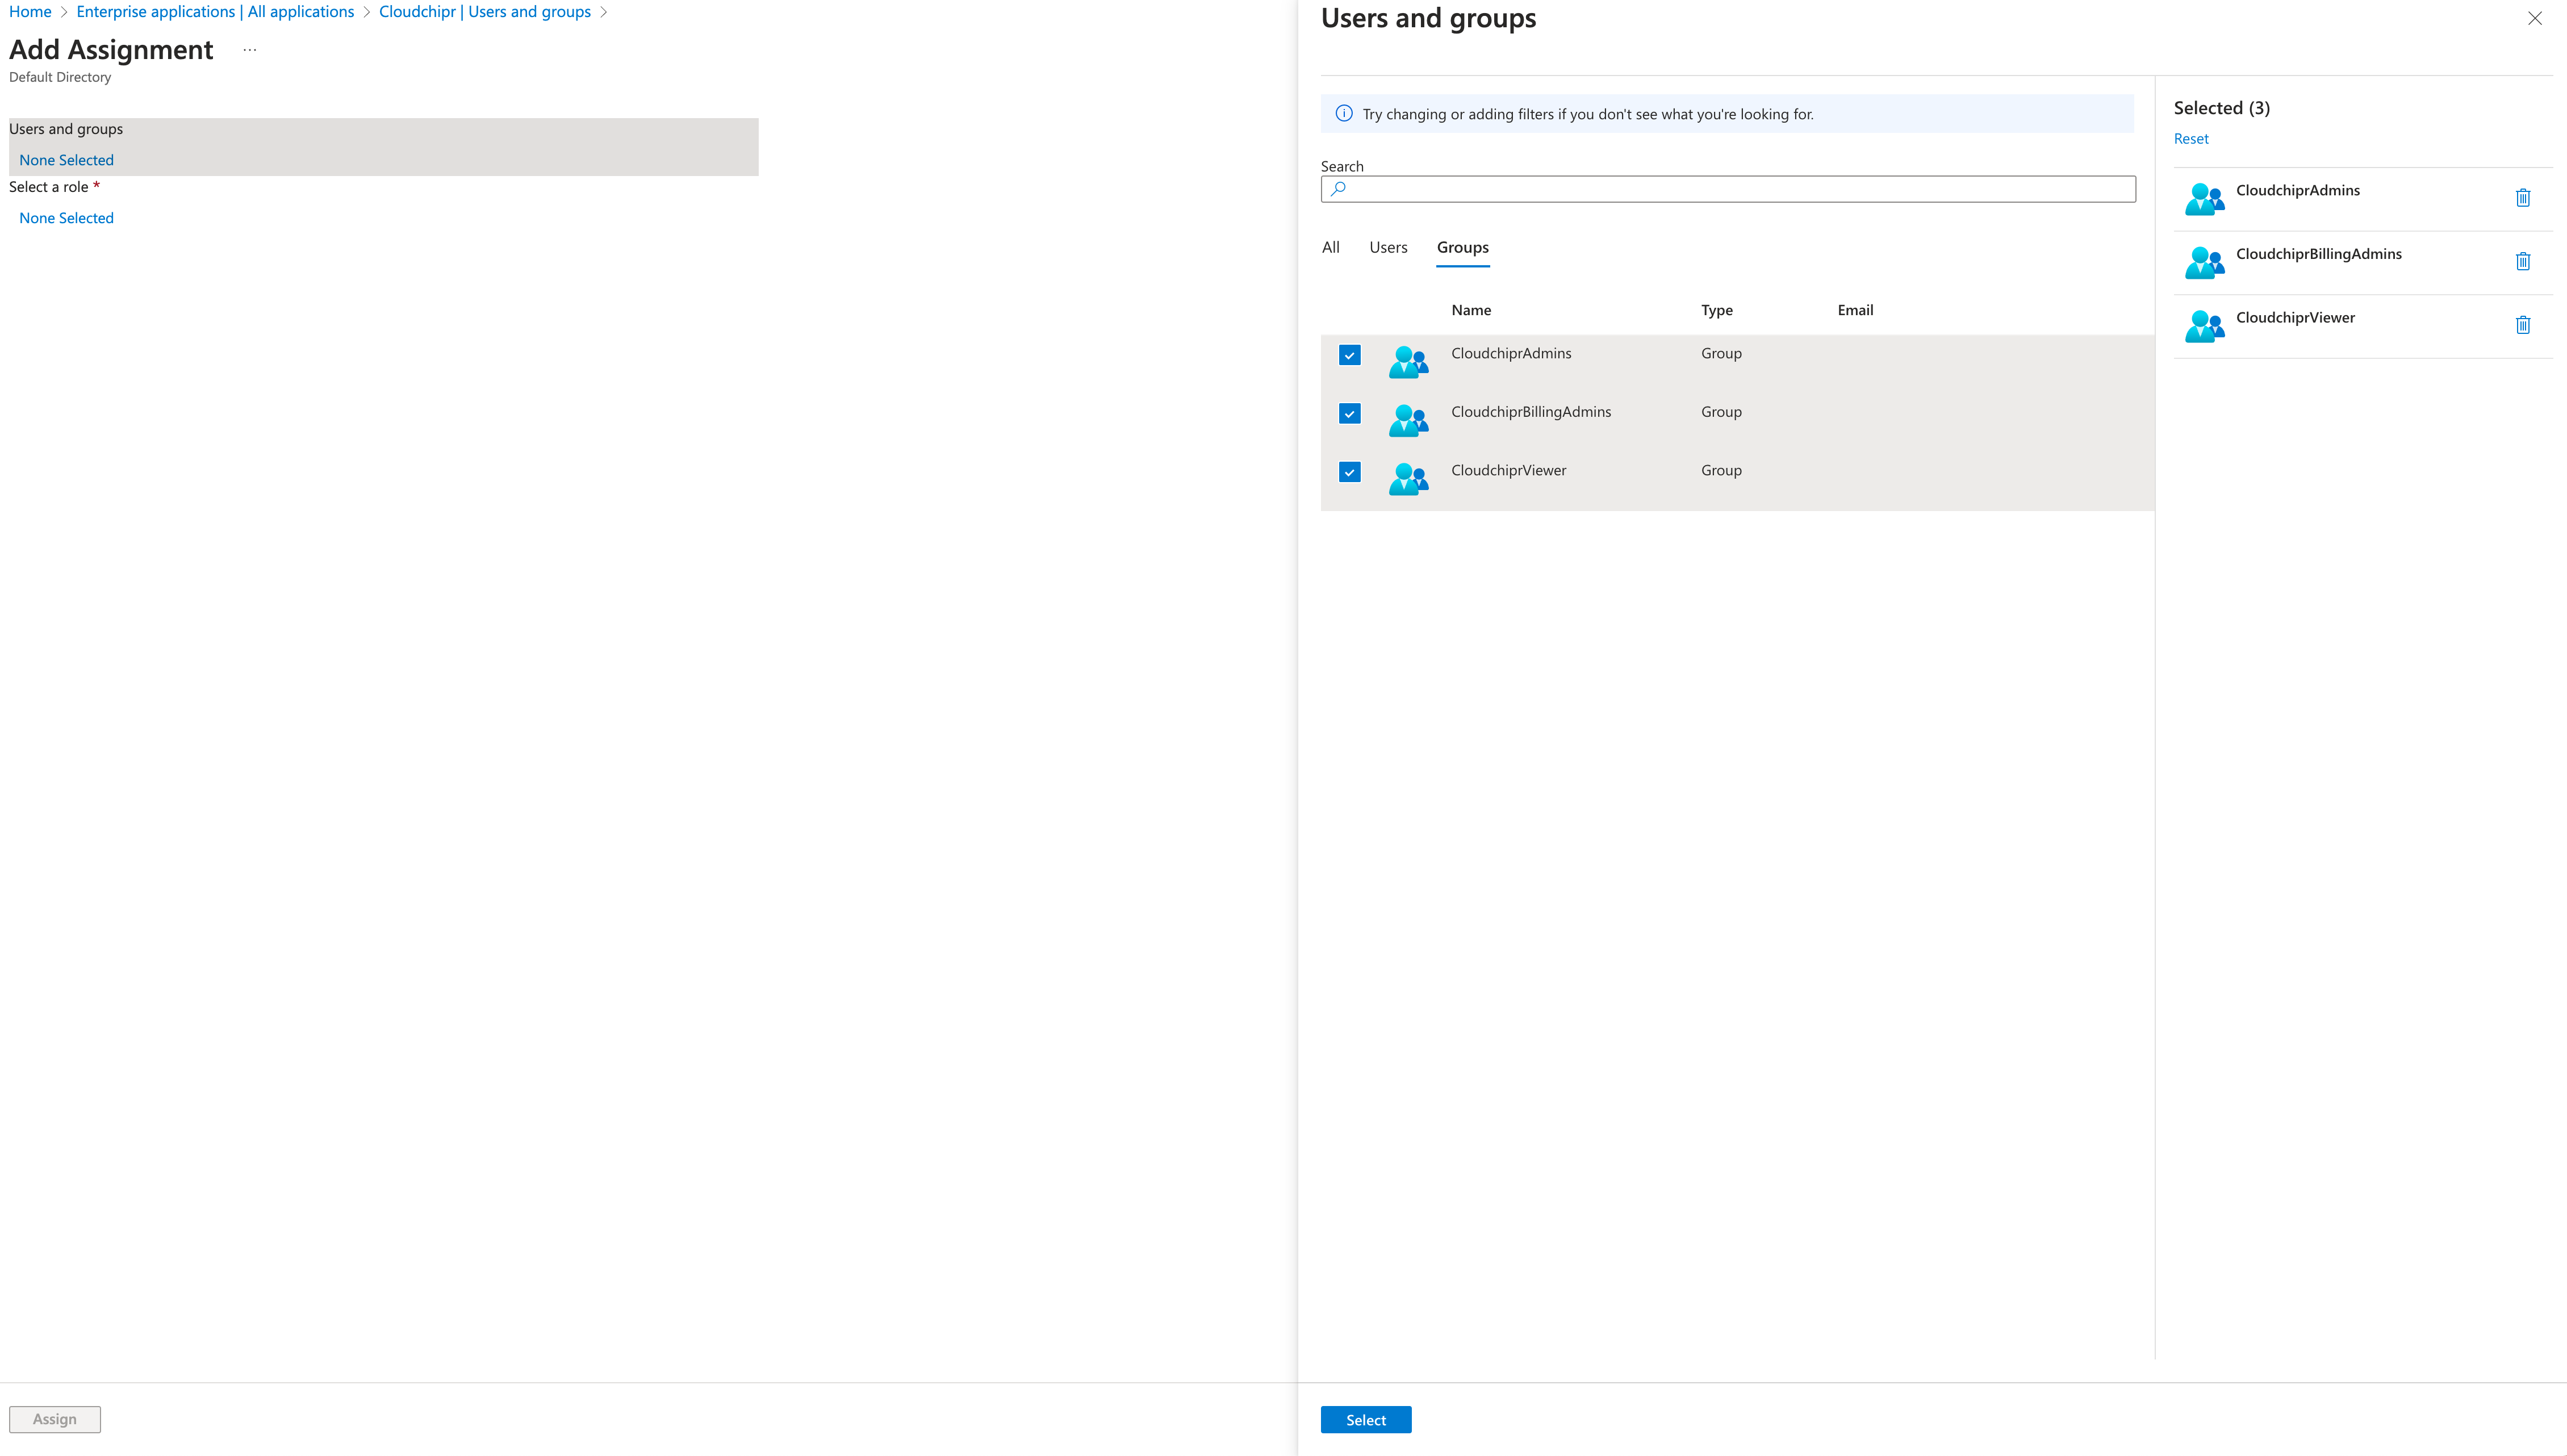
-
-
Select
-
Set the default value for the Select a role dropdown (for example,
User) -
In the Add Assignment dialog, click the Assign button.
-
-
All users assigned to Cloudchipr groups can access the Cloudchipr app on https://www.office.com/apps based on their respective group roles, or simply by entering their emails at https://app.cloudchipr.com.
- In the Identifier (Entity ID) text box, enter the