Tasks
The Tasks feature in Cloudchipr provides a centralized way to track and manage tasks created from Live Resources and Savings Opportunities. It gives visibility into the status of tasks, their related resources, and associated actions. The feature supports customizable task properties and views, making it easier for different teams to manage cloud cost optimization workflows according to their needs.
Create Task
Tasks can be created from either Live Resources or Savings Opportunities.
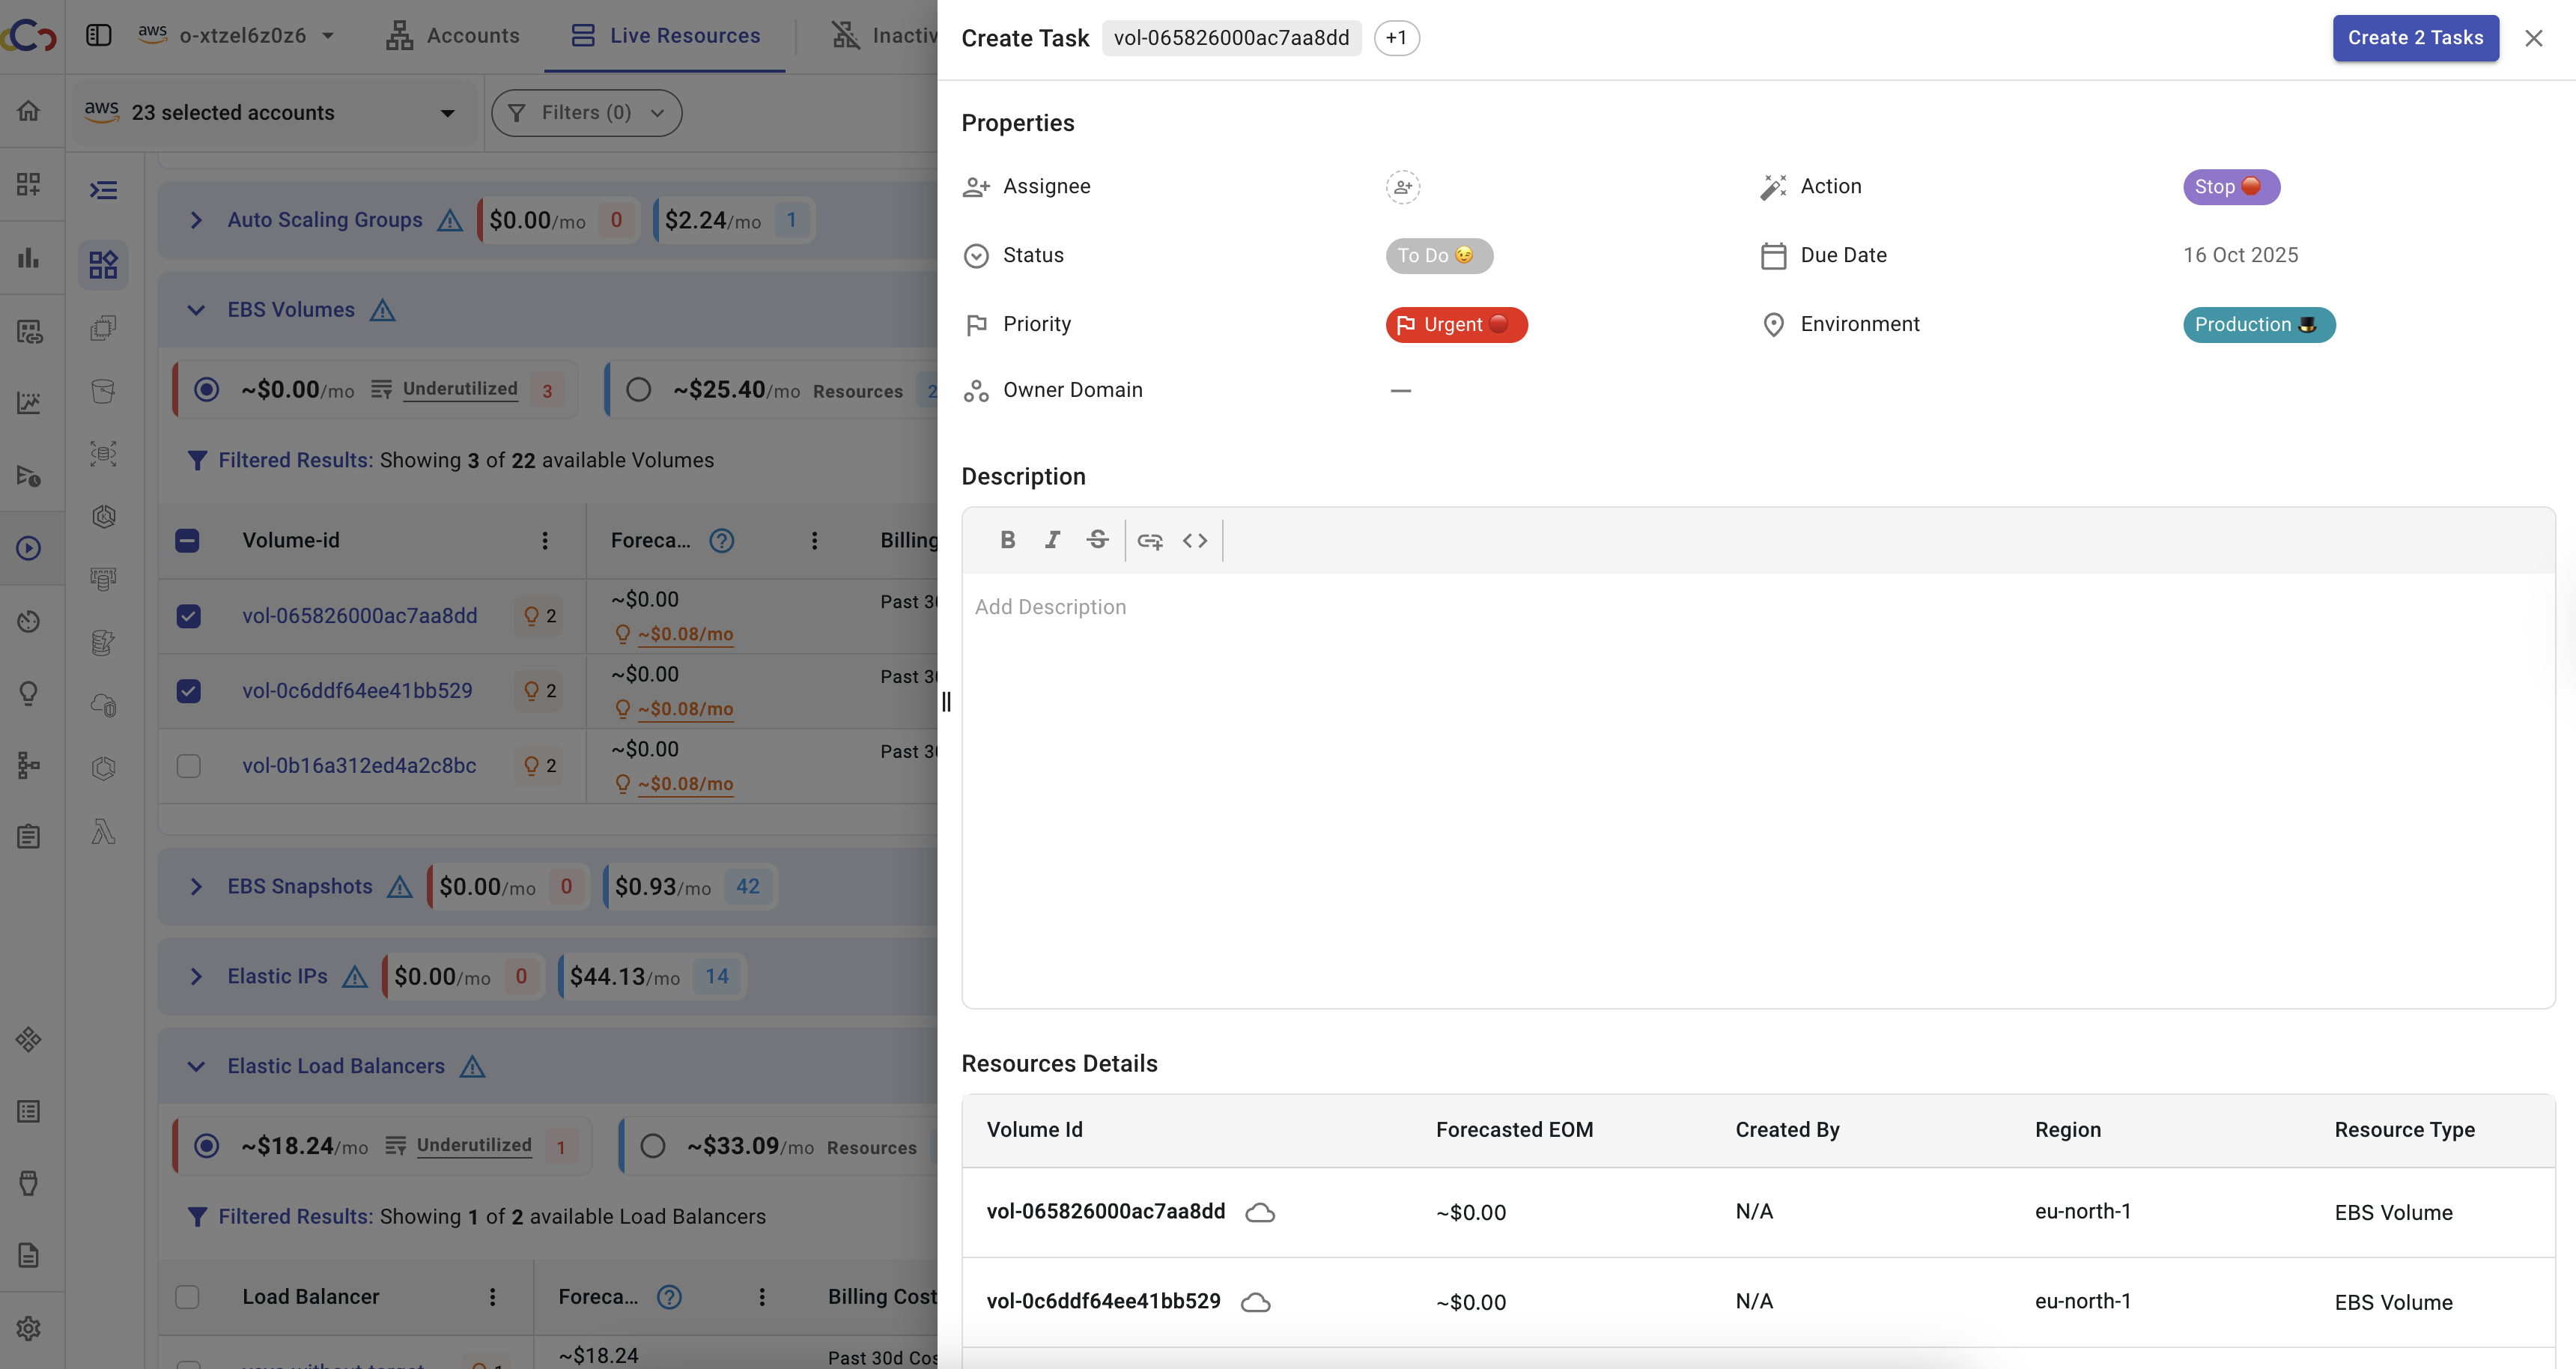
In Live Resources, select a resource. Once selected, the Create Task button becomes active. Click the button to open a drawer where the task can be configured.
The same process applies in Savings Opportunities - select an opportunity and click Create Task.
The task creation drawer allows assigning the task to a specific person and defining properties such as action, urgency, due date, and environment.
A description field is available for adding comments or additional details. A short summary of the selected resource is also provided for context.
Once the properties are set, click Create to create the task. The task will then appear in the Tasks section.
Task creation also supports bulk operations. Selecting multiple items in either Live Resources or Savings Opportunities creates a task for each selected item. For example, selecting three resources and clicking Create 3 Tasks generates three separate tasks, one per resource.
After a task is created in Live Resources or Savings Opportunities, an indicator appears next to the resource name to show the task’s status. Clicking the indicator opens the task editing window, where you can rename the task, update its properties, edit the description, add comments, and review the resource details.
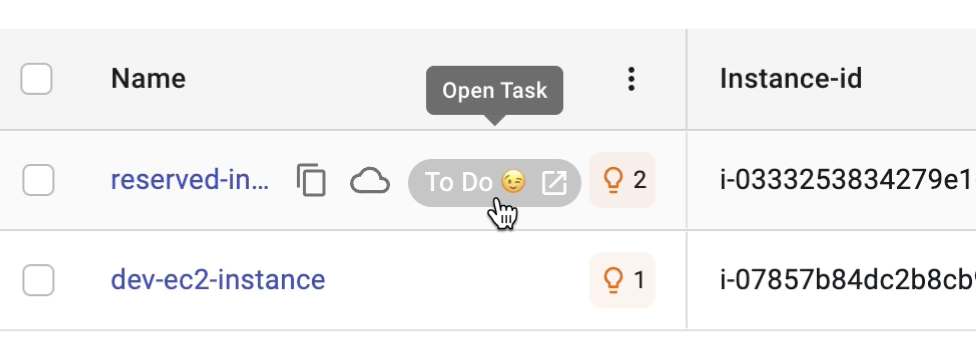
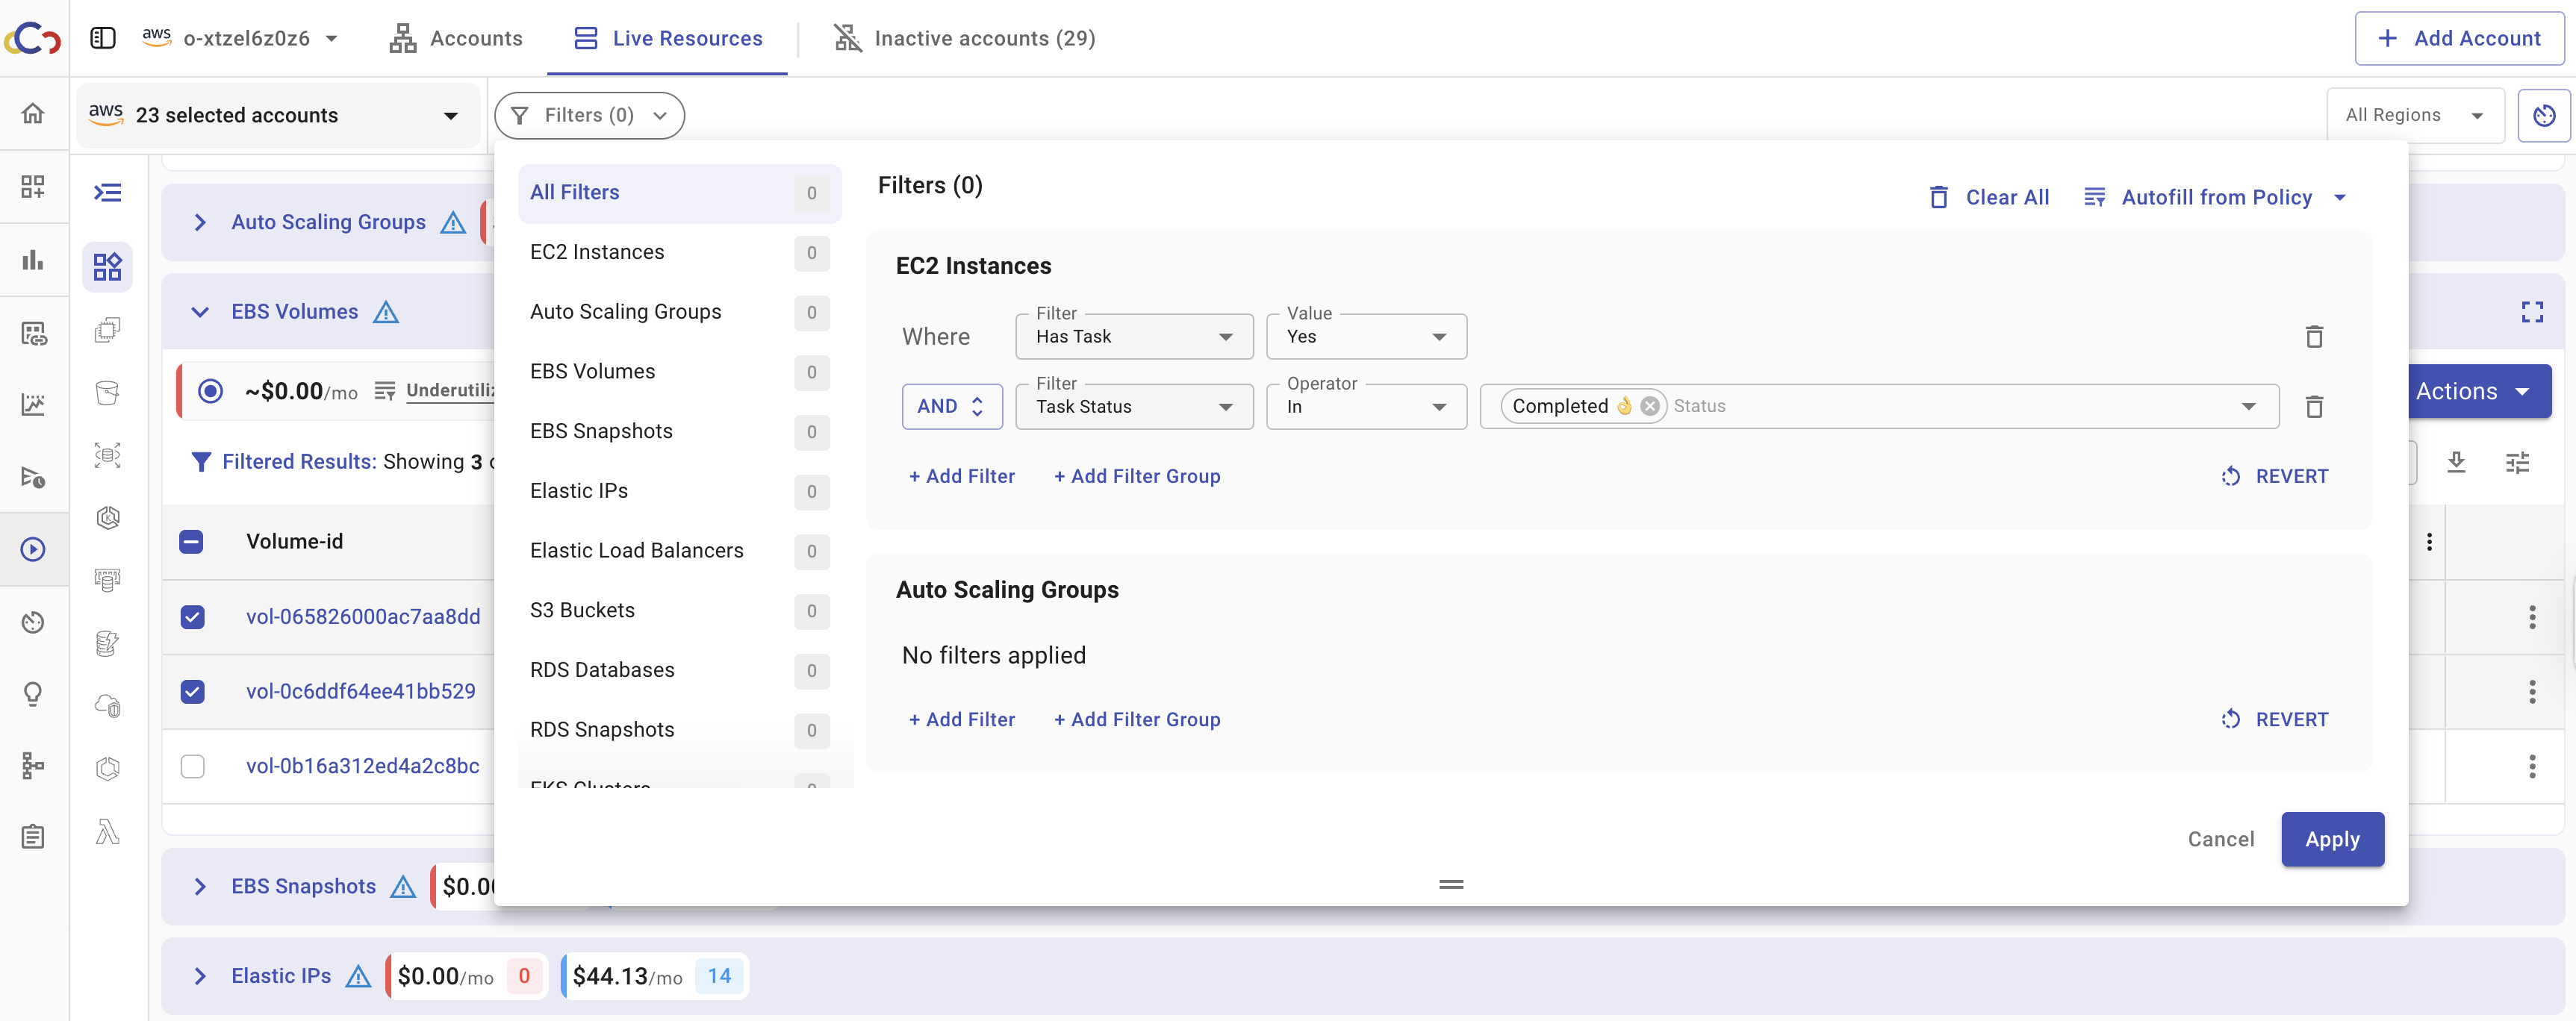
Both Live Resources and Savings Opportunities also provide filters to display resources based on their Task Status.
These created tasks can be further managed and adjusted from the Tasks section.
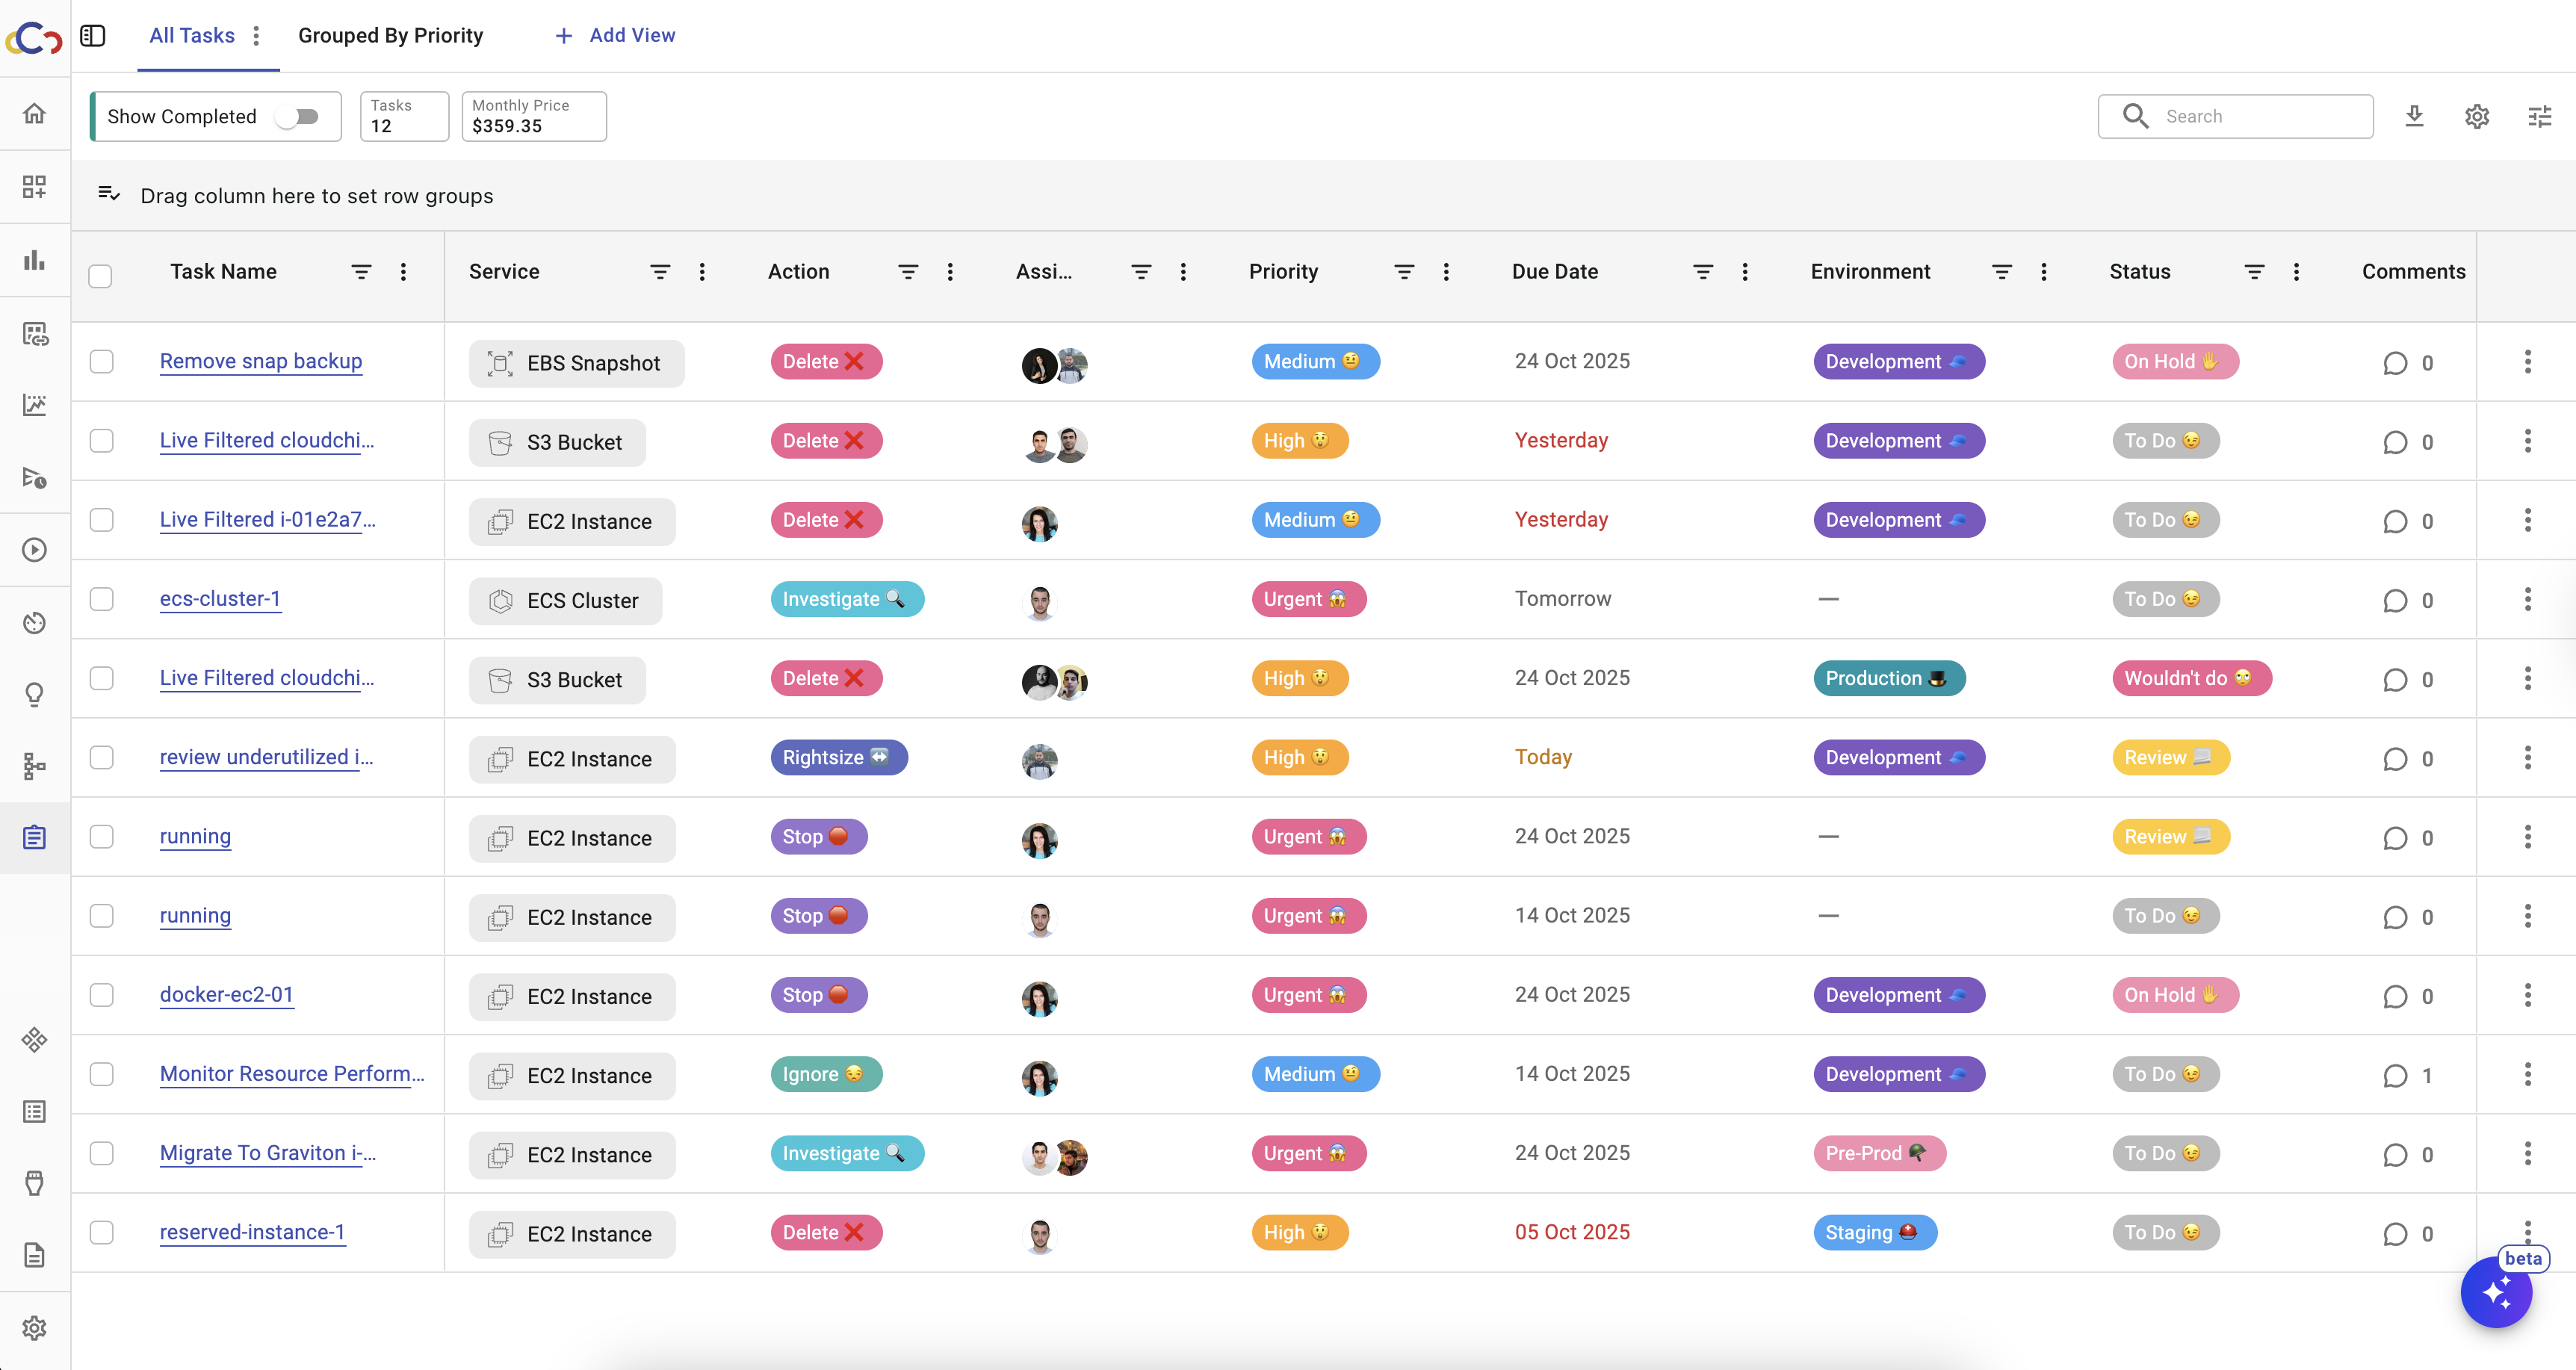
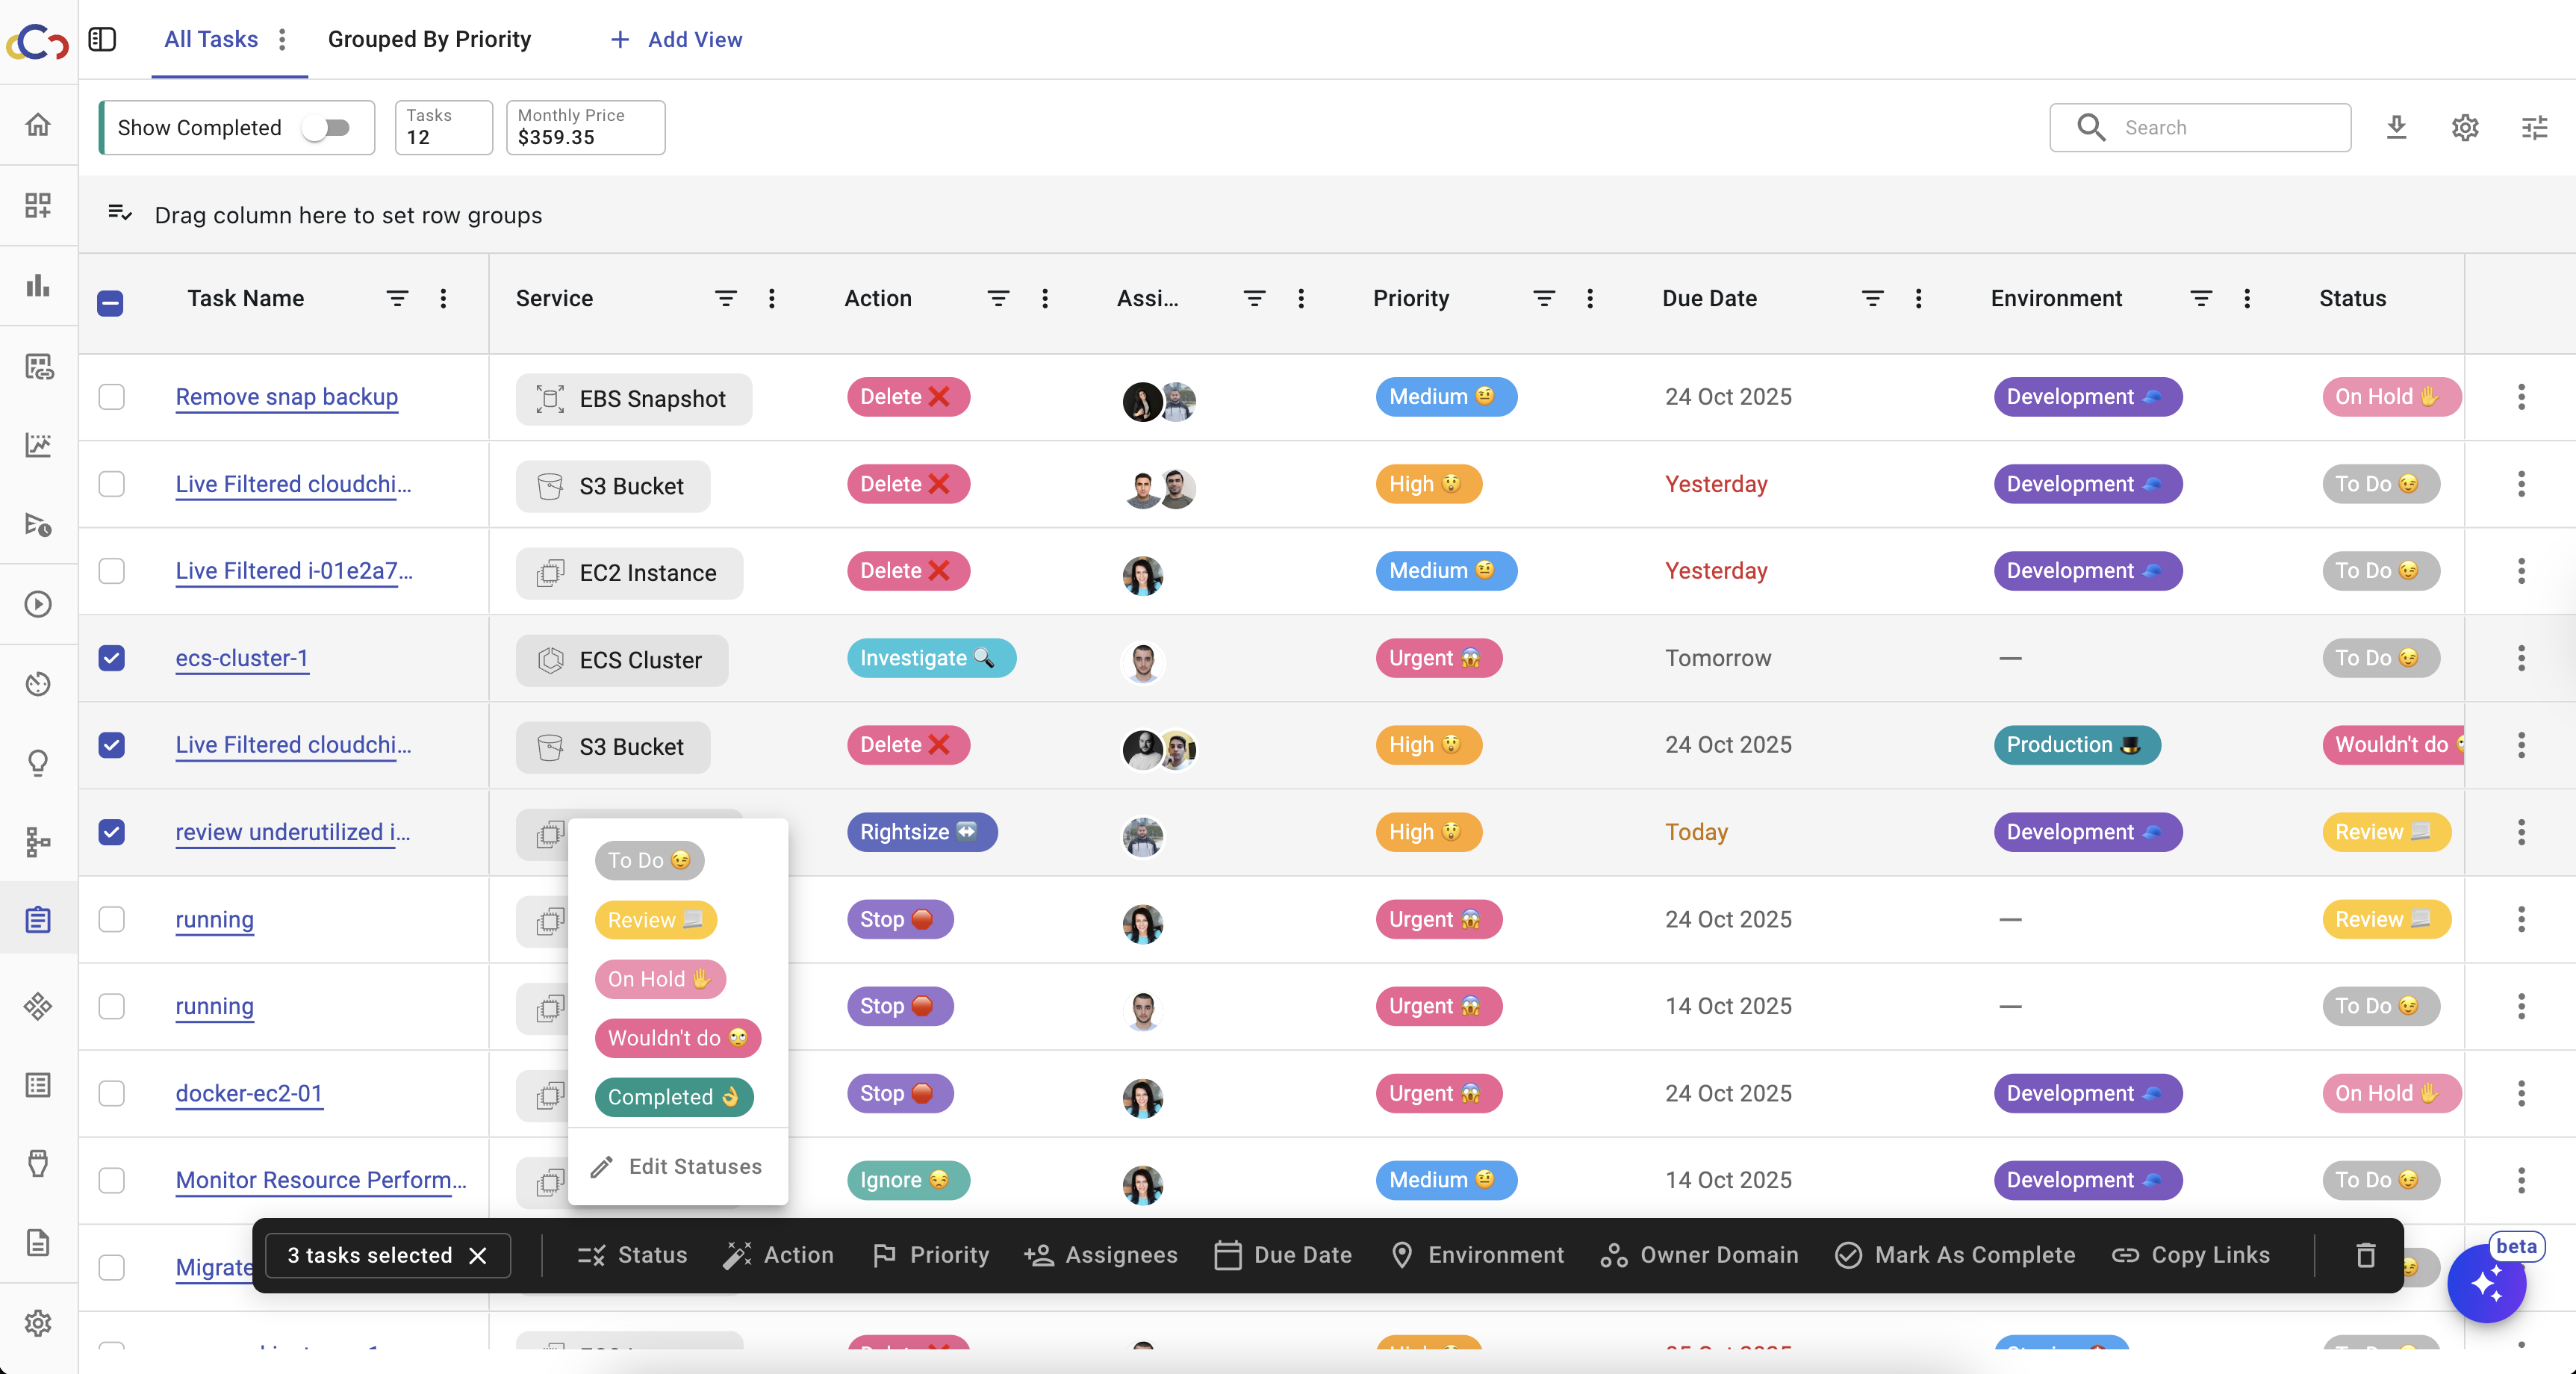
Task Table
The main tasks table in the Tasks section displays all tasks along with their key attributes (e.g., status, priority, owner, environment). The table is fully interactive, allowing task information to be updated directly within the table without opening the task details drawer. For example, to change a task’s status, click the current status value in the table and select a new option from the dropdown list.
Clicking on a Task Name opens a task editing window, which provides comprehensive information about the task and allows editing. This includes the task’s properties, description, details as well as a history of activities related to the task.

Since each task is linked to a specific cloud resource, the Target column contains a clickable link that opens detailed information about the associated resource. This provides quick access to the context and metadata of the resource for which the task was created.
Columns in the table can be customized using toggle switches in Table Settings.
Next to the Table Settings, there are two buttons that provide additional functionality:
- Export CSV – Downloads the entire tasks table, including all active columns. The exported file can be used for reporting or offline review.
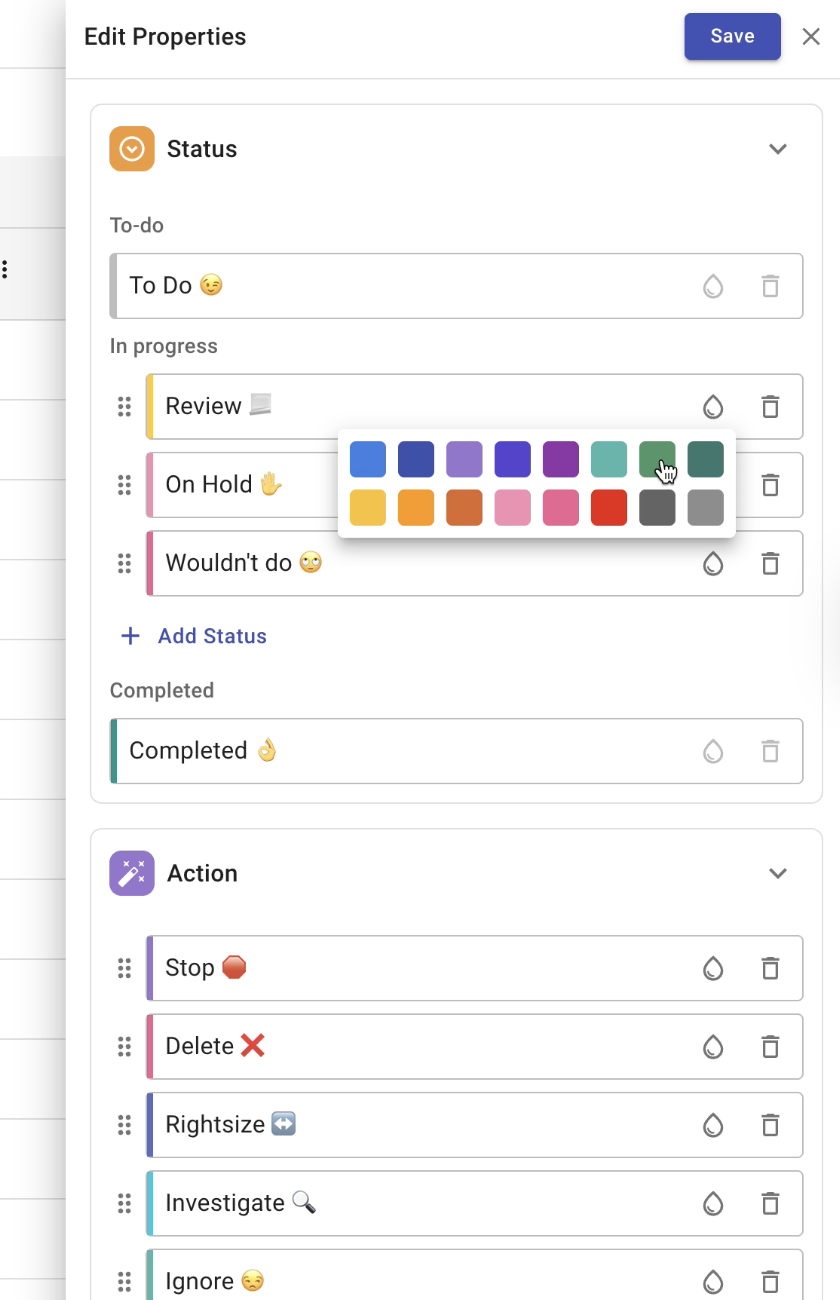
- Properties Settings – Allows to configure and manage properties used across tasks, including:
- Status Types – Define, modify, or remove workflow statuses.
- Actions – Create or update actions associated with tasks.
- Priorities – Set priority levels to match workflow requirements.
- Environments – Assign tasks to specific environments.
- Owner Domains – Manage ownership assignments across domains.
Task Views
Custom views can be created to organize tasks based on different criteria, such as team, project, priority, or other task properties. This makes it easier to focus on relevant work while maintaining visibility across different groups.
To create a custom view:
- Click the Add View button.
- Enter a name for the view.
- Click Save.
The new view initially displays all tasks. Tasks can then be sorted, filtered, or grouped as needed.
Views can be managed through the three-dot menu next to the view name. The menu provides options to:
- Rename
- Copy Link
- Duplicate
- Protect
- Delete
Managing Tasks
Tasks can be managed individually or in bulk.
Each task includes an actions menu that provides options to:
- Edit the task
- Mark as Complete
- Copy Link
- Delete the task
When one or more tasks are selected in the tasks table, an action bar appears below the table. The action bar allows bulk operations, such as updating the status of multiple tasks or deleting several tasks at once.
For example, to change the status of several tasks to In Progress, select the tasks in the table, choose Status from the action bar, and select In Progress. The status of all selected tasks is updated automatically.
Updated 9 months ago