Anomaly Alerts
Cost Anomaly Alerts monitors selected resources for unexpected changes in cost. Alerts can be configured with custom thresholds, time intervals, and grouping options, and notifications can be sent via email or integration methods. The feature provides visibility into cost trends, daily averages, and previous period costs, helping teams quickly identify and respond to unusual spending patterns.
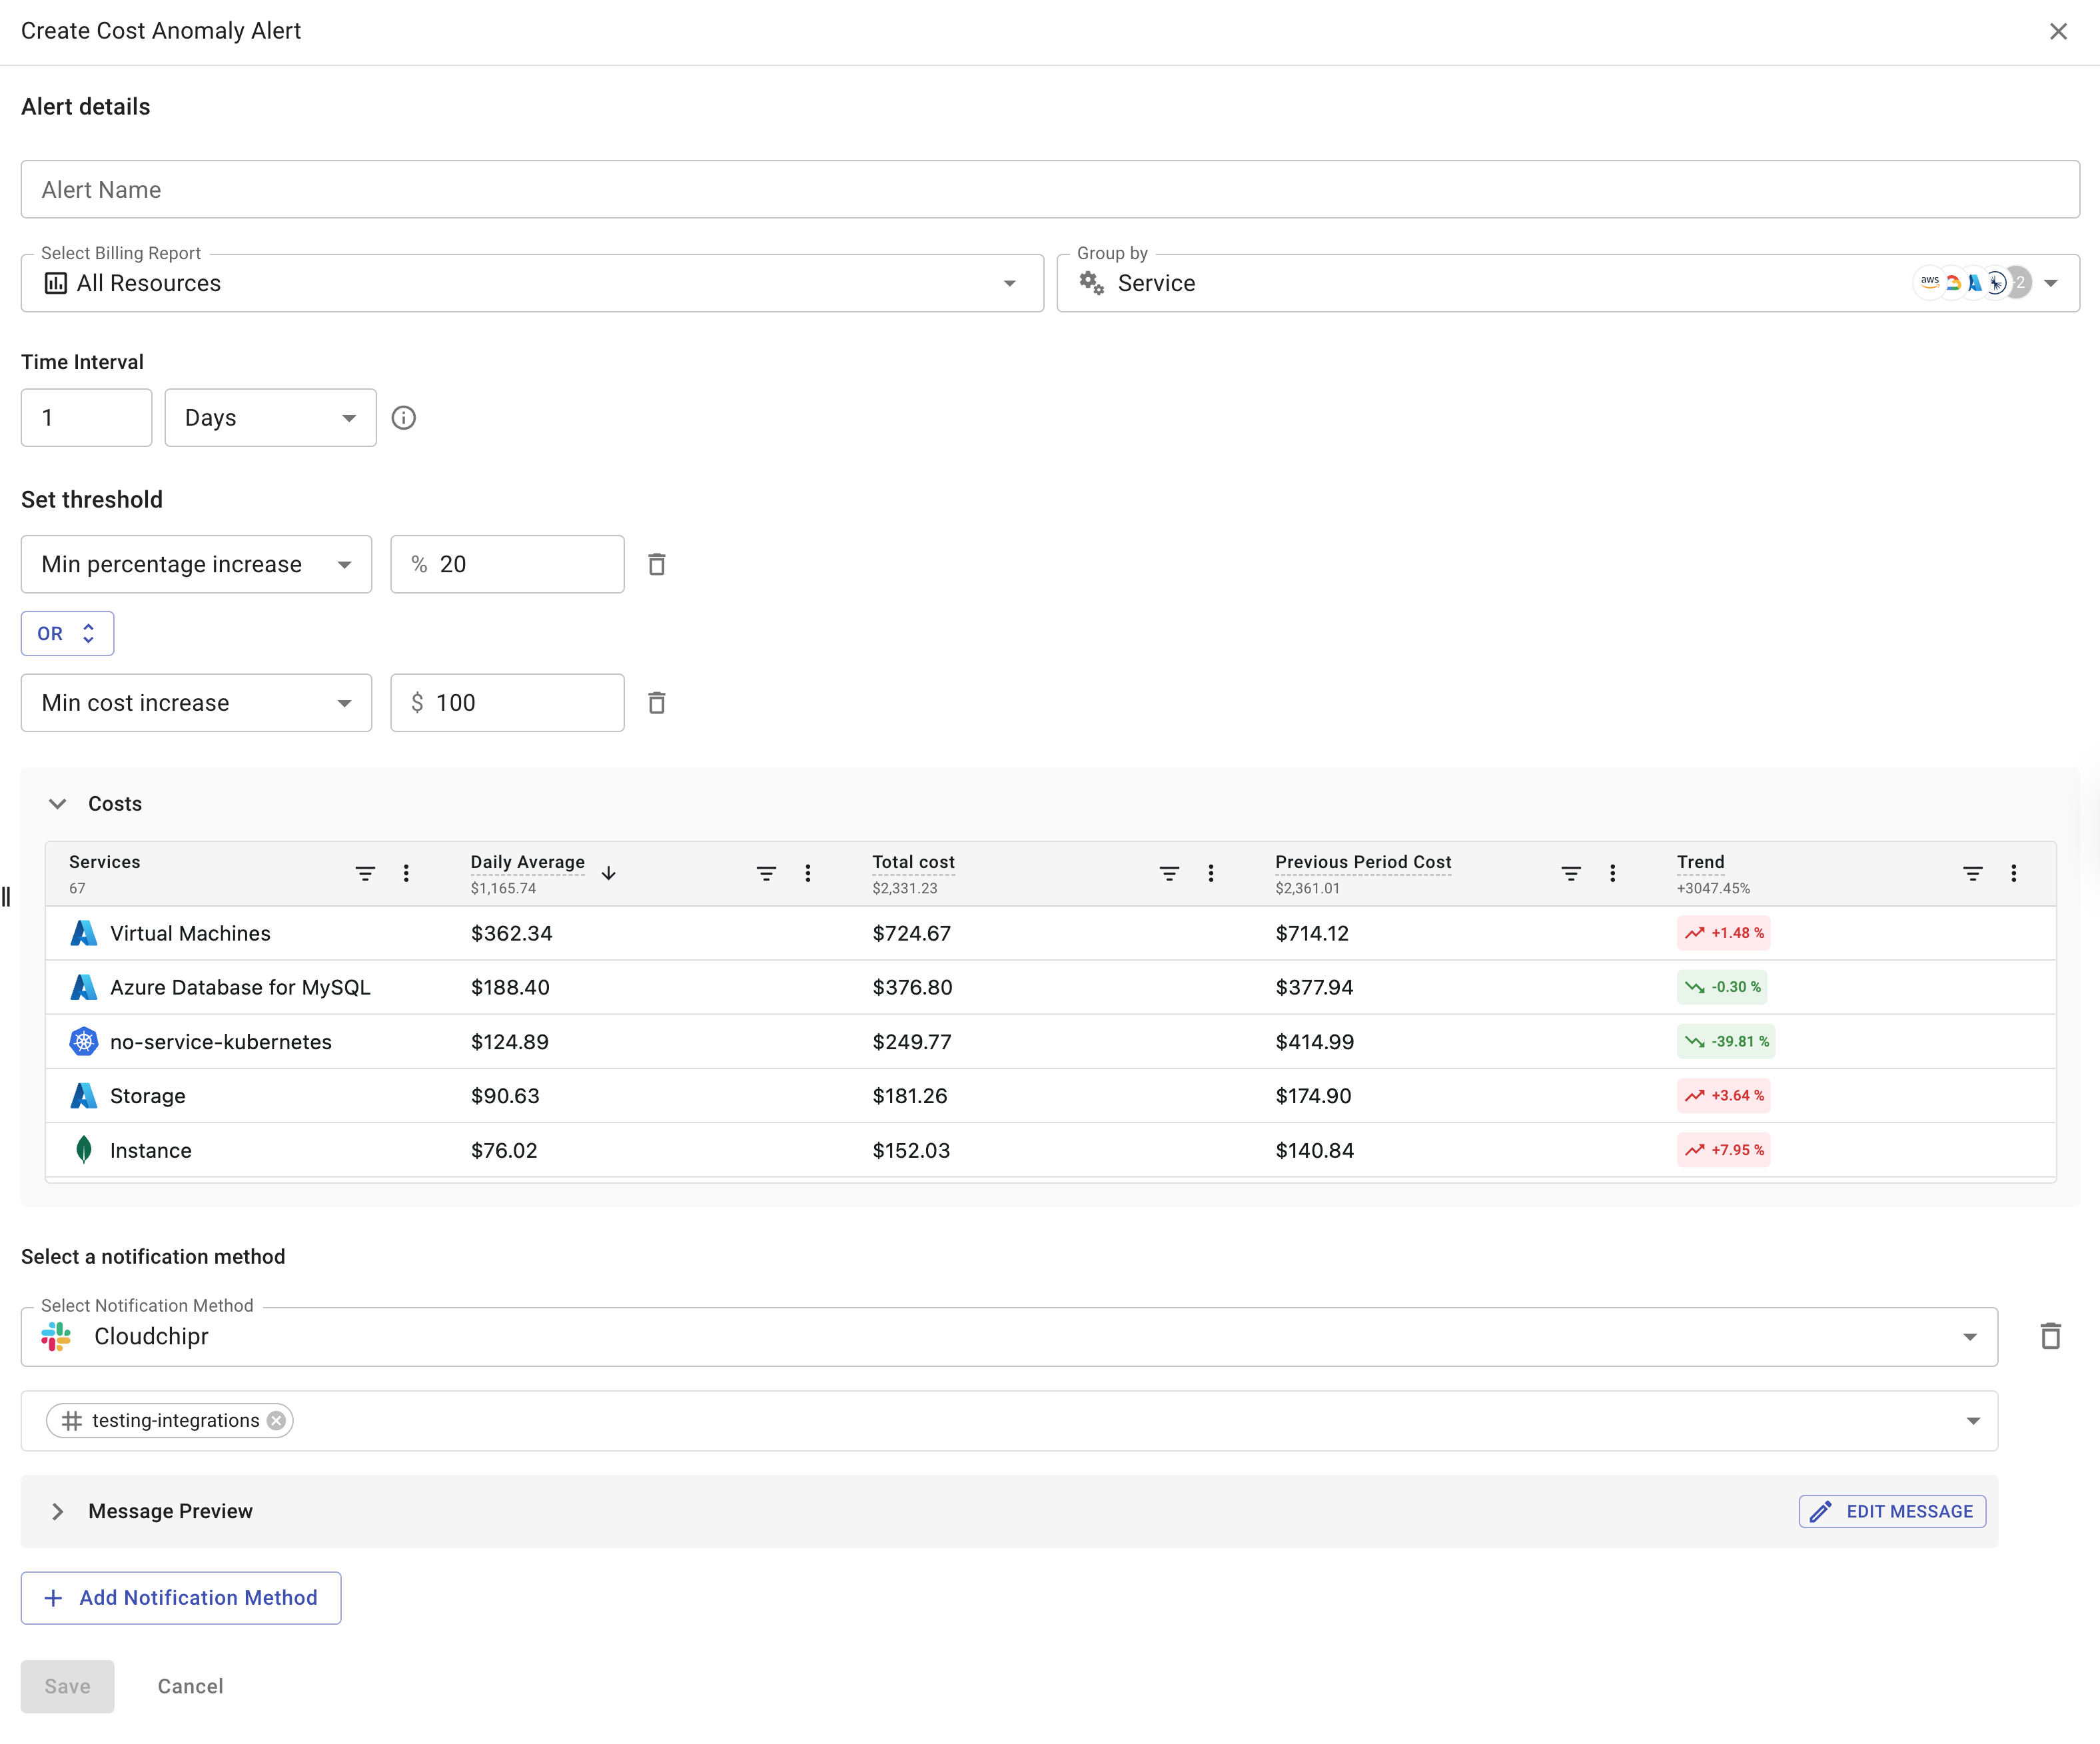
Create Cost Anomaly Alert
To create a cost anomaly alert, go to the Cost Anomaly Alerts tab in Budgets & Alerts and click the Create Anomaly Alert button. This opens the configuration drawer, where you can define the following settings:
- Alert Name: Enter a name for the alert.
- Billing Report: Select the billing report on which the alert will be based.
- Group by: By default, resources are grouped by Service, but you can change the grouping using the Group by list, for example, by Product Family, Tags, or Cloud Provider.
- Time Interval: Select the period for comparing costs with the preceding period. For example, if you select 2 days, Cloudchipr will compare the last 2 days with the preceding 2 days and trigger an alert if the change exceeds the configured threshold.
- Threshold: Set a threshold in either percentage or cost. You can also combine thresholds, for example, 10% or $100. A notification will be sent if the cost increases by more than 10% compared to the previous period, or/and if the cost exceeds $100.
- Costs: This section displays total costs, trends, daily averages, and previous period costs for the selected resources, providing better visualization and clarity.
- Notification Method: Choose how the alert will be sent. You can select a custom email, use existing integration methods, or create a new integration instantly. Multiple notification methods can be combined.
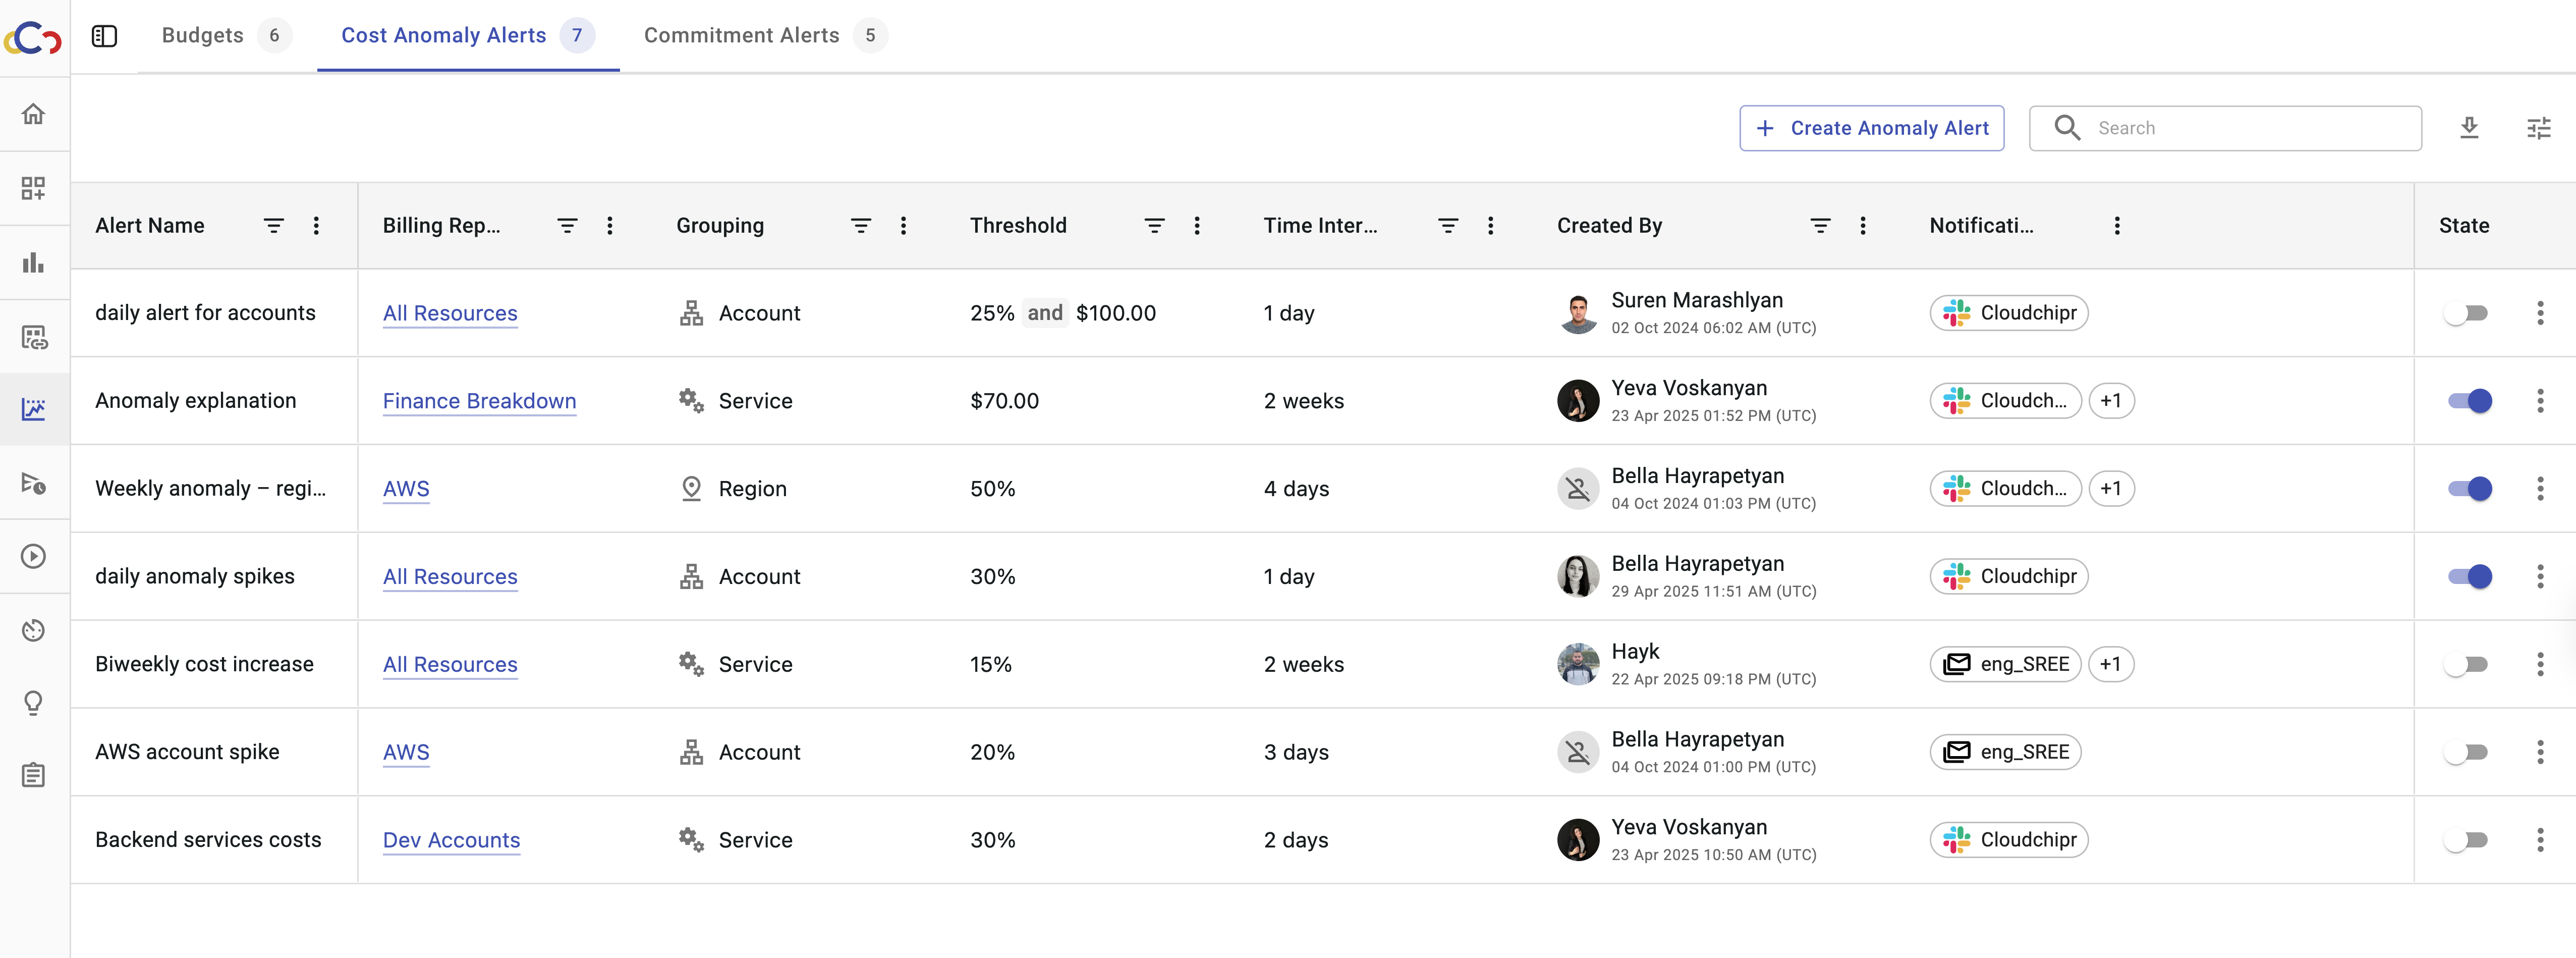
On the Cost Anomaly Alerts page, all created alerts are listed with their main attributes, such as the associated billing report, grouping criteria, and configured thresholds.
Clicking the billing report name opens the Billing Explorer page with that specific report.
The Status column allows enabling or disabling alerts directly from the table.
Updated about 2 months ago