GCP Setup
GCP account connection takes a few terminal commands both for standalone projects and Organization.
Step 1: Connecting Account
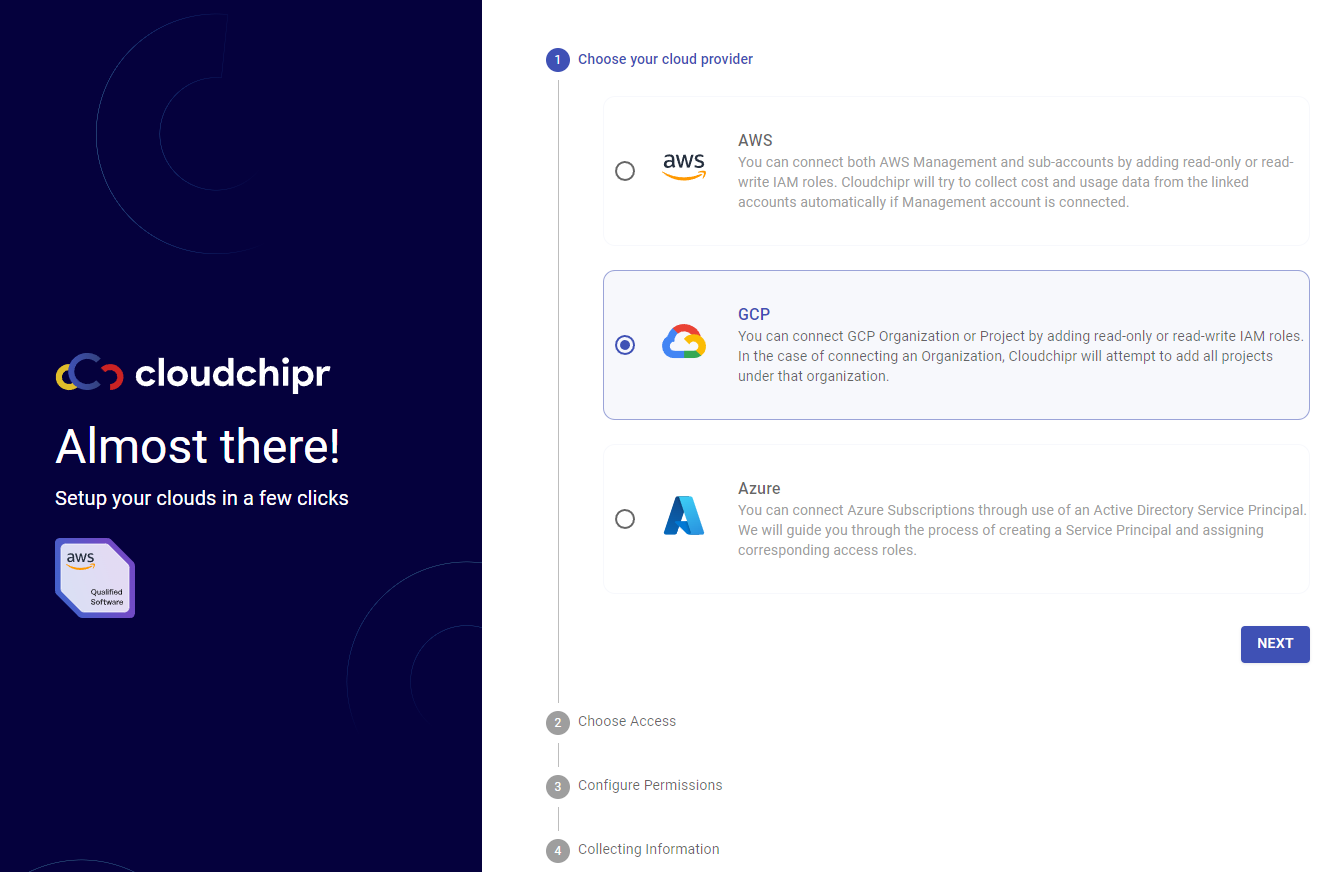
During the Sign-Up process the first time, Cloudchipr will ask you to choose your cloud provider. Please choose GCP (you can add other cloud providers later).
Step 2: Choose the Initial Access Mode
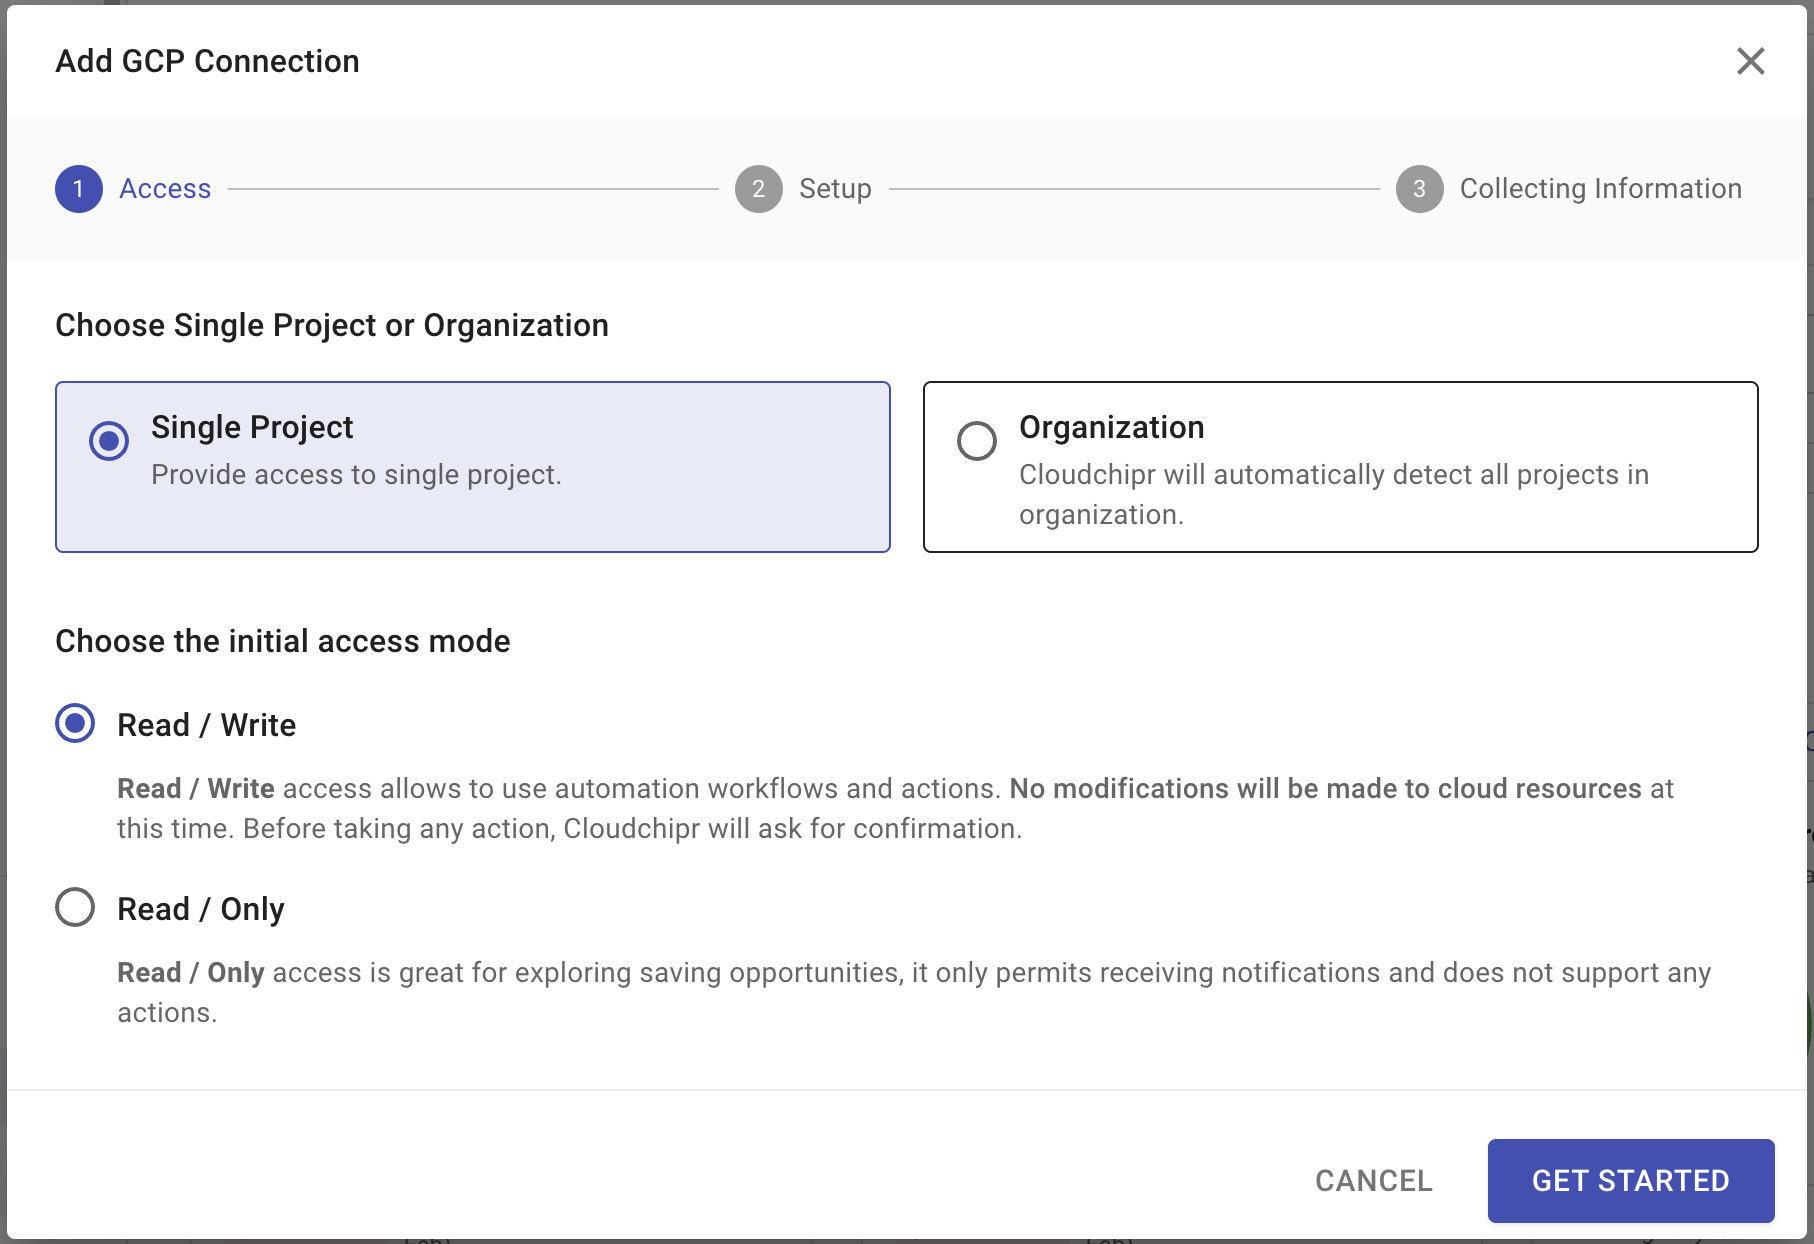
Select whether to connect your GCP Organization (recommended) or a single GCP project.
Flexible Connectivity Options:
- Organization: With Organization connected, Cloudchipr will automatically detect and list all the projects under your organization.
- Single GCP Project: If a single Project is connected, Cloudchipr might not have access to your Billing Accounts, so most of the analytics and visualization features will not be available by default.
After selecting your connectivity option, determine the access mode that best suits your needs. Cloudchipr provides two distinct access modes:
Cloudchipr offers two types of access modes:
- Read/Write Access: This mode allows the use of automation workflows and actions. Cloudchipr will not modify any cloud resources at this stage. Confirmation will be requested before taking any action.
- Read-Only Access: Ideal for monitoring usage and receiving cost-saving alerts. This mode allows you to receive notifications but does not support actions.
Step 3: Setting up GCP Account Connection
Choose Connection Method
Select how you wish to connect your GCP account. You have two options:
- GCP Console: Use the Google Cloud Platform Console for a graphical interface setup.
- CLI (Command Line Interface): Opt for the CLI if you prefer executing commands directly.

Create IAM Role
You need to set up an IAM Role to grant our service account the necessary permissions. The scope and permissions of the IAM role will depend on the chosen level of access (Single Project or Organization) and whether it's Read/Write or Read/Only. Please see below the GCP IAM roles needed for each permission type.
Single Project
Organization
- Read/Write:
- Read/Only:
For Both Single Project and Organization:
- Helper Dropdown: Use our helper dropdown feature to easily retrieve your Organization or Project ID, which is essential for the next steps.
Using GCP Console:
Navigate to your GCP Console and manually add the IAM role. This process involves selecting the appropriate permissions based on whether you're setting up for a Single Project or an Organization.
Using CLI:
We provide the complete command necessary to create the IAM role. You will need to input your specific details:
- For Organization: Enter your Organization ID.
- For Single Project: Input your Project ID.
The provided command will include placeholders for your Organization/Project ID. Replace these placeholders with the actual IDs obtained from the helper dropdown.
Step 4: Confirmation and Dashboard Access:
- After successful completion, a confirmation message will appear that Cloudchipr is now connected to your AWS account.
- Next, select GO TO DASHBOARD. This will take you directly to your Cloudchipr dashboard, where you can observe and manage your cloud costs.
Updated 6 months ago