Azure Setup
Azure connection setup takes a few terminal commands both for a single subscription and the entire organization.
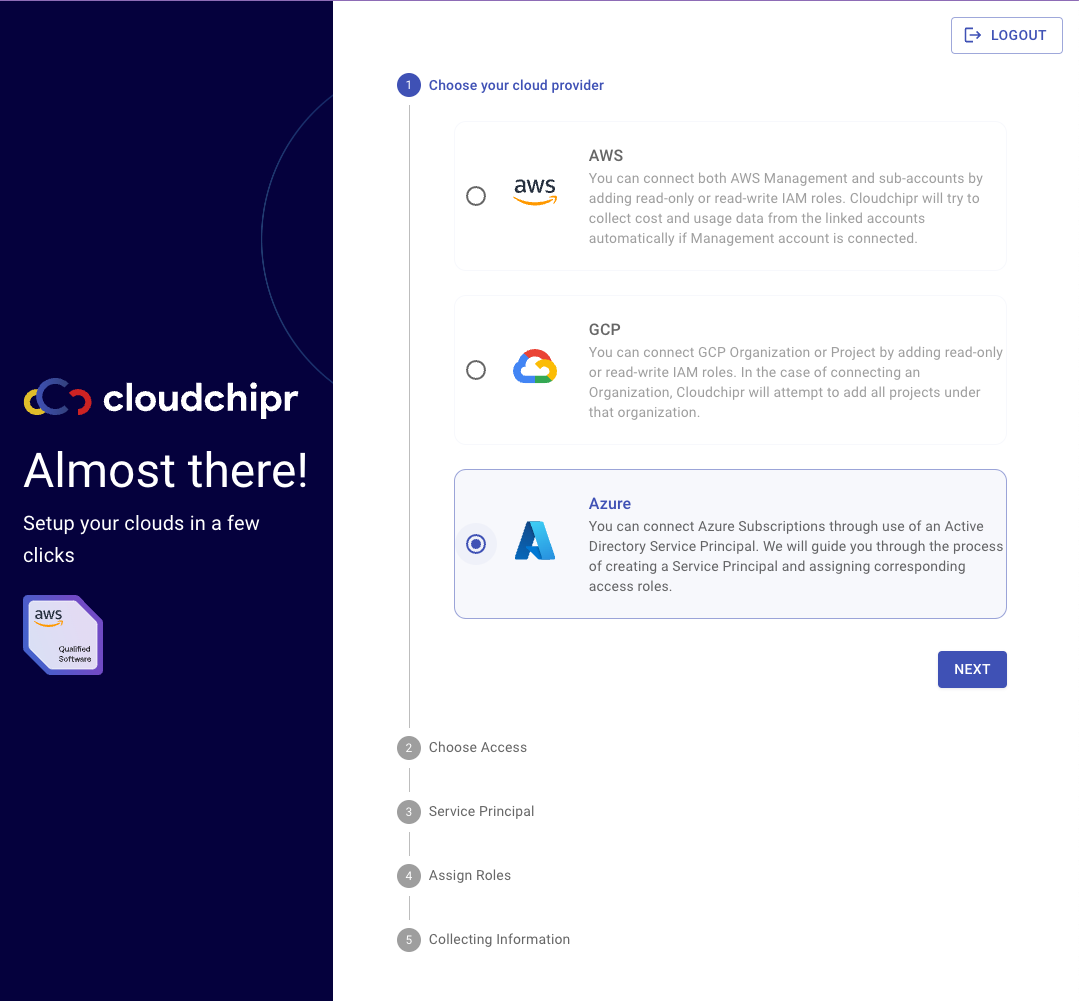
Step1: Add a Subscription
Choose Azure as your cloud provider and click the "Next" button.
Step 2: Choose the Initial Access Mode
Cloudchipr offers two types of access modes:
- Read/Write Access: This mode allows the use of automation workflows and actions. Cloudchipr will not modify any cloud resources at this stage. Confirmation will be requested before taking any action.
- Read-Only Access: Ideal for exploring cost-saving opportunities. This mode allows viewing resources and sending notifications but does not allow taking actions.
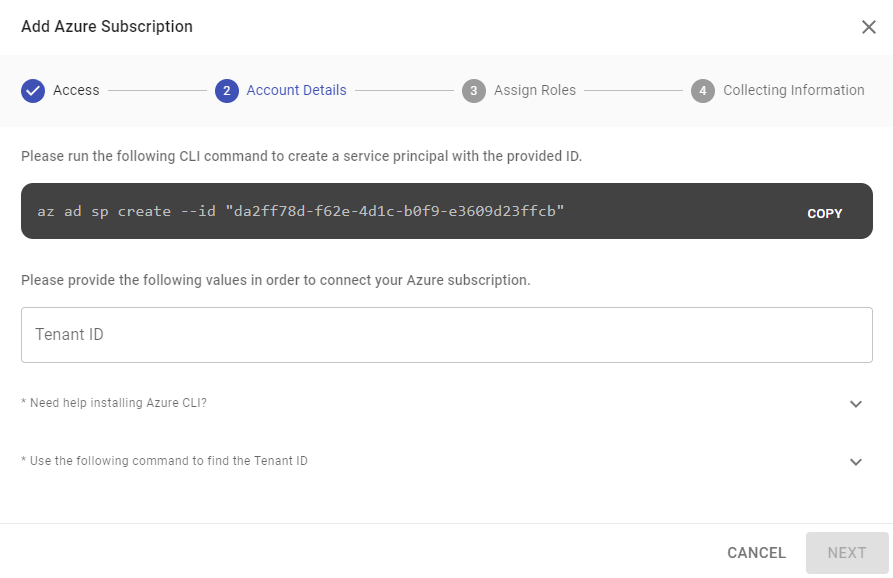
Step 3: Create Service Principal
You will be prompted to run an Azure CLI command. This command creates a service principal using your provided Tenant ID.
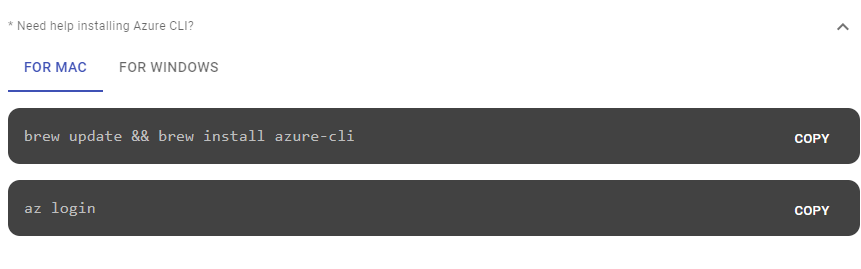
Install Azure CLI and get your Tenant ID:
For users without the Azure CLI installed, Cloudchipr offers installation commands for both Mac and Windows platforms. Additionally, it provides the command to get your Tenant ID. Cloudchipr needs your Tenant ID for granting necessary access permissions.

Step 4: Assign Roles to Service Principal:
During the setup, you will be asked to assign roles to the service principal, offering two options for connection:
Connect Subscription: Provide your subscription ID to connect.
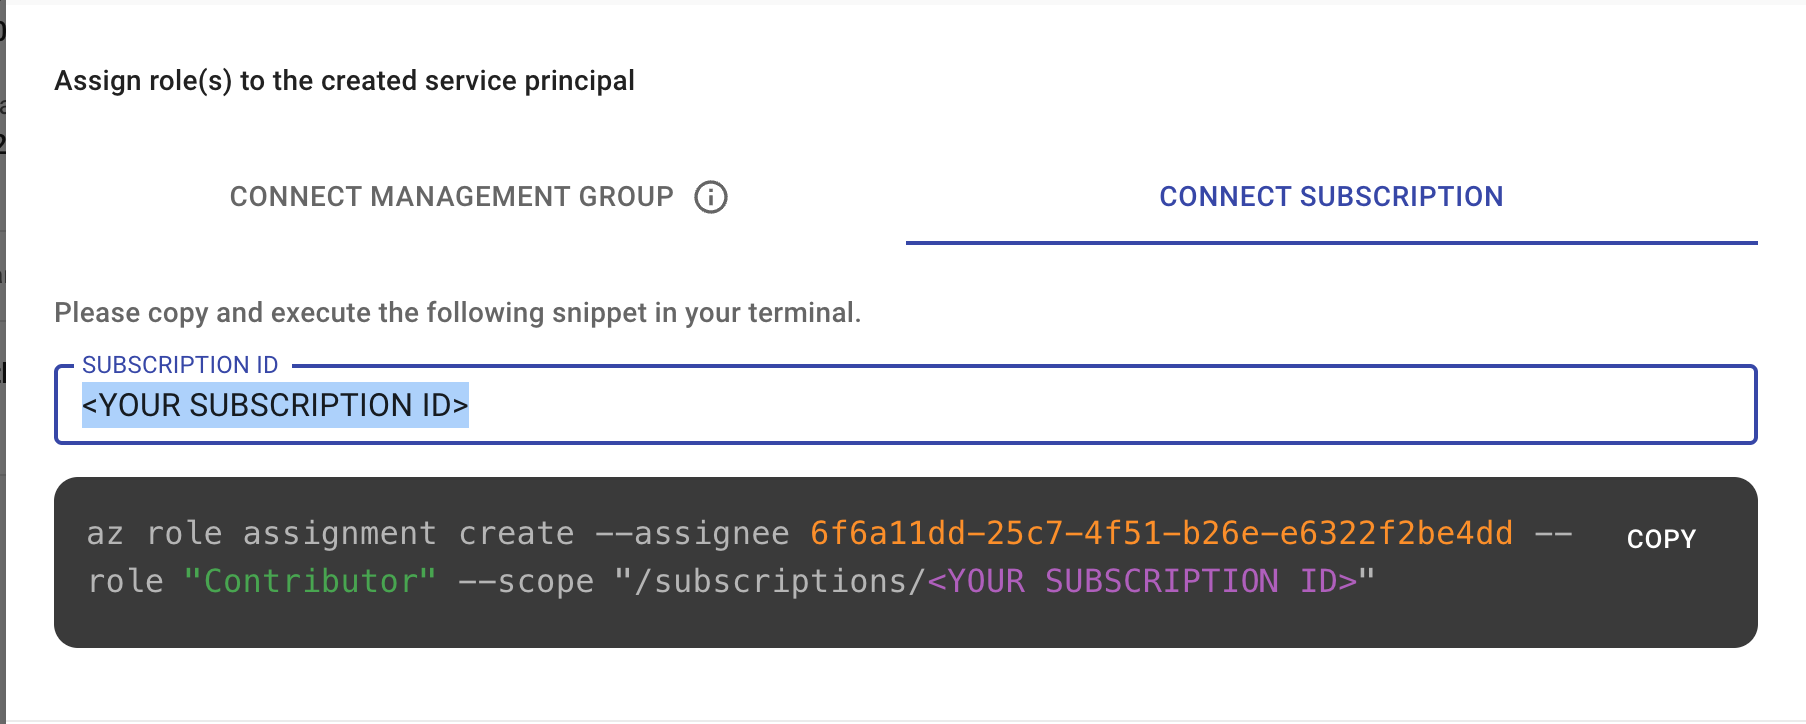
Connect Management Group: Opt for this to manage permissions across multiple subscriptions.
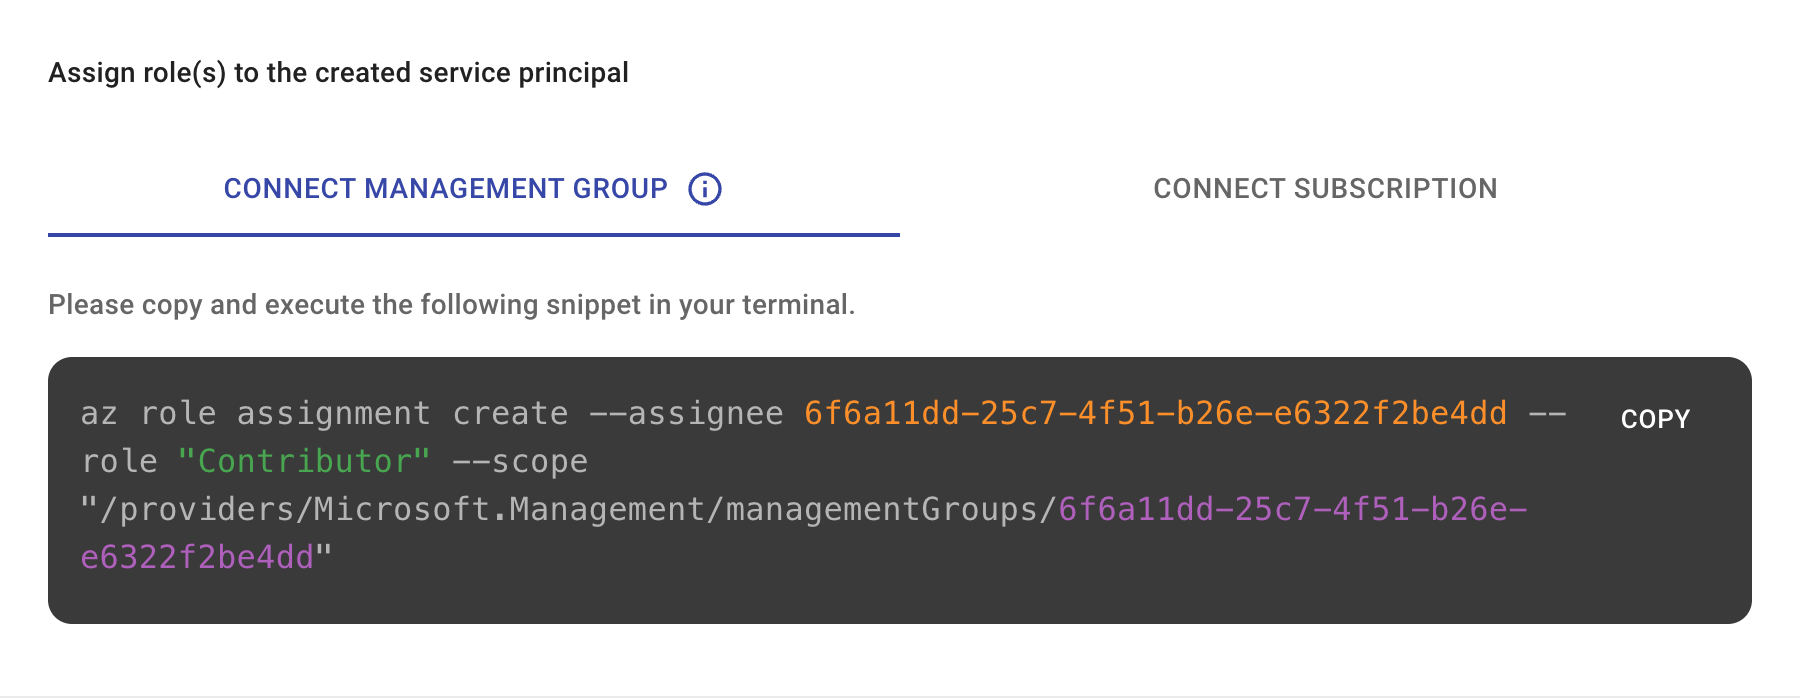
Cloudchipr needs Contributor role for Read/Write access and Reader role when Read/Only access is granted.
Step 5: Confirmation and Dashboard Access:
- After successful completion, a confirmation message will appear that Cloudchipr is now connected to your Azure account.
- Next, select GO TO DASHBOARD. This will take you directly to your Cloudchipr dashboard, where you can observe and manage your cloud costs.
Updated 6 months ago